Tour du Vallaisonnay: My 5-Day Hut-to-Hut Hiking Guide in Vanoise National Park
Last Updated on October 1, 2026 by Kimberly
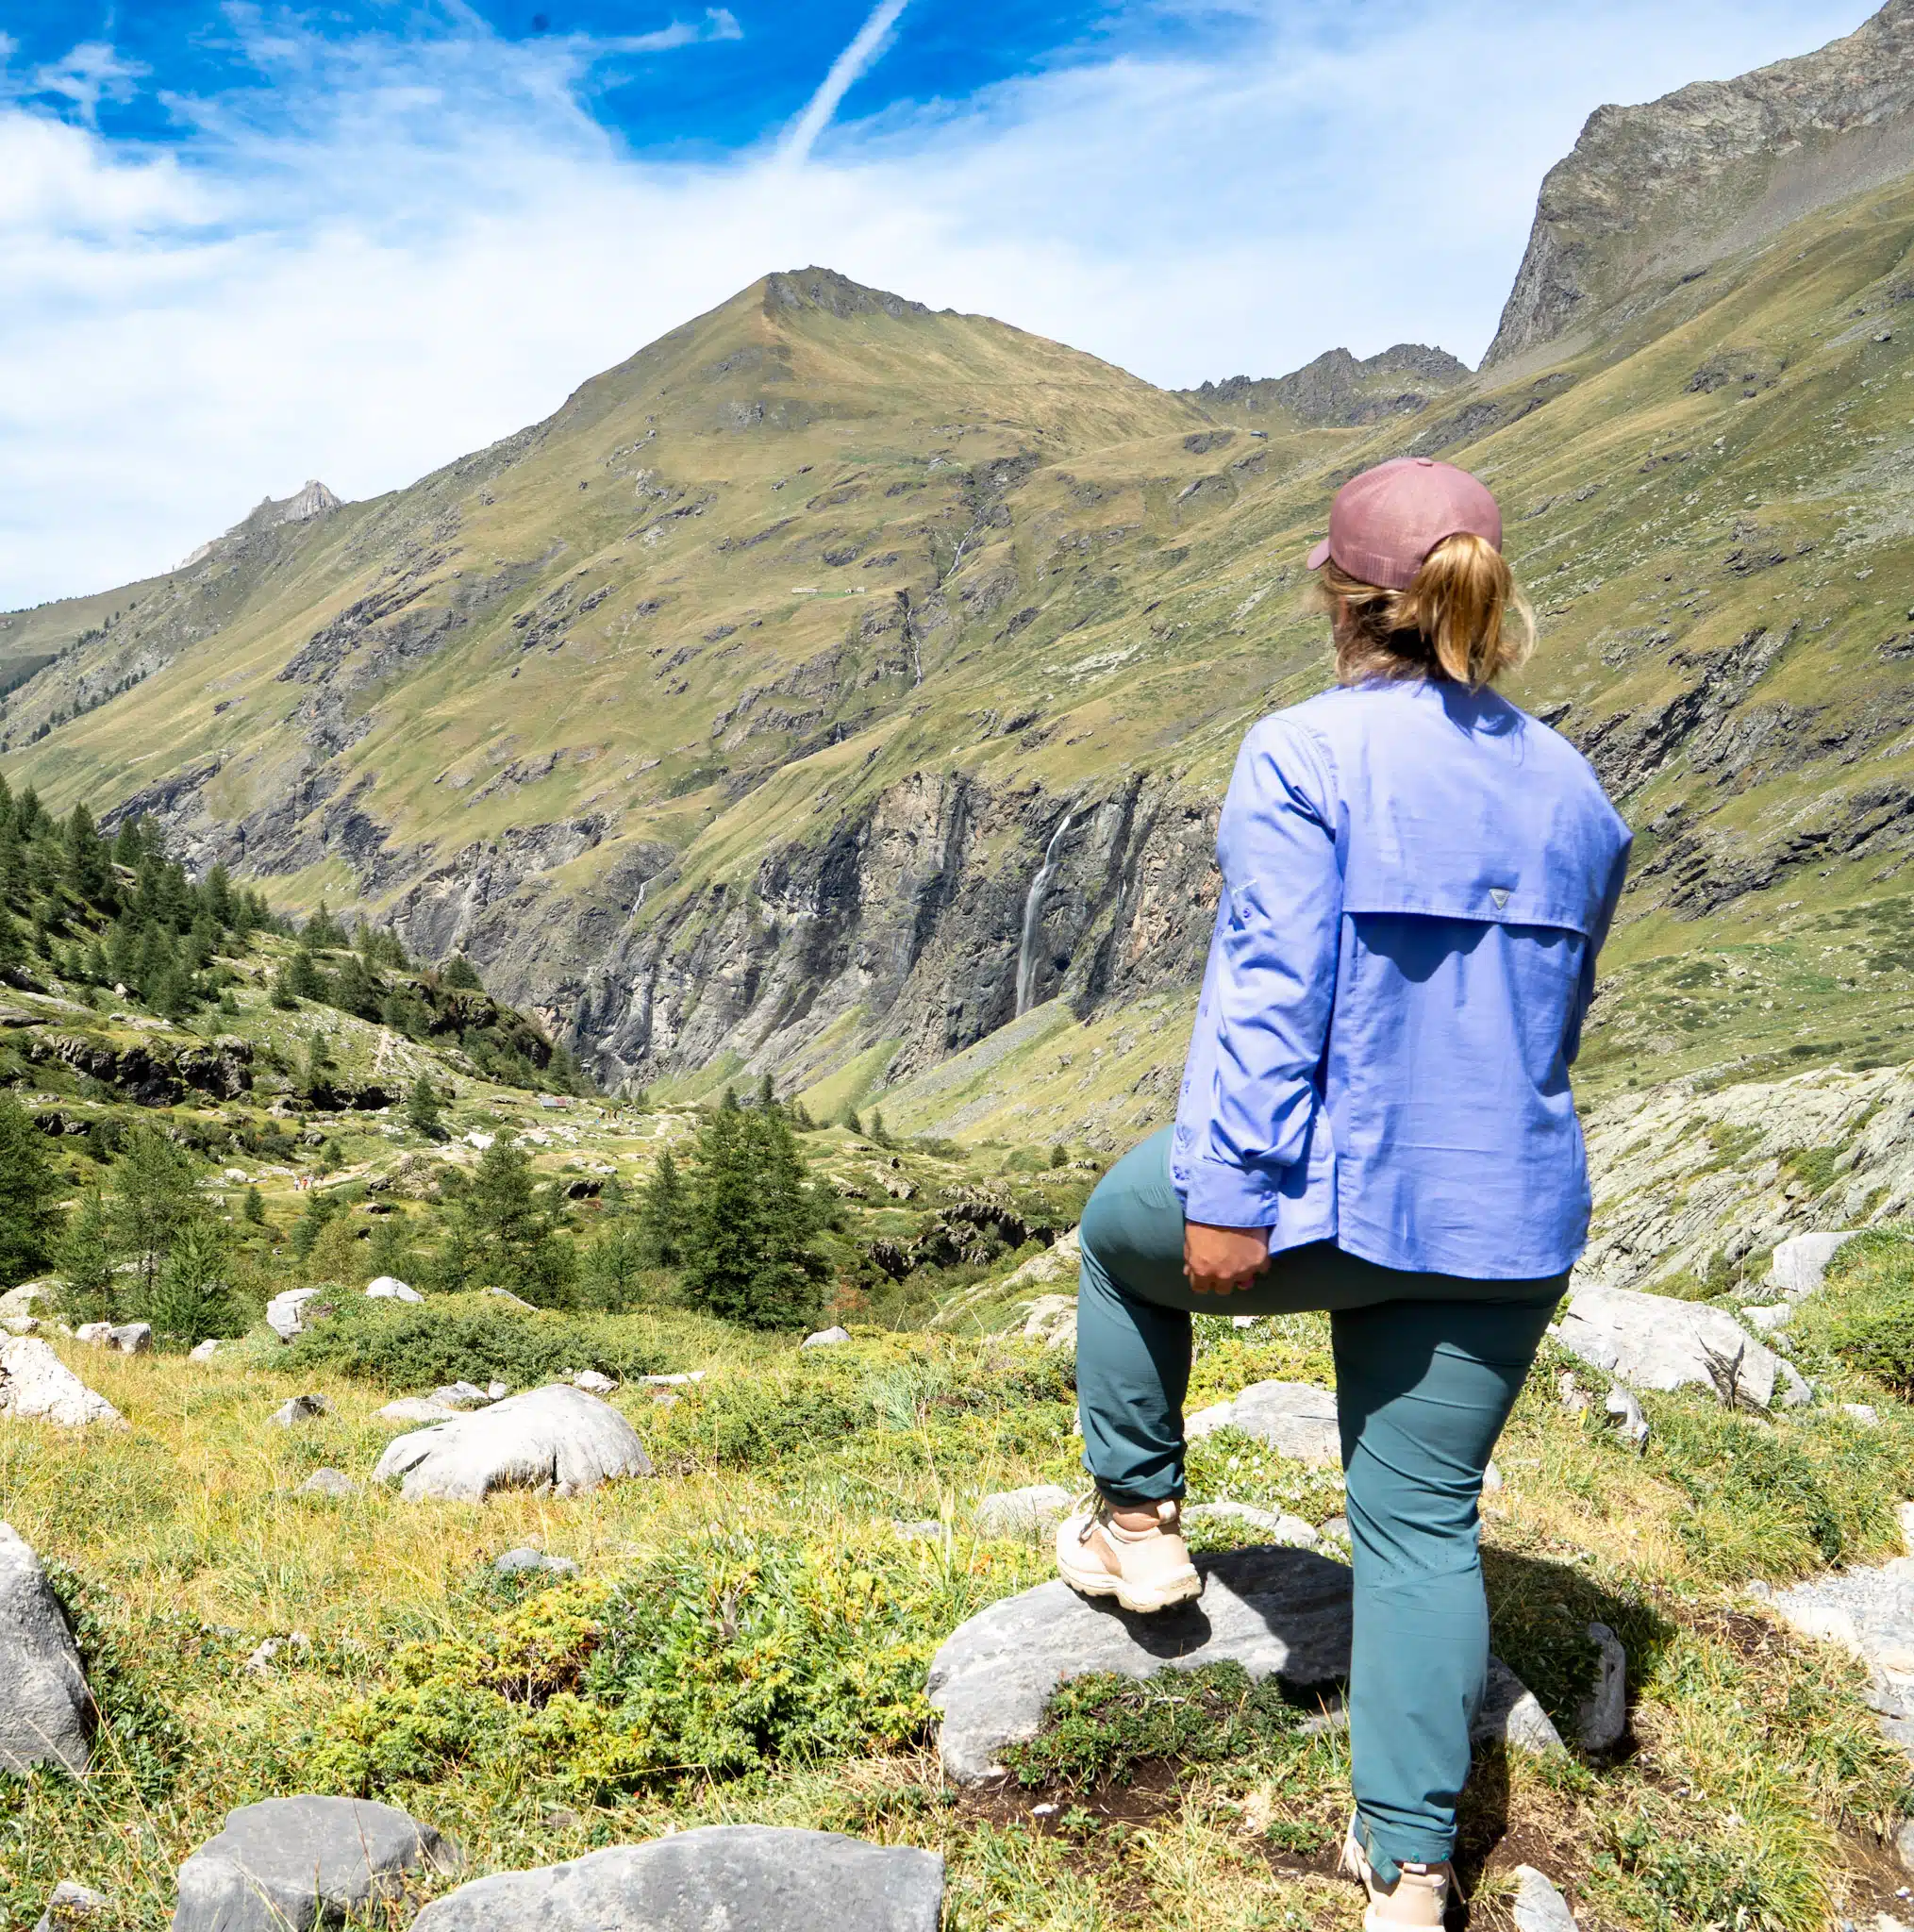
Move over, Dolomites; I think I found my new favorite area of the Alps: the Vanoise National Park in France. The Vanoise is a national park in Savoie, in the French Alps, southeast of Chambéry and close to the Italian border. It was France’s first national park, created largely to protect the ibex, and it has a great hut-to-hut route that I think everyone, especially solo female hikers, will enjoy
This post was made possible because of Bookatrekking.com, as it was a hosted self-guided hut-to-hut, but all opinions are my own.
You can find this on Bookatrekking’s site: the Tour du Vallaisonnay. I didn’t expect how much else was here. This is a glacier park you can see from the trail for five days straight: marmots calling across the meadows, ibex coming off the ridgeline, golden eagles over the refuges, and delicious Savoie food every night.
This guide covers the five-day version of the Tour du Vallaisonnay route, with shorter stages and time to actually stop.
This blog post will help you understand how hard it is, what the huts are like, what it costs, and how to get there without a car.
This Post Pairs Well With
Disclosure
I completed this Tour du Vallaisonnay trek as a Bookatrekking Summer 2026 ambassador, and Bookatrekking hosted my trek as part of that partnership.
Bookatrekking arranged my refuge accommodations and provided my self-guided itinerary and navigation through its app.
Everything in this guide reflects my own experience on the trail, including what I enjoyed, what I found difficult, where I think the beginner rating needs additional context, and what I would do differently. You can read my Bookatrekking Review for more information
- Before and after: Chalet Bon Air, Peisey-Nancroix
- On the loop: Entre-le-Lac, Plaisance, La Gliere, Col du Palet
- Late June into September, while the refuges are staffed
- Late August gave me the quietest trails and the best wildlife
- Ibex coming down the ridgeline at Entre-le-Lac around 7 p.m.
- The valley opening up on the approach to La Gliere
- Refuges fill by mid-July for August dates
- Trains: compare fares on Omio
- Packed lunches: order the night before, around 10 EUR
Where Is Vanoise National Park?
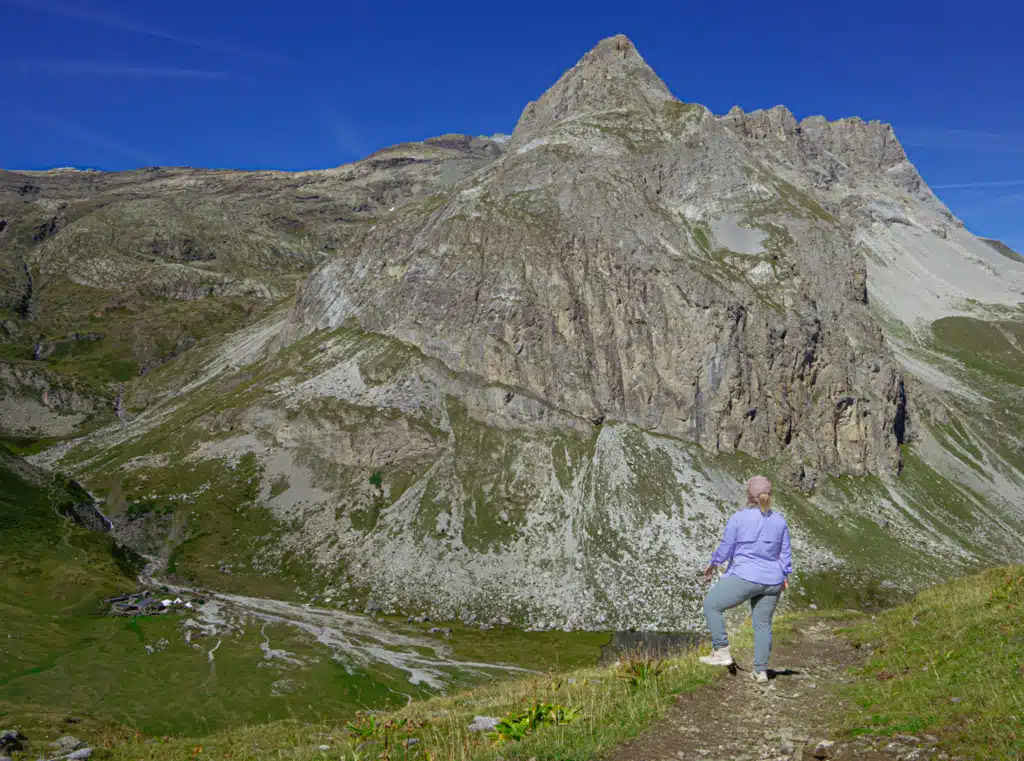
Vanoise National Park sits in the Savoie department of the French Alps, southeast of Chambery and close to the Italian border.
The Vanoise Alps lie between the Mont Blanc massif and the Massif des Écrins, in a region holding more than 100 summits above 3,000 meters.
I’d never been inside the park before this trip. I’d spent time across the border in Italy’s Aosta Valley and gone snowshoeing around Morgex, so this corner of the Alps wasn’t completely foreign. Even so, Vanoise surprised me almost immediately.
The park holds protected status. No drones are allowed in Vanoise National Park, and no dogs are allowed in the park either. Tourism development, including large ski areas, sits around the periphery, while the protected central zone is much more tightly controlled.
Cicerone notes there’s no permanent habitation inside the central area beyond seasonal pastoral activity, which explains why the landscape feels so different from the resort valleys just outside it.
Vanoise National Park describes the Tour de la Vallaisonnay as a roughly 36-kilometer circuit that can be done in three to five days. Bookatrekking’s five-day version measures about 38 kilometers, averaging around three hours fifteen minutes of walking per stage. The gap between published totals comes down to small differences between route tracks.
Vanoise National Park Rules You Need to Know Before You Go
Vanoise is a protected national park, not just a mountain range with trails through it, and the rules inside the central zone are stricter than most hikers expect. Worth reading before you book rather than finding out at the trailhead.
No dogs and no drones. Neither is permitted in the park, even on a leash, and not at the refuges. If you hike with a dog, this route is not an option.
Carry out every piece of trash. There are no bins in the heart of the park. Not at the refuges, not at the passes, nowhere. Anything that comes up with you goes back down with you.
That includes the things most hikers assume are fine to leave behind. Banana peels, apple cores, cheese rinds, orange peels. At altitude, in the cold, those break down slowly enough that they are still sitting there weeks later, and in the meantime they pull wildlife toward the trail. The park is explicit about it. Organic waste comes down too.
Logistics are the biggest reason
The reason there are no bins is logistics. Waste from the huts has to be flown out by helicopter, which is expensive, noisy, and burns fuel over a protected landscape. Every wrapper you carry down yourself is one that does not need a flight.
The park pushes what they call a pique-nique zéro déchet, a zero-waste picnic, which in practice means packing your food in reusable containers or cloth wraps before you start walking and carrying a refillable bottle.
One thing to know: refuges will often let you take a small amount of their sorted waste down with you if you have room in your pack. If you are on your final descent and traveling light, ask. It costs you nothing.
Bivouac only in designated spots, and only with a reservation. If you are planning to camp rather than sleep inside, you cannot pitch wherever you like. Inside the protected zone, bivouacking is permitted only around designated refuges and requires advance booking. Tents must be up by 7 p.m. and down by 8 a.m.
You can find all this information on the Vanoise National Park site, and the rules do change, so check before you go.
Tour du Vallaisonnay vs. the Tour of the Vanoise
The names get confusing fast once you start researching, so this is worth clearing up. The Tour du Vallaisonnay is the short circuit in this guide. The Tour of the Vanoise is a much longer trek through the wider region, which Cicerone calls more than 150 kilometers over roughly 11 stages, taking in parts of the GR5 and GR55.
That same guide also covers the Tour des Glaciers de la Vanoise and other shorter multi-day routes.
I had no idea how extensive the trekking network was until I got there. I went to Vanoise for one five-day hike and left with a whole new list of trails and refuges I want to see.
Why I Chose the Tour du Vallaisonnay
Three things:
- I wasn’t looking for the hardest trek I could find
- wanted a multi-day Alpine hike that would challenge me without every single day revolving around mileage and elevation gain.
- wanted a different corner of the Alps. I love the Dolomites, and I’ll keep hiking there, and I’ll keep sending you there too.
But the Dolomites are dealing with very real tourism pressure, especially around the most photographed trails, lakes, and huts, and I didn’t want to spend another whole summer pointing people at the same handful of places.
I wanted somewhere new to me that still gave me the hut-to-hut experience I love.
Then I found the Vallaisonnay on Bookatrekkings website: a short circuit, five manageable days, and a park I knew almost nothing about.
The five-day version appealed because the stages are short.
For me, half the pleasure of hut-to-hut hiking is moving through a landscape slowly enough to actually notice it. I wanted to stop at waterfalls, take photographs, watch wildlife, eat lunch somewhere beautiful, and arrive at the refuge without feeling like I’d raced a clock all day.
What the Refuges Are Like on the Tour du Vallaisonnay
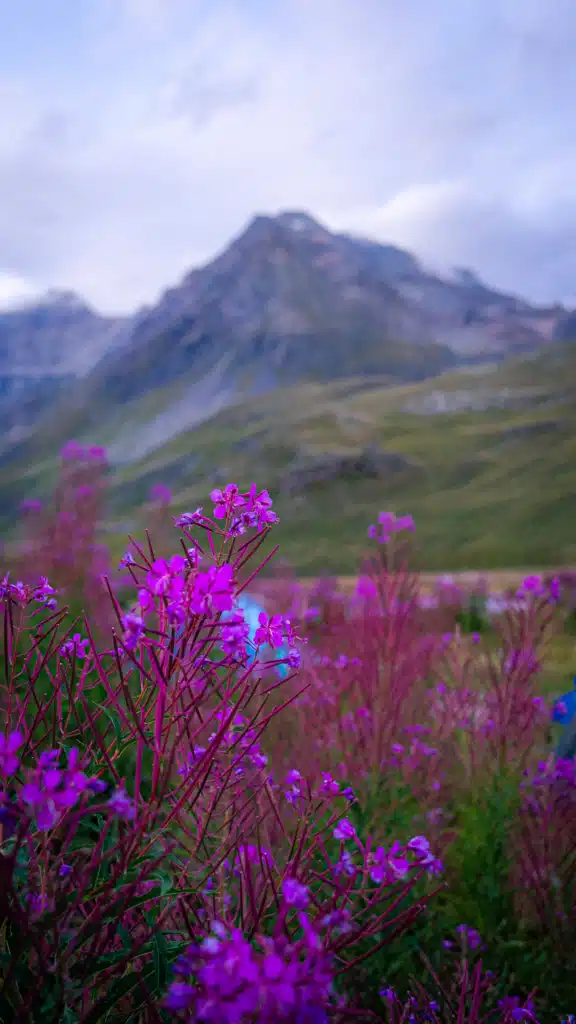
The Vanoise refuges felt noticeably different from the Dolomites rifugios I’m used to. Some Dolomites huts feel almost like rustic mountain hotels, with big menus, larger facilities, and enough comfort to make a first hut-to-hut trek easy. The Vanoise refuges I stayed in felt more basic and more obviously tied to the limits of running an operation inside a remote protected area. Neither is better. They’re just different.
What to Expect if This Is Your First Hut
A refuge is not a hotel that happens to be on a mountain. You’re entering a shared space with limited resources.
- Take off your hiking shoes near the entrance and put on hut shoes.
- Store trekking poles and packs as the guardian instructs.
- Dormitories are shared, charging outlets are limited, and quiet hours matter.
- Breakfast may be simpler than you eat at home. The shower may last three minutes. You may carry your trash for several days.
- None of that makes the experience worse. It just means arriving with realistic expectations.
Food, Packed Lunches and Solar Power
Dinner leaned hard into comforting Alpine food. Soup came up constantly, so did croziflette, and dessert was usually fromage blanc and berries. I enjoyed it, though by the end of the trek I knew the menu well.
Breakfast was harder. Bread, jam, cereal, coffee, and hot milk didn’t give me enough protein for the way I like to fuel before a climb, and I learned that the hard way on Day 2. Next time I’ll bring food I know works for my body. I also wished I’d packed Liquid I.V. for the hot descent days.
I bought packed lunches at Entre-le-Lac and La Glière, both around 10 EUR, and both were worth it. Simple but substantial enough that I didn’t need to haul several days of lunch food from the start. Order them the night before. Late-season supplies are limited, and the guardians need to know what they’re preparing.
Solar power was a recurring feature, which means electricity is a shared and finite resource rather than something you can assume unlimited access to. The same goes for Wi-Fi. At La Glière, they used the Wi-Fi mainly for weather and emergencies, and I liked that. You’re already in the mountains.
Bivouacking in Vanoise
If you’re planning to bivouac rather than sleep inside, don’t assume you can pitch a tent wherever you want. Inside the park’s protected heart, bivouacking is only permitted around designated refuges and requires advance reservation. Current rules allow tents between 7 p.m. and 8 a.m. in authorized areas. Check the current regulations before your trip.
Day 1: Rosuel to Refuge Entre-le-Lac
Bookatrekking’s first day was roughly 8.6 kilometers with 730 meters of ascent.
I started around 9:30 a.m and took the seasonal shuttle bus to the trailhead at Refuge Rosuel. There is a car park here where you can leave your car for the 5 days, and you can park your campervan near Refuge Rosuel. You’ll also find the Vanoise National Park Information Center.
National Park Employees do speak English and will gladly answer any questions you may have.
Getting Started
The valley stretches toward the mountains with waterfalls dropping from both sides. Near the start, there’s an optional discovery walk that takes you uphill before dropping you back down.
I skipped it as I already had plenty of climbing ahead and didn’t need to add elevation just because the GPX offered it.
The climb out of the valley was steady and steeper than the total distance suggests. I used my trekking poles from the very beginning and was glad I had them.
Eventually I reached a wooden viewing platform over one of the waterfalls and stopped for several minutes to take photos.
From there the trail runs through alpine forest, rising and falling before wrapping around the hillside onto rockier ground. A stone staircase brought me to one of my favourite viewpoints of the day, where the landscape opens toward the upper valley. The signs put Entre-le-Lac at another hour and fifteen.
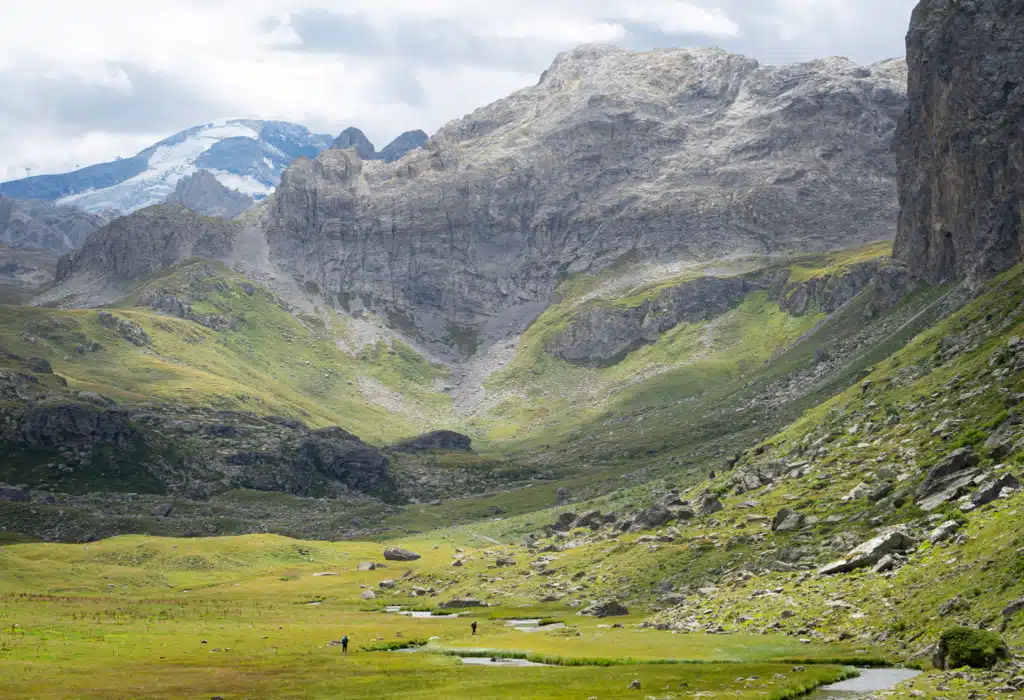
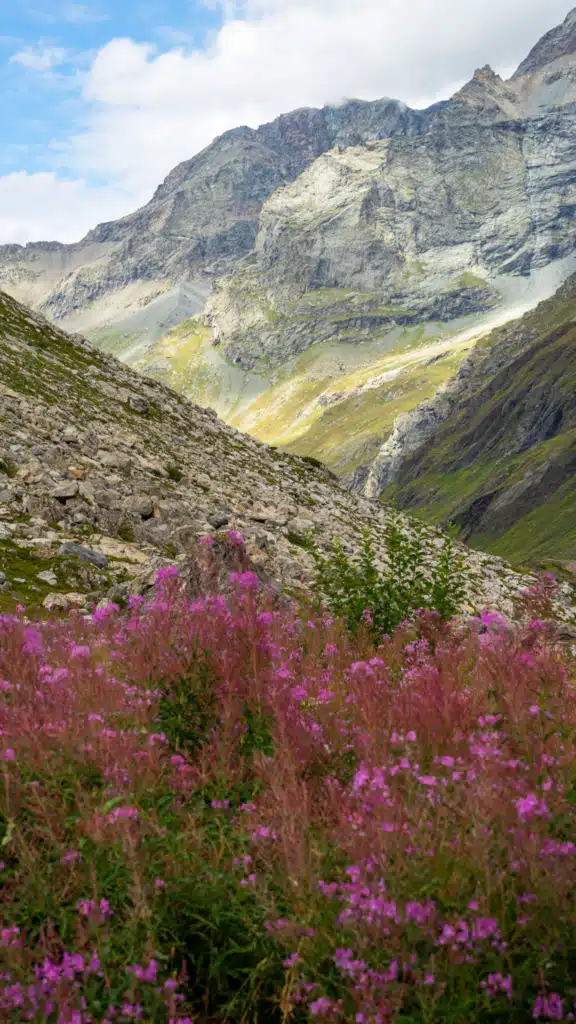
This next stretch is where Vanoise really started showing itself. Streams cut through the landscape, marmots called in the distance, waterfalls dropped off the surrounding slopes, and glaciers appeared further up the valley. I remember thinking the whole area felt like an enormous natural amphitheatre.
Walking through Lac De La Plagne
Then Lac de la Plagne came into view. There’s a rocky section around the lake where the horse trail passes through an area of rockfall. It isn’t technically difficult, but slow down if you have any balance concerns, because the uneven rocks are exactly where one careless step becomes a sprained ankle.
When I came around the rocky bend, fishermen were casting into the water. I followed the banks to an elevated footpath and a small bridge over a partly dry riverbed, and by then I knew I was close.
Staying at Refuge Entre-le-Lac
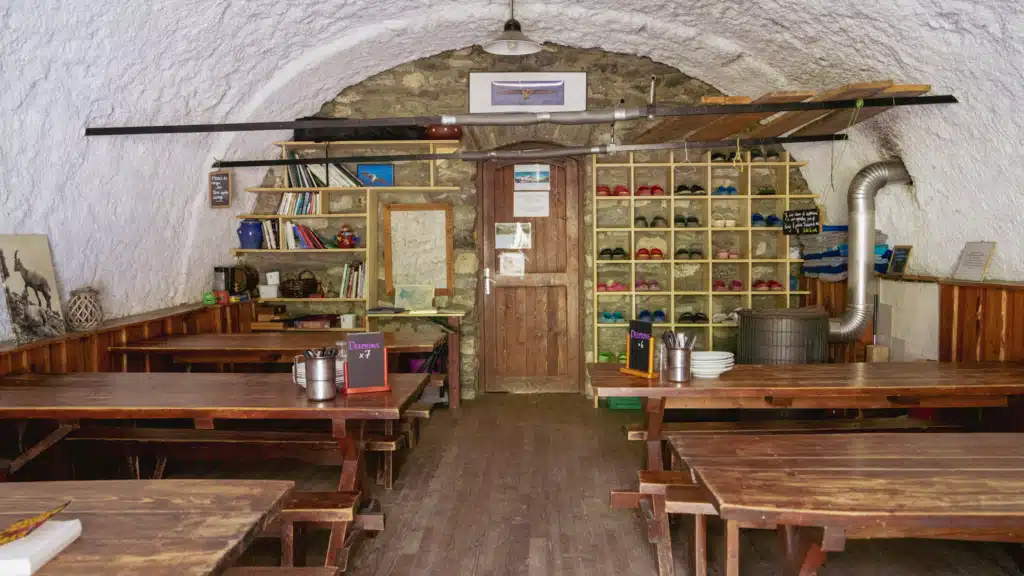
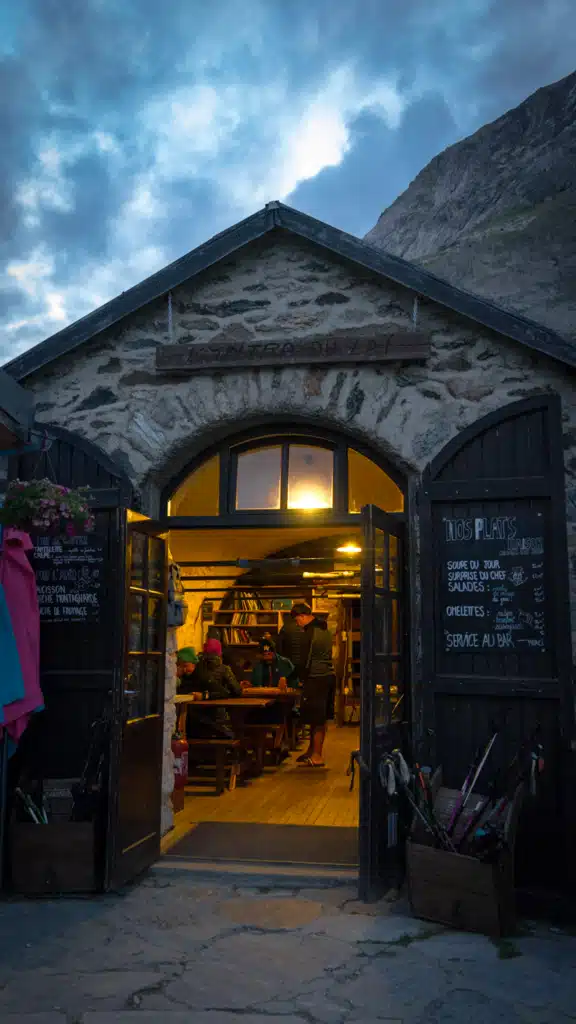
My Dolomites treks had taught me enough about huts that I walked straight toward the bar to check in, and my assumption was right.
A staff member ran through the routine: trekking poles into a small bin before the entrance, hiking shoes off, hut shoes on, packs where the refuge wanted them.
These systems keep dirt out of the dormitories and cut the risk of bedbugs moving between sleeping areas.
How many Beds are at Entre-le-Lac?
Entre-le-Lac holds 40 people and is normally staffed from mid-June into September. During my stay, there were also yurts and bivouac spots outside.
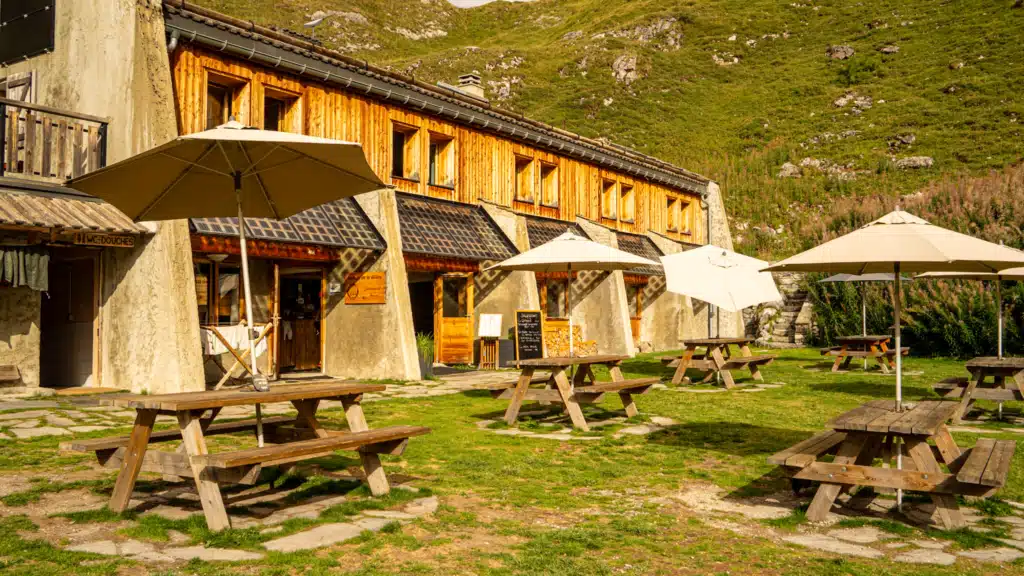
The bathrooms were basic but impressively clean, with squat toilets, sinks for brushing your teeth, and hot showers at 3 EUR for three minutes.
The refuge runs largely on solar, so charging is something you share rather than spread across every device you own.
I was assigned top bunk number 16, and I had the worst night of sleep of the whole trek. There was a snorer directly across from me, and several families with children were considerably louder than I expected.
Refuge culture normally comes with quiet hours and an understanding that everyone’s sharing the space, but some nights simply work better than others.
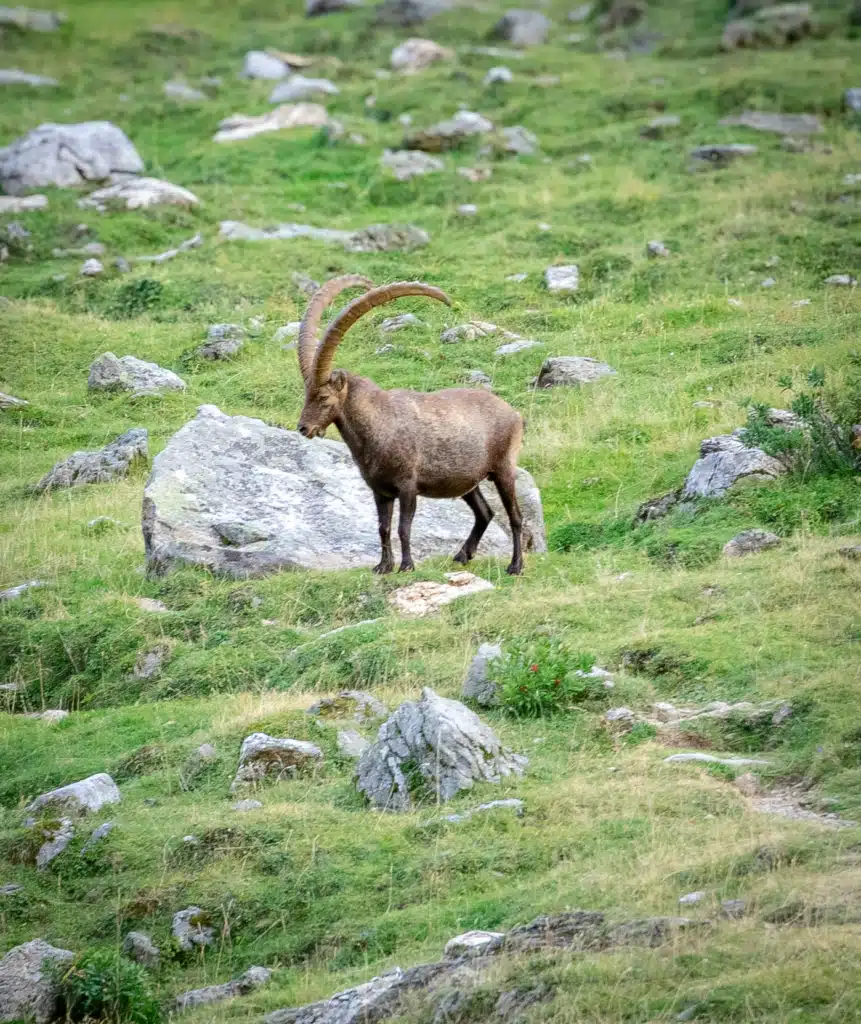
Outside, though, was one of my favourite moments of the trip. Around 7 p.m. a group of ibex started moving down from the ridgeline, and several of us stopped what we were doing to watch. I had my camera and couldn’t believe how close they looked.
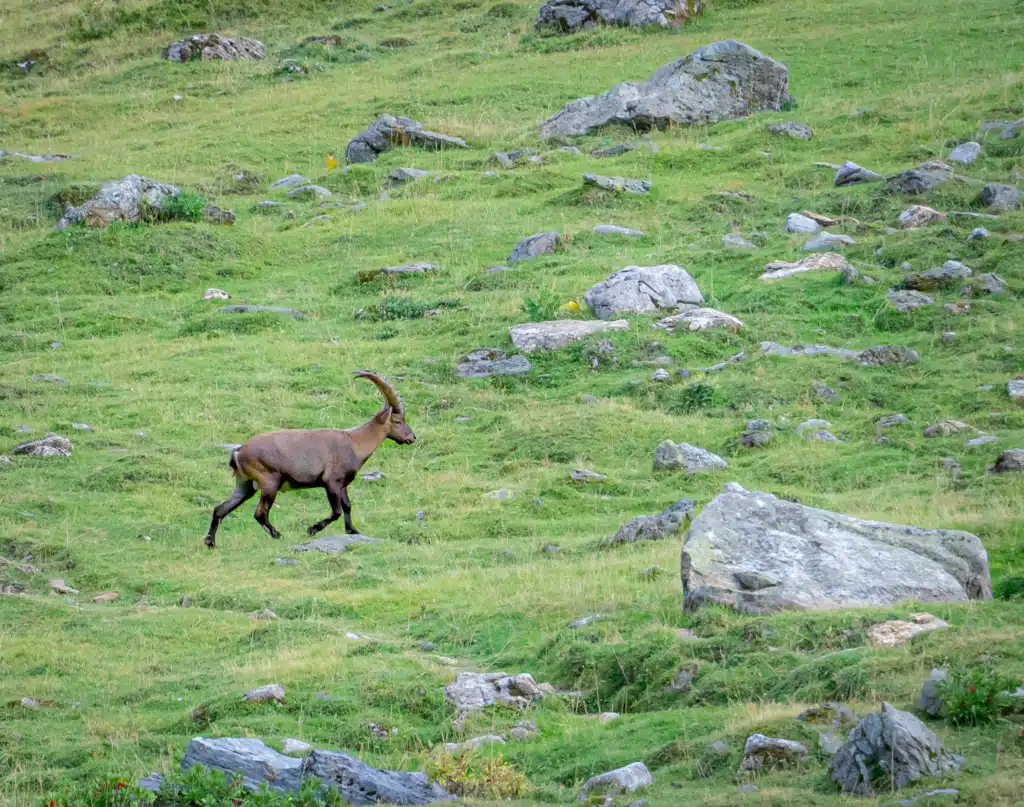
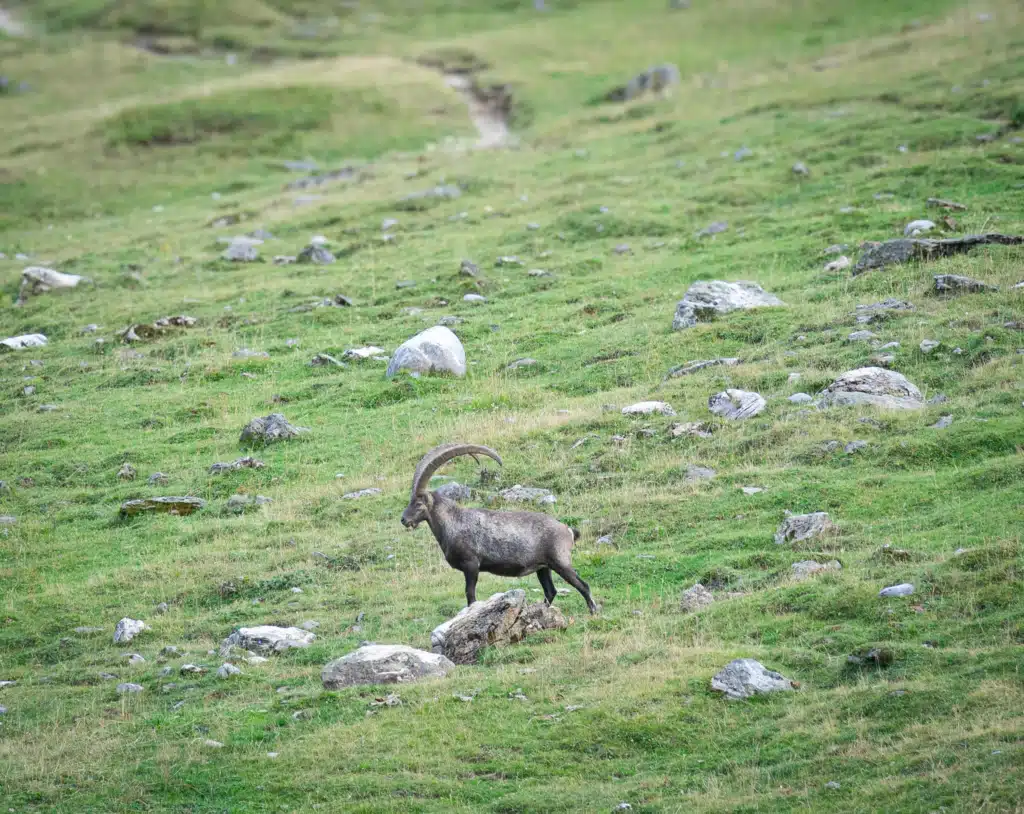
That evening I also ran into the GR5 hikers I had met at my Hotel in Nancroix, and we talked with a woman from the Netherlands.
I’ve regretted that we never exchanged contact details.
Those conversations are a big part of what I love about long-distance hiking. Everyone’s moving through the same landscape for different reasons, and for one evening you end up at the same table.
Dinner and breakfast at Refuge Entre Le Lac
Dinner was regional mountain food: soup, duck with mashed potatoes, croziflette.
Breakfast was much simpler, just bread, jam, cereal, hot water, hot milk and coffee served in a bowl. I didn’t eat enough, and I found out how much that mattered within about twenty minutes that morning.
You can go to their official site and check out prices for extras:
Day 2: Entre-le-Lac to Refuge de Plaisance
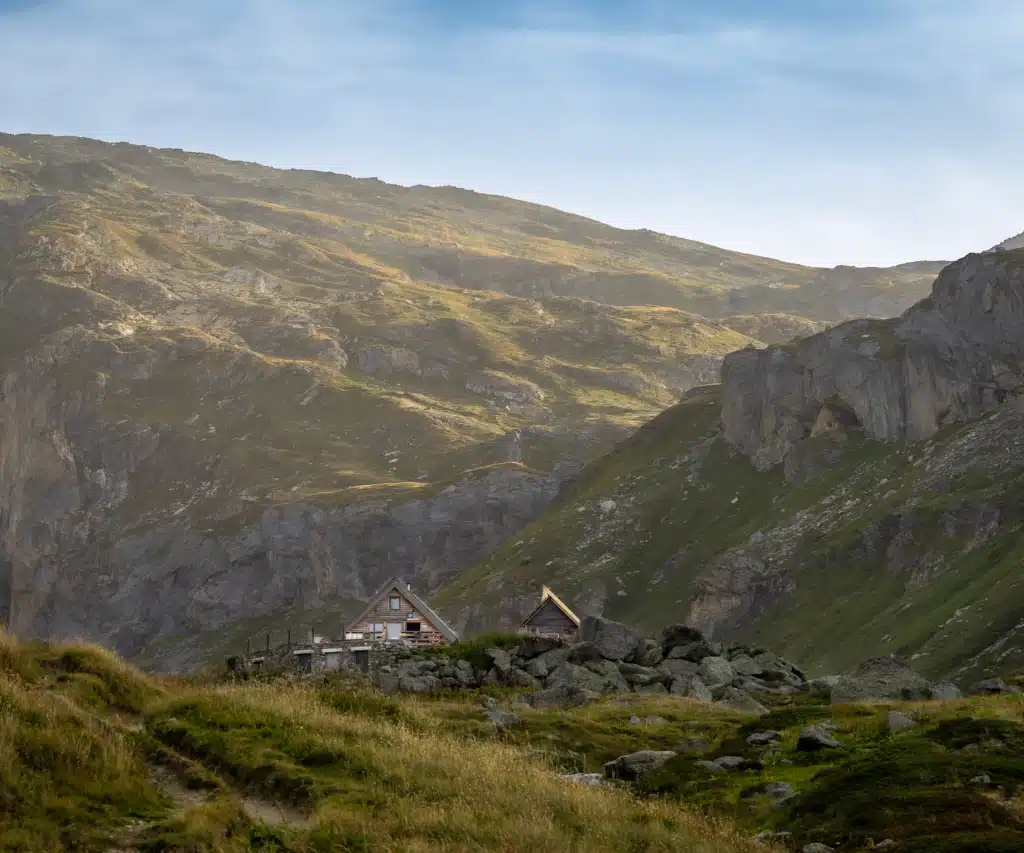
The hardest climb came immediately behind Entre-le-Lac. The trail just kept going uphill.
I’d slept badly, hadn’t eaten enough breakfast, which was why it was so tough for me.
Once the trail leveled out on the higher ground, I felt much better. I stopped for lunch and ate the packed meal
I’d ordered from Entre-le-Lac for about 10 EUR: lentil salad, local cheese, bread and a Twix.
The lesson was obvious. Refuge breakfast may not give your body the fuel it actually needs, and I should have brought more protein.
After lunch, the day got much easier. As I headed down into Col Du Plan Sery, the view was absolutely spectacular. You’ll have one big downward push with loose rock; break out those hiking poles for the assist.
This wasn’t bad; it was just rough on the knees, and there were steep ledges. Once you get towards the end of the valley, you’ll take a trail that wraps along the mountainside. You’ll have a beautiful view of waterfalls coming off the mountainside.
The descent toward Plaisance was wet in places, but the scenery made it hard to care. Glaciers stayed in view no matter which way I looked.
Staying at Refuge de Plaisance
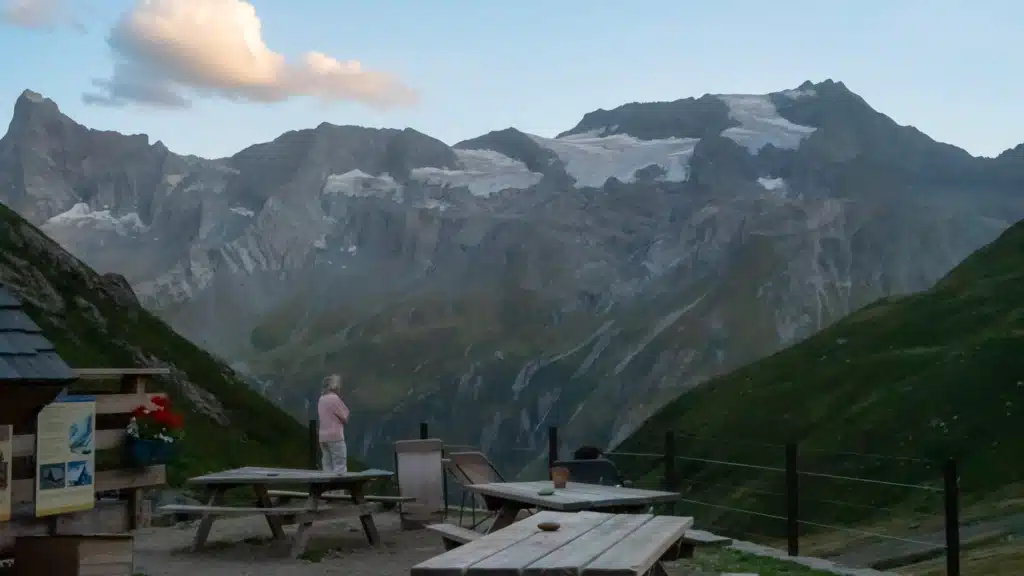
Plaisance feels completely different from Entre-le-Lac. It sits in an open mountain setting, with two chalet-style buildings, and when I stayed, a crew was working on part of the dormitory roof and camping outside for the duration. The guardians were exceptionally kind.
The wildlife was another highlight. Plaisance is known for ibex, and that evening several of us watched ibex and golden eagles around the refuge. The weather turned later on and pushed everyone inside, so I spent part of the night reading my book with a local amber beer from the Ecrins and talking to other hikers.
My French is limited, but people were incredibly accommodating. Several wanted to practice their English while encouraging me to use whatever French I had, and that became a pattern for the rest of the trip.
The showers and toilets were noticeably more modern than the previous night, which is where I learned a very specific lesson about timed mountain showers.
Get completely undressed first. Then insert the coin. Then press the green button. Once the three-minute timer starts, the shower doesn’t care whether you’re still trying to get out of your hiking pants.
Day 3: Plaisance to Refuge de la Glière
The start of Day 3 was one of my favorite parts of the whole trek. I left Plaisance around 8:30 a.m. and followed the river down through the valley.
You’ll be following the Py Stream, known locally as le Ruisseau du Py or Le Py, toward the 80-meter-high Py waterfall (Cascade du Py)
This isn’t physically tough, but it is downhill and runs alongside an area with steep ledges.
One thing to note: I occasionally lost the trail due to Erosion. You’ll have to walk down across a new riverbed, dry ones thankfully, and up onto the trail. Some of it is steep. So keep this in mind.
You’ll come to a bridge (pictured below)
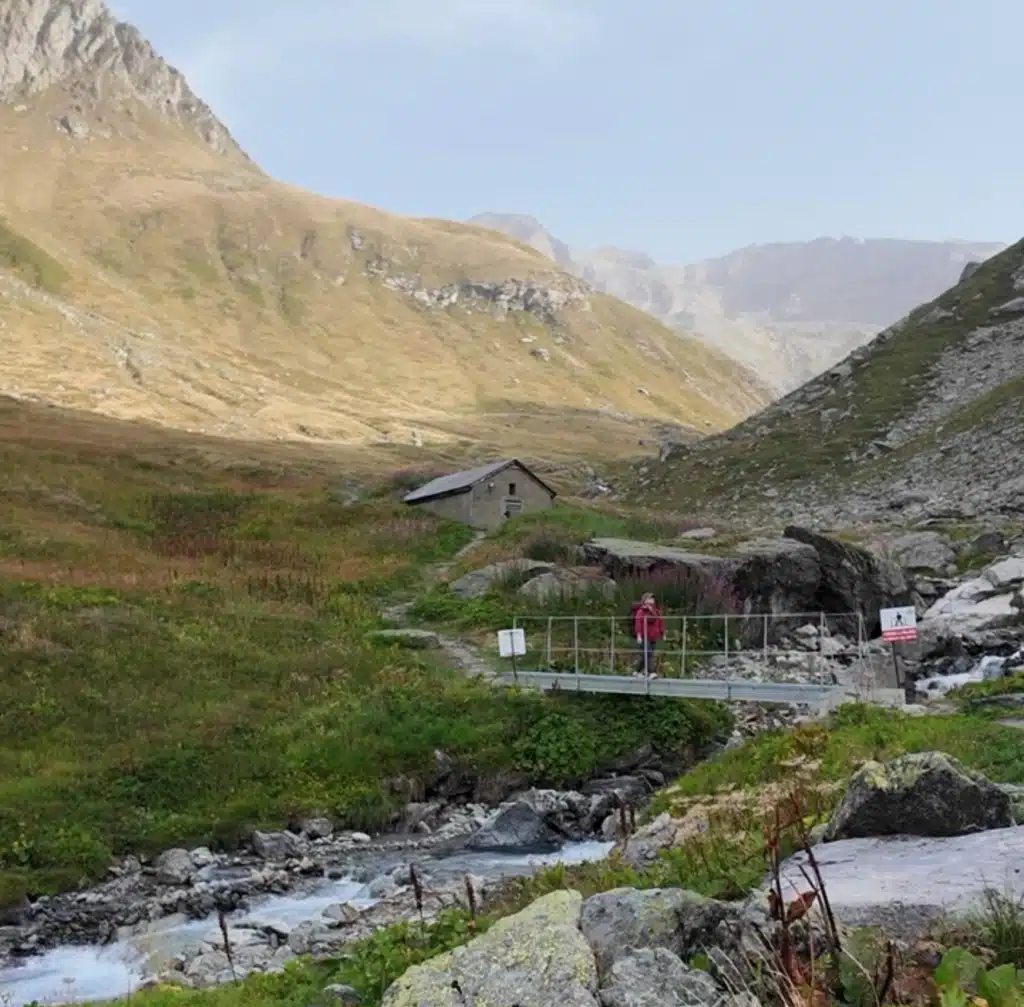
This trail is where you’ll see various ibex along the river as you head into the valley.
And let me tell you that it is, without a doubt, incredibly beautiful as you head down. You’ll get various angles of the Cascade du Py.
Please be careful on this portion as it is steep!
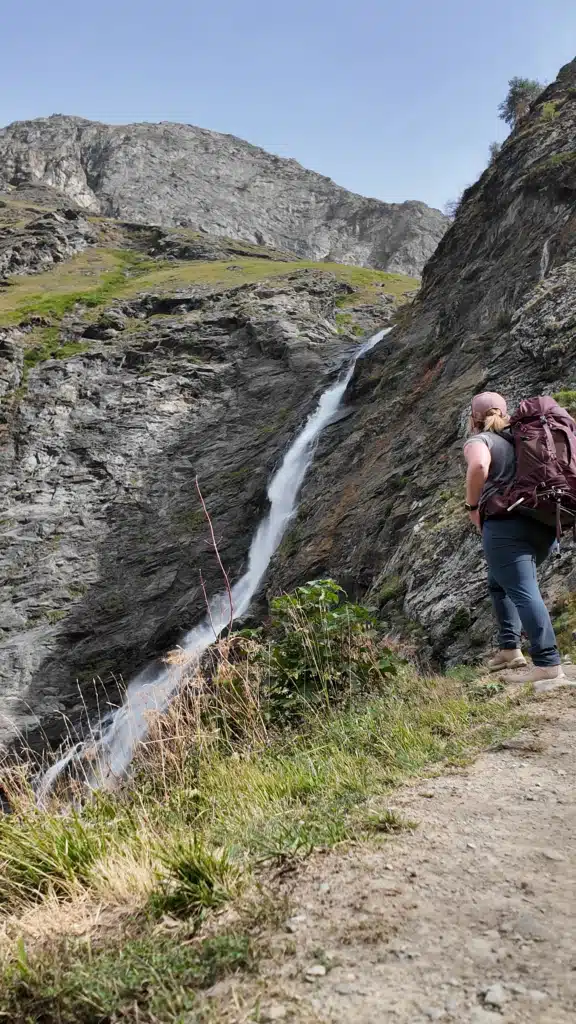
The route drops toward Laisonnay and brings you into a slightly more developed part of the valley, which is where I picked up enough signal to call my husband.
On the Access Road to La Gliere
From there I went through a small settlement, followed a shaded riverside path from the Bookatrekking app, and rejoined the access road toward La Gliere. What I learned here is that I left the National Park and came back into it. You’ll see signs noting this, along with signs to be mindful of the Marmots.
That access road was the least interesting part of the trek. It felt long, and once I left the shade it was hot.
The views almost made up for it, with enormous glaciers ahead and the landscape opening toward the Grand Bec and Bellecote.
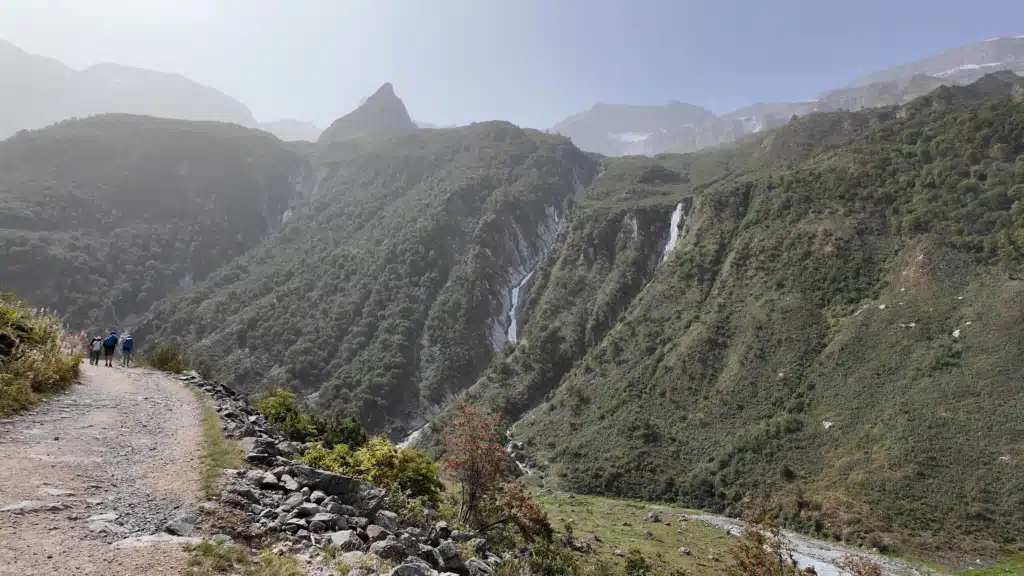
My hike also coincided with Saharan dust moving through the Alps. The distance went hazy, everything picked up a light coating, and I could actually feel fine grit on my skin. A good reminder that mountain conditions are rarely as simple as one weather icon before you leave.
Staying at Refuge de la Glière
The approach to La Glière was one of my trip’s favorites. The valley opens around you with meadows, mountains, glaciers, and a river cutting through below.
But I’ll be honest, walking along this white-dusted road was HOT.
Families were out walking the grassy areas, and marmots seemed to be everywhere. It looked vaguely like walking onto a Hobbit film set, if someone had added glaciers.
La Gliere immediately became my favorite refuge. The sleeping area felt modern and comfortable, the bathrooms were well maintained, and hot showers were again around 3 EUR for three minutes.
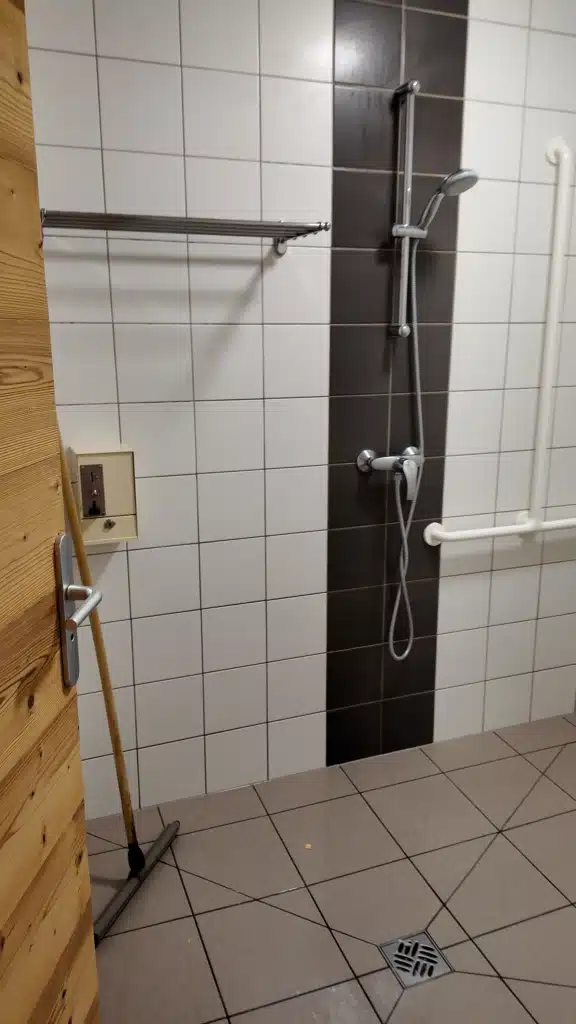
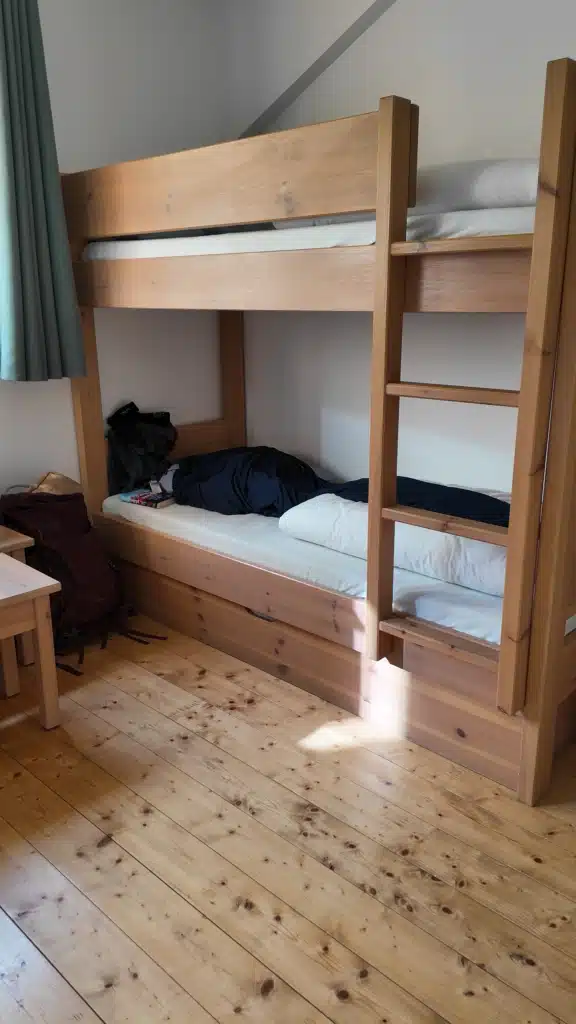
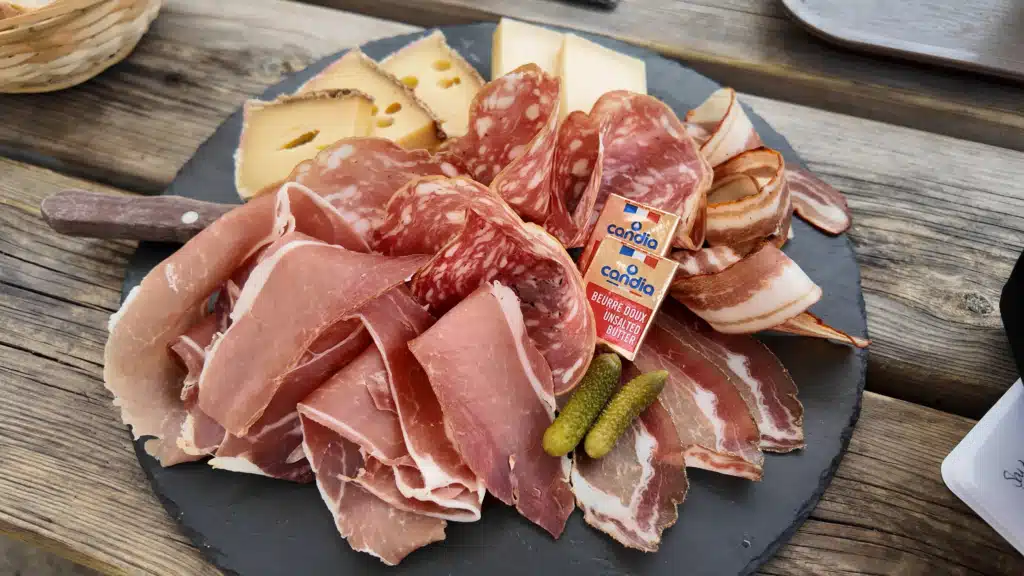
This was also one of the huts where we could bring packs into the sleeping area rather than leaving everything in an entry storage room.
Most importantly, the women running it were some of the kindest guardians I’ve met on any hut-to-hut hike. If any of them ever read this, thank you.
It’s important to know that if you book through Bookatrekking, you’ll pay for any extra drinks or food you consume outside of breakfast and Dinner.
Keeping this in mind, I spent about 48EURO here on a meat and cheese board, beer, and several sparkling waters.
I had, after all, arrived at 2 pm, and they wouldn’t let us check in to the Refuge dorm until 4 pm.
Wifi and Charging Electronics at La Gliere
Like most of the huts, La Gliere runs heavily on solar. That said, there are outlets in the room, and they remind you to ask the Guardians before charging items.
Wi-Fi wasn’t treated as a normal guest amenity, and connectivity was mostly reserved for weather and emergencies.
That was one of the biggest differences I noticed between the French refuges and the Dolomites rifugios I’m used to.
The Vanoise huts feel much more obviously shaped by the realities of operating inside a protected environment.
Day 4: La Glière to Refuge du Col du Palet
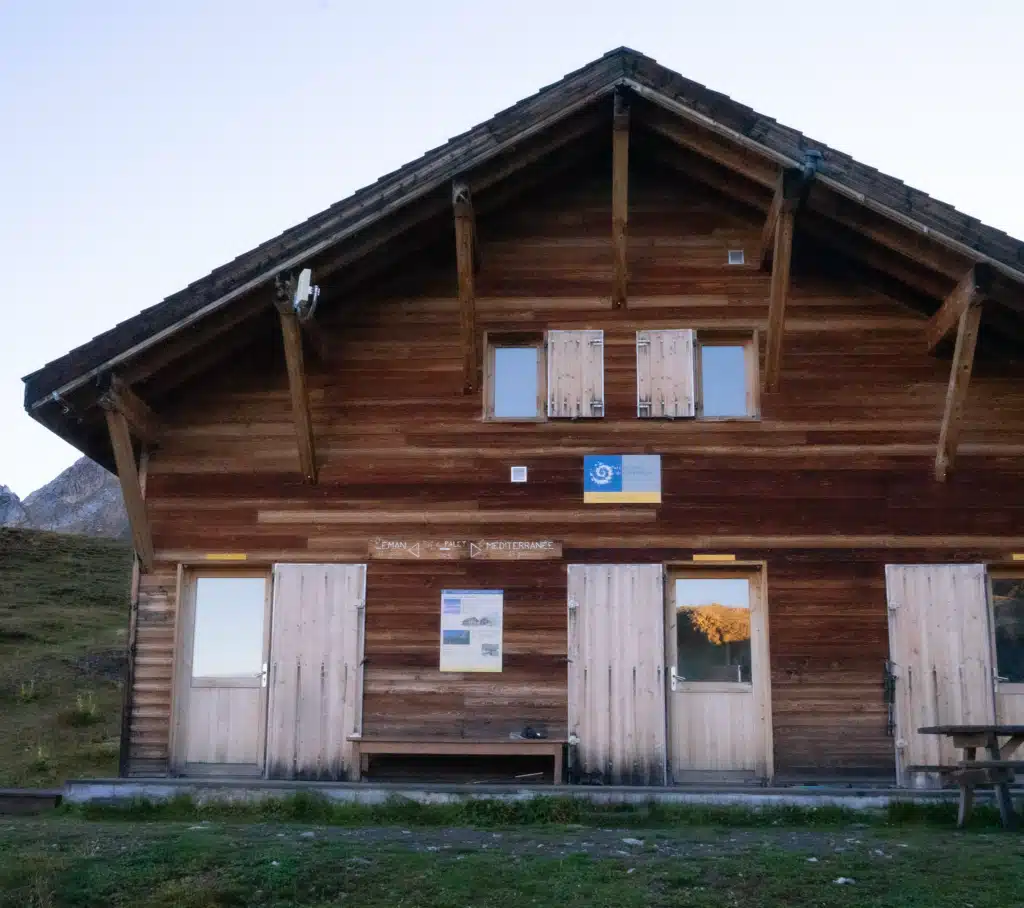
Total time and Distance: 2:45 to Col Du Palet I 6.89km
It rained on Day 4. A lot.
At breakfast, you’ll receive a morning weather forecast that some refuges hang on a bulletin board.
They let us know we were going to get wet, but the specific area we were in wasn’t as bad as some others.
The path you’ll take is right off to the right as you walk away from the Refuge.
You’ll be gaining elevation today, but it’s not too bad. Nothing I couldn’t handle.
On this particular day, you have the option to cut through the hillside rather than take the Chemin Du Col Du Palet road the whole way. I chose to cut through to save some time
There’s a small church nearby, Chapelle de la Glière, plus the beautiful Doron du Premou tucked behind the hill. Then the climbing starts.
You can stay on the road in places, but I preferred the trail. Eventually I reached grazing land with cows moving freely through the pasture, and the path got noticeably less obvious. I walked straight into the pasture until I could see a well-worn trail again and followed it up. You’ll get utterly confused here as the signs DO NOT match what is on your GPS. Follow your GPS towards Col de la Croix des Fretes
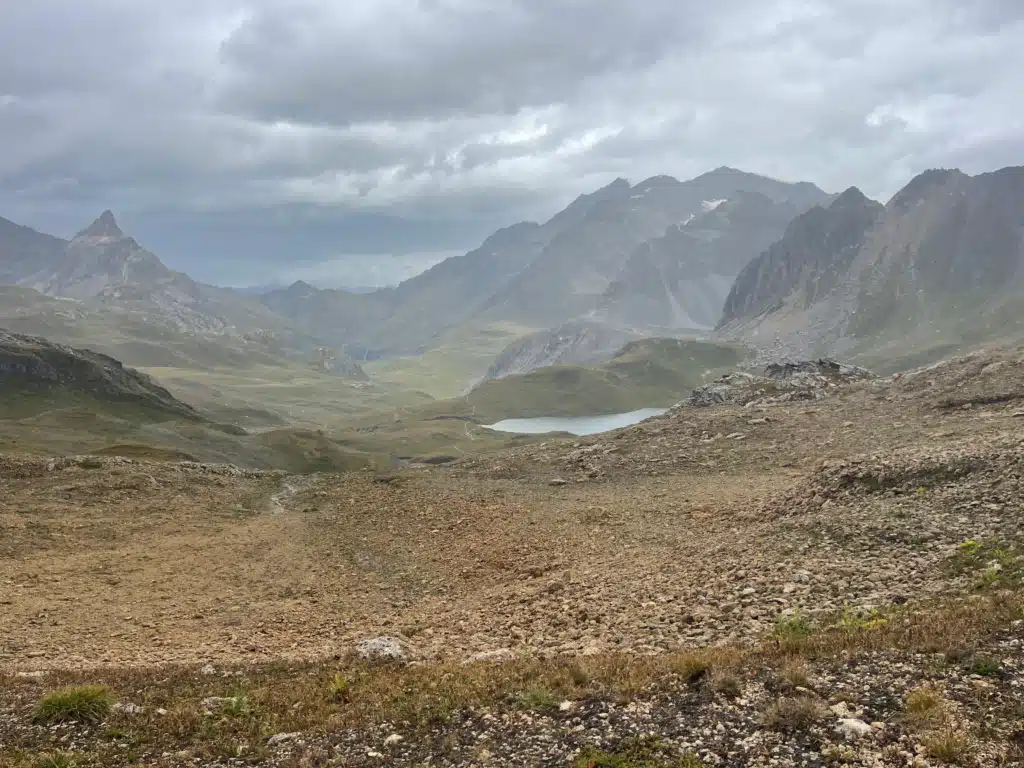
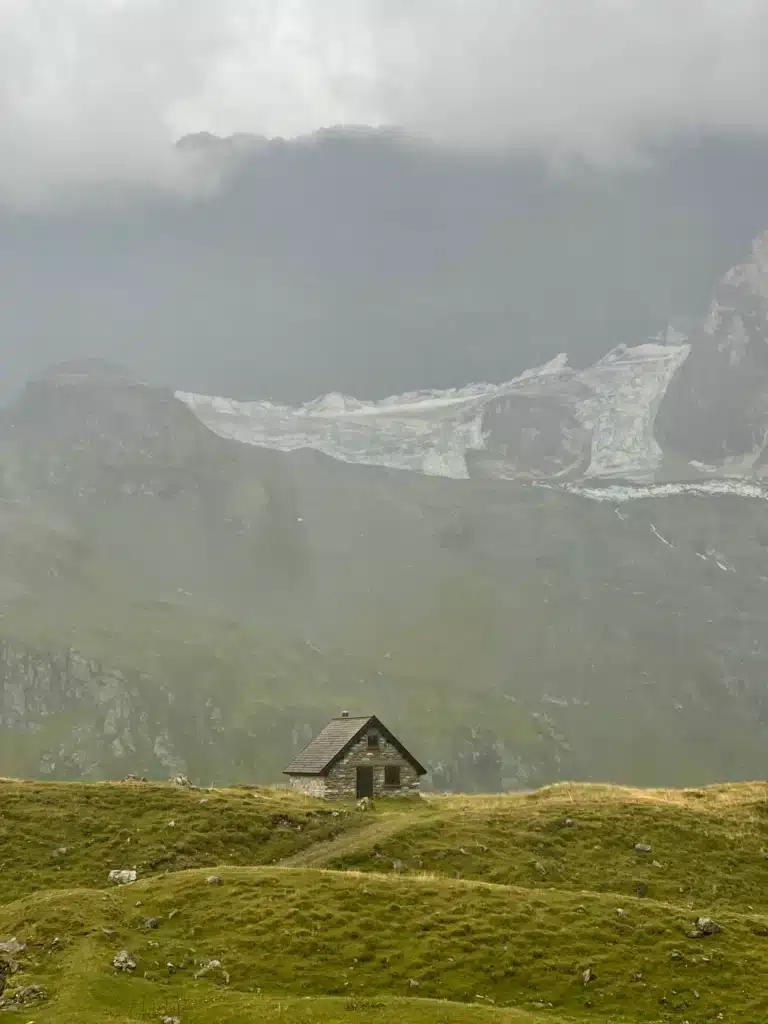
I moved faster than I normally would because I wanted to keep going rather than stand around getting wetter. The path up to Col du Palet is steep enough that I was grateful for my poles all over again, and near the top the wind picked up hard.
Then the view opened. Even in bad weather, it was one of the best panoramas of the trek. I was soaked, tired of the rain, but damn, that view will astonish you!
A short distance later, Refuge du Col du Palet appeared. You can choose to take the access road to the Refuge or take the side trail along it. I took the access road for safety purposes.
Staying at Refuge du Col du Palet
You’ll check in at the front, where the staff here will greet you and get you settled. Same process as the first couple of refuges.
Bags go in a shoe area, poles outside, and change into your hut shoes.
With the weather still bad, I spent the afternoon reading, journaling, and napping.
The sleeping arrangement at Col Du Palet was tight, bunks packed close together, and I had an upper. I am so thankful no one was up top with me.
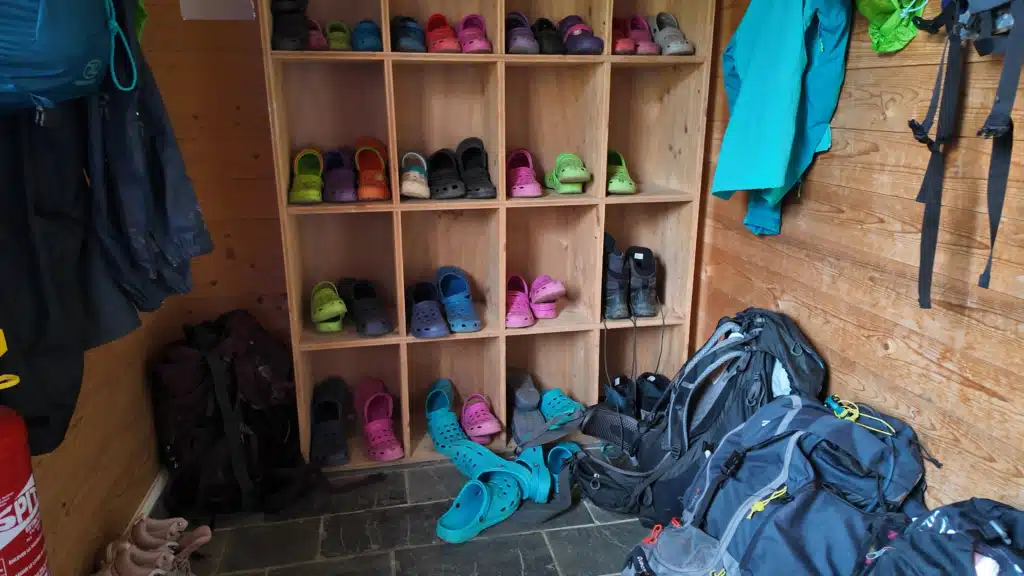
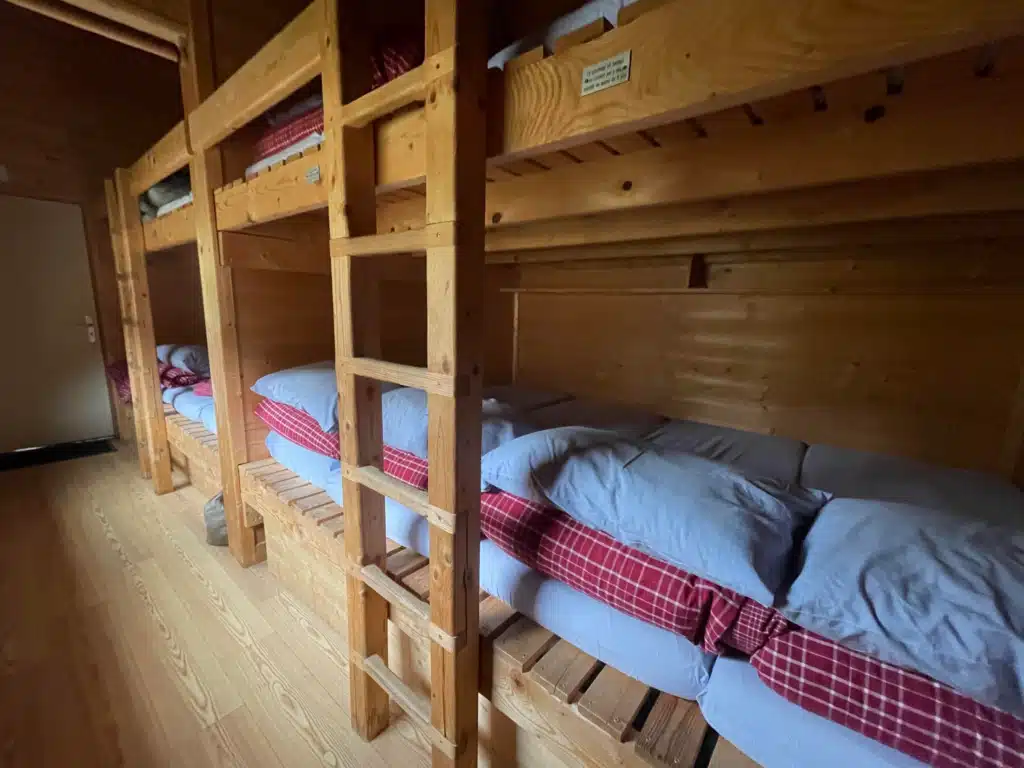
The communal atmosphere here was the best part of the trek. Two women from Lyon and Paris I’d also met at La Gliere were staying, and we had some wonderful conversations. Dinner was croziflette and soup again, with fromage blanc and berries for dessert.
Long conversations soon followed after dinner. A Canadian couple played board games and joined the conversation.
The History of Refuge du Col du Palet
Col du Palet felt like the most remote refuge of the trip, partly because of the weather and partly because it genuinely sits high in the mountains. Its history makes it even more interesting.
The older stone building started life as a military barracks rather than a hiking refuge. French military engineers strengthened the Tarentaise defenses through the late 1930s as tensions with Italy rose, and they finished the high-altitude barracks at Col du Palet in early 1940. Today, hikers use it on both the Tour du Vallaisonnay and longer routes through Vanoise.
Day 5: Col du Palet to Rosuel
Col Du Palet to Rosuel- 16 to 20 km and 4.5 to 5.5 hours to complete
The final stage was my favorite day of the trek. By day five I’d completely settled into hiking alone.
You’ll essentially be walking back towards Rosuel the whole time; the signs listed it as 4.5 hours.
There’s a wonderful section where marmots appear across the landscape before the trail turns and reveals a panorama back toward Lac de la Plagne and the mountain beside Entre-le-Lac.
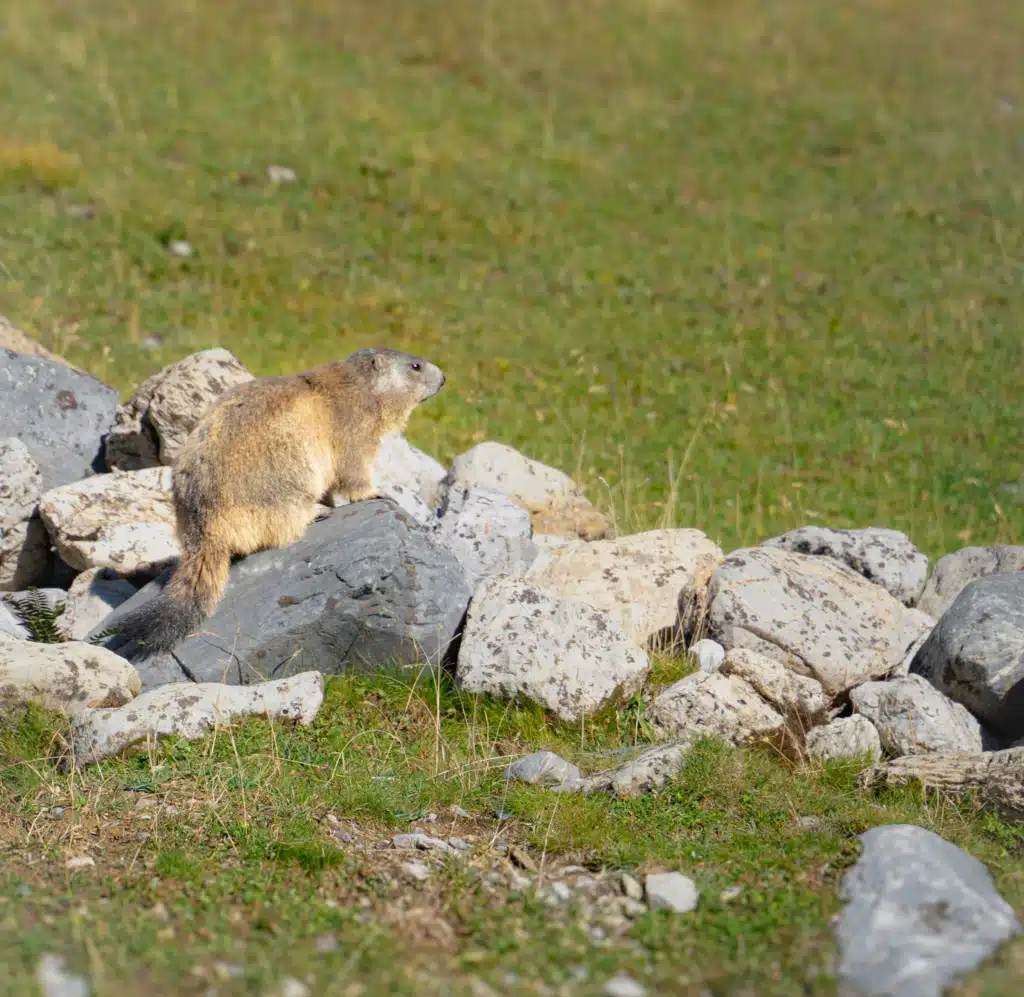
The final descent isn’t technically difficult, but it still needs attention. Near Lac de la Plagne, I crossed a small field of rocks and boulders where a careless step would roll an ankle, and there’s a narrow ledge-like stretch around the viewpoint toward Entre-le-Lac and the lake.
Neither scared me. But this is exactly why I dislike descriptions that make downhill stages sound automatically easy. Your legs are tired, you’ve been walking for days, and 1,000 meters of descent still requires concentration. My poles helped again.
Eventually I reached a cattle guard and signage telling me I was leaving the protected area of Vanoise. I still had walking left before Rosuel, but psychologically that was the moment the trek ended.
I got surprisingly sad. Five days earlier I’d walked into a national park I knew almost nothing about.
More importantly, I knew I wanted to come back.
How to Get to the Tour du Vallaisonnay Without a Car
The trailhead is Refuge de Rosuel at 1,557 meters, at the end of the road in the Peisey-Nancroix valley inside Vanoise National Park. This loop starts and finishes here, so no matter how you arrive, Rosuel is the address you’re aiming for.
Arriving Via Train
I chose this route because I could reach it without driving or renting a car.
I traveled from Belgium, entirely on public transport. It’s a long journey, so I broke it up with an overnight in Lyon, where I did a food tour before continuing to the Alps the next day.
From Lyon, my route went through Aix-les-Bains and Albertville before continuing to Landry, a useful transport hub for reaching the Peisey-Nancroix valley and the Rosuel side of Vanoise.
I compared rail fares before booking because I saw surprisingly large differences between the SNCF site and Omio for my dates.
Omio gave me the better combination, so that’s what I booked. Compare rather than assuming one platform is always cheaper.
My trip also involved delayed trains, and some connecting French services were held for passengers arriving late. That saved my connection, but I’d never design a complicated travel day assuming it’ll happen. Leave yourself breathing room.
Uber works in the area, but it costs a lot, and there are taxi numbers at the Train Station in Landry.
A Word of Advice: Landry train station is actually closed; however, trains do arrive here. Go around the back to use the bathrooms and to check the arrivals/departures screens.
Driving to Rosuel
Drive to Peisey-Nancroix, then follow the D87 to the end. There’s a large car park by the refuge, and you leave the car there for the whole trek. Worth knowing that the road is a dead end, so once you’re at Rosuel, there is nothing further up the valley.
By Transfer Service
I book transfers through Welcome Pickups so the price is agreed before I get in the car. For train times and regional connections, the SNCF regional site covers this area.
Flying in
The three airports that make sense are Geneva (GVA), Lyon Saint-Exupéry (LYS) and Chambéry (CMF). From any of them, you can pick up a train toward Landry or Moûtiers, then take a taxi from there. I came in through Lyon, and there’s a note further down about doing that as an overnight rather than a same-day connection.
Where to stay before and after the Tour de Vallaisonnay
Don’t try to arrive and start walking the same day. The same is true for after the hike.
I stayed at Chalet du Bon Air in Peisey-Nancroix the night before and the night after, which puts you fifteen minutes from the trailhead and means you finish the loop and get a real bed. Other options in the valley are on Booking.com.
For my late-August 2026 visit, the Peisey-Nancroix valley shuttles were still running, as were the Les Arcs summer lifts and funiculars I wanted to use elsewhere in the area.
These are seasonal, so don’t plan a future trip around my dates without checking the current schedule. The Rosuel bus stop was about a five-minute walk from the refuge and visitor information area, near the caravan parking.
Is the Tour du Vallaisonnay Good for Beginners?
I think the five-day version makes a very good first hut-to-hut trek, but the word beginner needs context.
Bookatrekking describes it as a beginner trek with manageable stages, well-marked trails, and no technical climbing, and the shorter daily distances genuinely do make it more approachable than most classic Alpine routes. Having hiked it, I agree with the label, though I’d personally call it easy-to-moderate Alpine hiking.
You don’t need mountaineering experience or via ferrata gear. Nowhere did I need technical skills. But you’re still hiking in the Alps. There are sustained climbs, rocky paths, long descents, uneven footing, fast-changing weather, and consecutive days carrying your own pack.
Day 4 was under seven kilometers, and I spent most of it climbing through steady rain before hitting strong wind near Col du Palet. On the last day I descended roughly 1,000 meters back to Rosuel. Neither was technically difficult, and neither was a casual walk.
This trek suits someone who already walks or hikes regularly, has done some hill preparation, and understands that a mountain refuge is not a hotel.
The Tour du Vallaisonnay is great for families and solo Hikers
Here is who I think the Tour du Vallaisonnay is actually great for:
- Active beginners.
- Women considering a first solo hut-to-hut trek.
- Families already comfortable walking in mountain terrain.
- Hikers who want the French Alps without committing a full week or more. It’s also worth a look if you’re researching the GR5 and want to experience this part of Vanoise on a shorter loop.
Who Should Not Hike the Tour du Vallaisonnay
Skip it if you need private hotel-style accommodation every night, can’t manage shared dormitories, need constant phone service, or expect long hot showers on demand.
It may also be too gentle if you’re specifically after technical terrain, very long stages or high altitude.
The Vallaisonnay isn’t an extreme trek, and that’s part of why I liked it.
Hiking the Tour du Vallaisonnay Solo as a Woman
I felt comfortable hiking this route alone. There were long stretches where I genuinely was alone, especially toward the end of the season. On my final morning, I walked for hours before seeing many other hikers, and I enjoyed the solitude.
At the same time, hut-to-hut hiking gives solo travelers something I think is particularly valuable: independence during the day without complete isolation every evening. I could walk by myself for hours and still know that eventually I’d reach a staffed refuge, eat dinner with other people, and probably see some of the same faces again the next day.
Over five days, those faces started repeating. The British hikers I saw at multiple refuges. The women from Lyon and Paris. The GR5 hikers. The Dutch woman at Entre-le-Lac. Several French hikers wanted to practice English with me and, in return, pushed me to use my limited French. Learn the basics before you go, then use them. You may surprise yourself.
Someone did eventually ask why I’d ever want to hike alone. My answer isn’t complicated. I wanted to.
Would I Recommend It for a First Solo Hut-to-Hut Trek?
Yes, with preparation. The route is well signed, the stages are manageable, and the refuge system means you finish each day around other people.
But solo hiking also means taking on more responsibility. You need to understand your route, check the weather, know where you’re sleeping, tell someone your itinerary, and prepare for the possibility that phone service disappears. For me, the connectivity was the single biggest thing I’d manage differently next time.
Prepare to Be Offline
By Plaisance, I’d effectively vanished from normal cell service. My husband eventually got worried enough to call the refuge to check that I was alive. I was. I was sitting inside reading and drinking beer.
It still changed how I’d prepare for another solo trek. Once I got into the Lac de la Plagne area, my service was essentially gone, and while I picked up enough signal near Laisonnay the next day to call home, I’d never rely on it.
Above Lac de la Plagne, no consumer network reaches up there. Set it up for the getting-there and getting-home portion, and plan the trek itself as though you’ll be unreachable.
Before you hike into Vanoise, tell whoever needs to know that you may be out of contact. Give someone your itinerary, download your navigation, and keep the refuge phone numbers somewhere you can reach offline.
On a future solo trek with this kind of connectivity, I’d seriously consider carrying a Garmin inReach or another satellite communicator.



How Difficult Is the Tour du Vallaisonnay?
I’d put it comfortably in the beginner-to-moderate range, and I have some basis for comparison. Before Vanoise, I’d walked shorter versions of the Alta Via 1 and Alta Via 2, the Palaronda Trek, the MADE Trek in northeastern Italy, and the Via Francigena through Tuscany.
Based on the ones I’ve personally done, my own difficulty ladder looks roughly like this:
Easiest to hardest, from my own boots
VF→ MADE Trek → Tour du Valaisonnay → Alta Via 1 → Alta Via 2 → Palaronda Trek
That ranking is subjective, and it’s still more useful to my returning readers than repeating the word “easy.”
I never hit a point where I thought I physically couldn’t finish the day.
The harder moments came from everything around the hike rather than the hike itself: poor sleep, not eating enough, carrying a heavy camera uphill, rain, wind, and being unable to reach my husband.
Hiking in Vanoise Late August
I started on August 26, toward the end of the main summer season, and I loved the timing. The trails were incredibly quiet, wildlife sightings were excellent, and I spent long stretches walking by myself.
There are trade-offs. By late August the refuge season is winding toward its end, food supplies need more careful management, transport schedules start shrinking, and the weather can turn fast.
Over five days, I got warm sunshine, cool nights, Saharan dust, heavy rain, and strong wind at Col du Palet.
In 2026, the free Peisey-Nancroix shuttle ran into early September, while the Les Arcs summer lift system was approaching the end of its season.
Those dates will change, so check the current year’s transport, refuge opening dates, and forecast before planning around them. I’d absolutely hike Vanoise in late August again. I just wouldn’t treat late August like July.
Where the Tour du Vallaisonnay Overlaps With the GR5
The two aren’t the same trek, but they share enough of the trail network that the connection is worth understanding. The GR5 is a much longer European walking route passing through Vanoise. The Vallaisonnay is a short circular trek inside the park.
Rosuel sits in the GR5 corridor, and Refuge Entre-le-Lac is on a route used by hikers moving between this side of the valley, Col du Palet, and Tignes. Refuge du Col du Palet is also used by long-distance hikers crossing Vanoise, and the park’s final Vallaisonnay stage sends you along the GR5 back toward Rosuel.
I’m not claiming to have hiked the GR5. What I can offer GR5 hikers is firsthand information about the terrain, refuges, weather, logistics, and hut culture in this part of Vanoise. Meeting people taking on much longer journeys was inspiring enough that I left thinking about routes I hadn’t seriously considered before.
What I Packed and What I Spent
I carried my Osprey Kyte 38L, my dependable hiking pack for about four years. Final pack weight was roughly 18 pounds.
For clothing, I brought two pairs of pants, two shirts, two sports bras, six pairs of socks, six pairs of underwear, and a rain jacket, plus my usual hut-to-hut essentials.
A sheet sleeping bag liner is required at these refuges, and sleeping bags are not permitted in the dormitories, so don’t leave it at home.
For photography, I carried my Sony Alpha, DJI Osmo Pocket 3, and Ulanzi TT24 tripod. The tripod was one of my better choices because it works with both cameras.
My biggest packing mistake wasn’t clothing. It was food. I needed more protein.
I wore my Timberland mid hiking boots and would happily wear them again. Other hikers were in everything from traditional boots to Hoka trail runners, so wear the footwear you already know works for your feet.
I used trekking poles the whole way and would recommend them. They helped on the climbs, helped more on the descents, and were genuinely useful once rain made the trail slick.
I carried roughly three liters of water in my Camelbak and refilled at refuge fill points. Don’t assume every stream is safe to drink, and ask the guardians if you’re unsure about water on the following stage.

How Much Cash Should You Bring on the Beginner Tour de Vallaisonnay
Booking through Bookatrekking means you’ll get dinner and Breakfast included in the price (which is 355Euro/425USD)
If you want lunch or snacks, you’ll pay for those separately and out of your own pocket.
I carried 200 EUR for refuge extras and incidentals, and I was glad I did. Cards may be accepted depending on the refuge and connectivity, but don’t get your hopes up for mountain internet.
Bring notes and coins.
During my August 2026 Tour de la Vallaissonay, showers ran around 3 EUR for three minutes, packed lunches were about 10 EUR, and drinks or food extras could add another 10 to 15 EUR a day.
Booking the Tour du Vallaisonnay With Bookatrekking
I hiked this as a Bookatrekking Summer 2026 ambassador, and they hosted my trek as part of that relationship.
What they made easier was the part of hut-to-hut hiking that gets annoying before you ever reach a trail: logistics. They arranged the refuge stays, built the itinerary, and supplied route information through their app. Their current five-day Vallaisonnay itinerary is designed around shorter stages for people who want a more approachable hut-to-hut experience.
It was still a self-guided trip. Once I left Rosuel, nobody from Bookatrekking was walking beside me. I followed the trail, watched the weather, carried what I needed, and got myself to the next refuge. I found the app useful because it kept the stages and navigation in one place, and their team was extremely responsive.
Could I book this route independently now that I’ve done it? Yes. The park publishes extensive hiking information, and you can contact the refuges directly. But if coordinating four refuge reservations is the thing stopping you from trying your first hut-to-hut trek, having someone else handle it removes a real barrier while still letting you hike independently.
Check Availability for the Beginner Tour de Vallaisonnay
Is the Tour du Vallaisonnay Worth It?
For me, absolutely. This hike reminded me that adventure doesn’t have to be punishing to be worthwhile. I climbed enough to feel challenged and still had time to notice where I was.
For the most part, I spent evenings watching ibex and golden eagles and walking beneath glaciers.
Hikes like these are worth it because you meet hikers traveling much further on the GR5. I learned how French refuge culture differs from the hut system I know in the Dolomites. I spent hours walking completely alone and then sat down to dinner with people from four different countries.
If you’re considering your first hut-to-hut trek, particularly if you’re a solo woman, an active beginner, or someone who wants the mountains without turning every day into an endurance competition, the five-day Tour du Vallaisonnay deserves a place on your list.
Beginner Tour de Vallaisonnay FAQ
Vanoise National Park lists the circuit at roughly 36 kilometers, while Bookatrekking’s five-day itinerary comes in at around 38. Totals vary depending on the track and route variations used.
It can be done in three to five. I chose five because I wanted shorter stages and more time on the route.
I’d describe the five-day version as beginner-friendly with moderate sections. There’s no technical climbing, but expect sustained elevation gain, rocky trails, long descents, consecutive hiking days, and changing Alpine weather.
For an active beginner, yes. It’s an excellent introduction to refuge-to-refuge hiking without demanding very long daily stages.
Parts of the trail network overlap, and the final official stage back toward Rosuel follows the GR5. Long-distance hikers crossing Vanoise also use the refuges and surrounding trails.
Yes. I did, and I felt comfortable. I’d still recommend sharing your itinerary, carrying offline navigation, checking the weather, and preparing for limited mobile service.
No. I hiked the Tour du Vallaisonnay solo, self-guided.
My service was essentially gone after Lac de la Plagne. I had brief signal around Laisonnay, but plan as though you’ll be offline for most of the trek.
Yes. I carried 200 EUR and recommend both notes and coins, because payment options and connectivity vary between refuges.
Several of the refuges I stayed in had hot showers for around 3 EUR for three minutes. Availability changes with water supply and refuge operations.
The main hut-to-hut season runs from late June into September, depending on snow and refuge opening dates. I went at the end of August and loved the quieter trails, though weather and seasonal transport needed more attention.
Resources for Planning Your Vanoise Trip
I’d never plan a multi-day mountain hike from one blog post, including mine. Trail conditions, transport, refuge opening dates, and park rules all change.
The Vanoise National Park official website should be a primary resource for current regulations, refuge information, hiking guidance, and conditions. The La Plagne Natural Heritage resources are useful for the geology, wildlife, and landscapes around this part of Vanoise. For anyone going beyond the Vallaisonnay, Cicerone’s Trekking in the Vanoise National Park is a good introduction to the wider network, including the Tour of the Vanoise, the Tour des Glaciers de la Vanoise, and routes using the GR5 and GR55.
One thing I’d do differently before returning is spend more time with resources like these first. Knowing the names of the mountains, understanding the glaciers, and recognizing the routes crossing around you adds another layer to the experience. I came to Vanoise to hike one five-day circuit. I left knowing I’d barely scratched the surface.