Palaronda Trek Itinerary: A 4-Day Solo Hike Through the Pale di San Martino

The Dolomites are full of famous hikes—but the Palaronda Trek isn’t popular because it’s easy or Instagram-friendly. It’s popular because it stays high, demands focus, and rewards effort in a way few hut-to-hut routes do.
This four-day trek through the Pale di San Martino crosses vast limestone plateaus, exposed alpine passes, and remote mountain huts where comforts are earned, not guaranteed. You’ll spend long days above treeline, navigating terrain that feels wild and unfinished. It’s stunning—but it’s not forgiving.
I completed the Palaronda Trek solo, and met some fantastic people along the way. This guide is written for people trying to answer one real question:
Is this hike actually worth it for me?
Inside, I break down what the trek demands physically and mentally, what the rifugi are really like, and how each day unfolds on the trail—including the exact routes I followed on Komoot. I also share how I booked through Bookatrekking.com, and the small planning choices that mattered far more than I expected once I was out there
What Is the Palaronda Trek?
The Palaronda Trek is a four-day hut-to-hut loop through the Pale di San Martino range in northern Italy, starting and ending in San Martino di Castrozza. It’s a high-alpine route designed for experienced hikers who are comfortable spending consecutive days above treeline.
There are also several different ways to do the Palaronda Trek, and for this blog and my experience, I did the Classic and booked through Bookatrekking. If you want to see other routes, you’ll have to look at this page
What makes the Palaronda different from many Dolomites treks isn’t just the scenery—it’s the sustained exposure and terrain. You’re often hiking across open limestone plateaus, steep scree fields, and rocky passes where footing and weather matter more than speed.
Most classic itineraries cover 35–40 kilometers over four days, with roughly 2,700–3,000 meters of cumulative elevation gain. The huts are staffed and welcoming, but the terrain between them is serious.
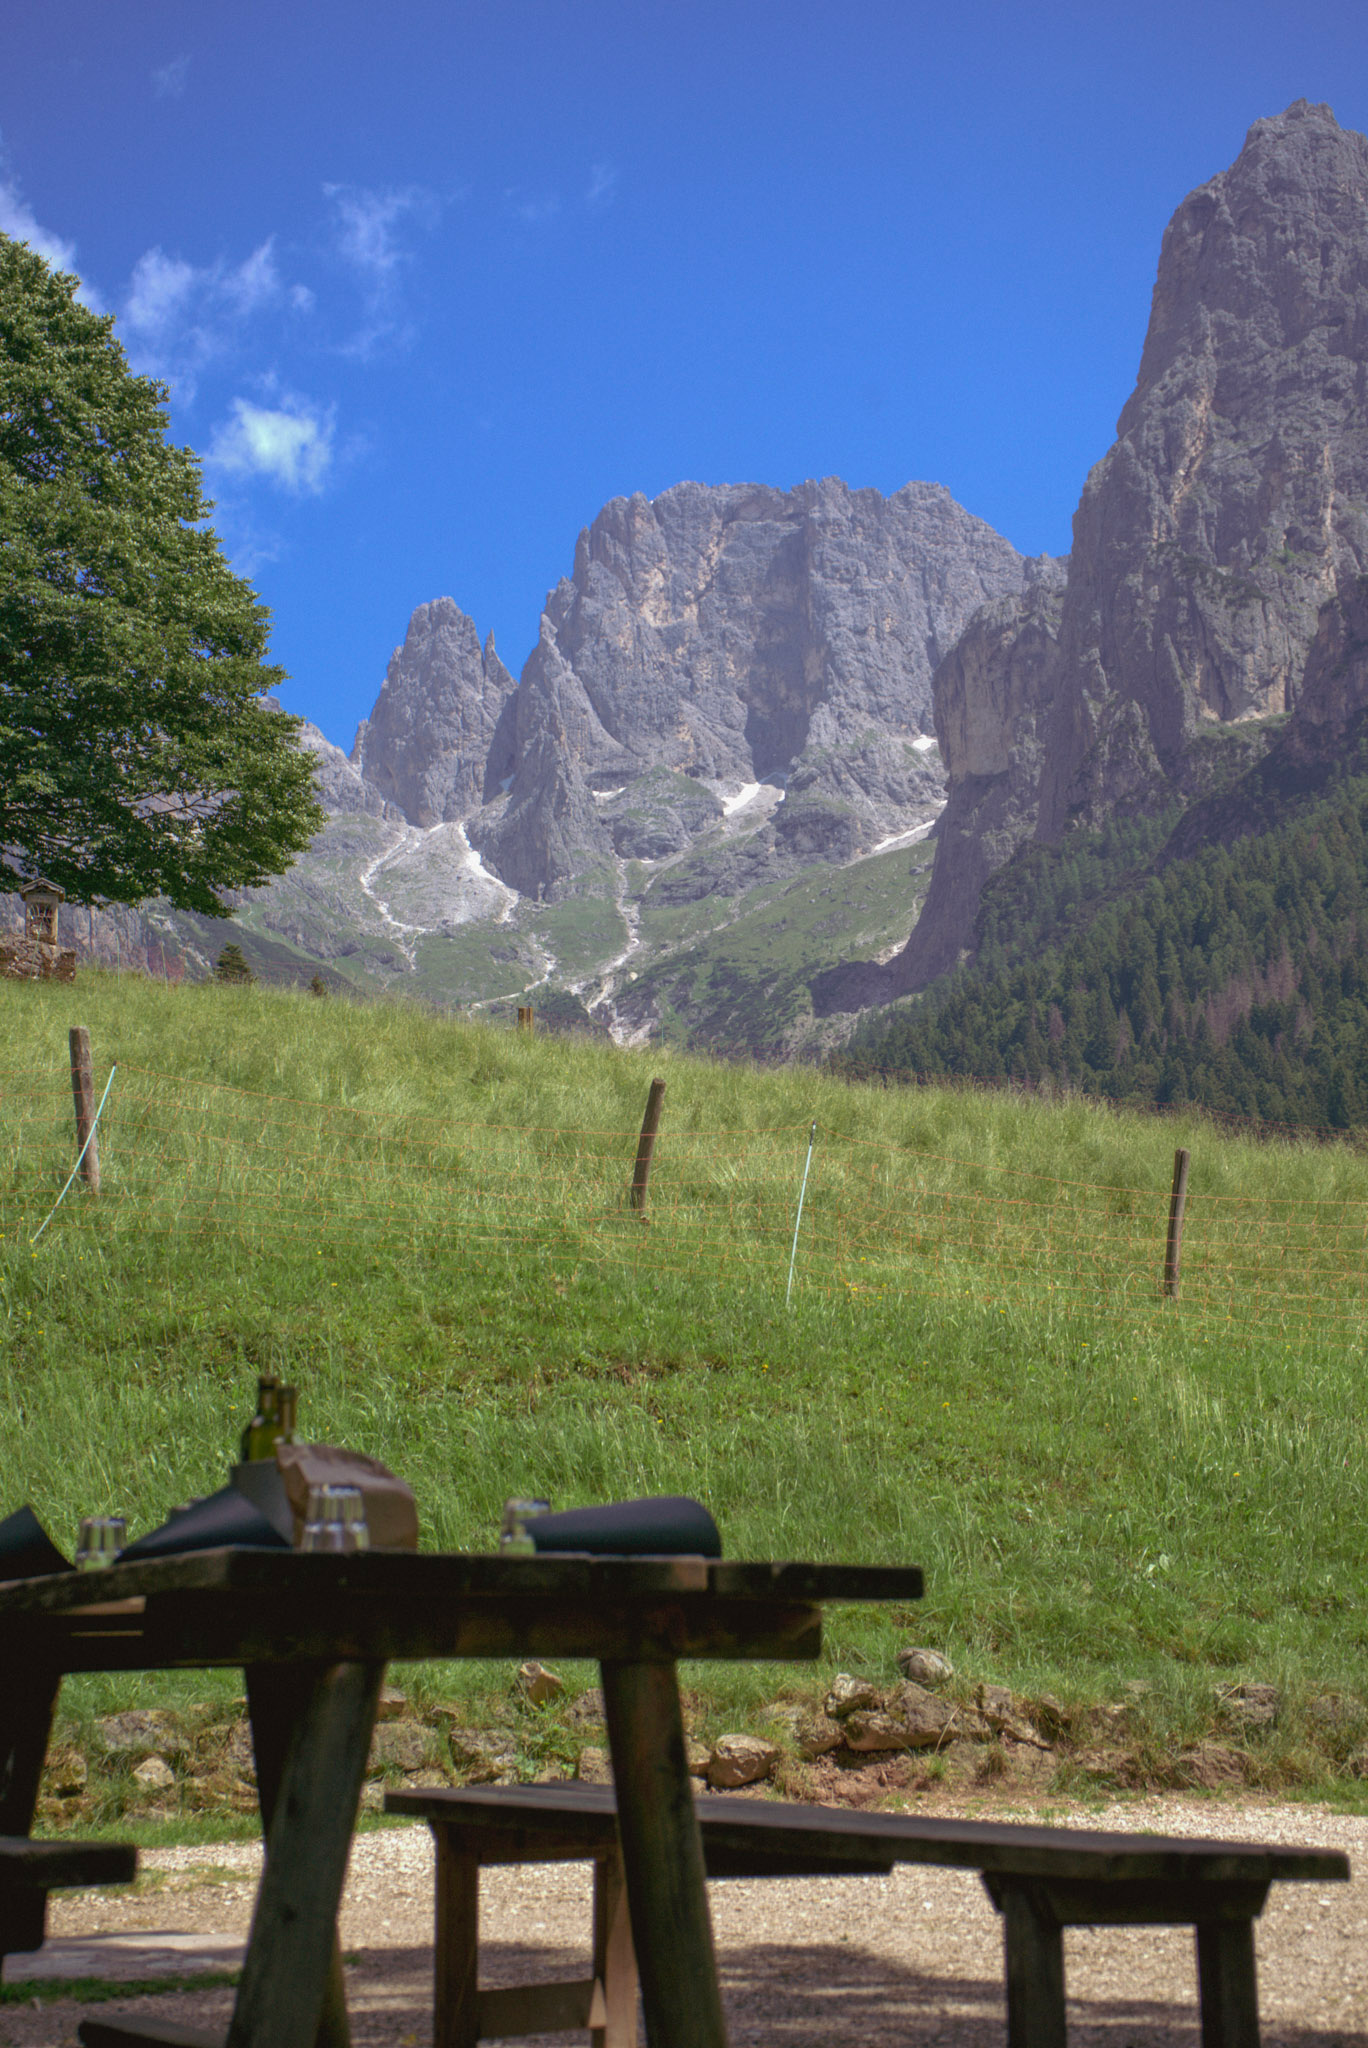
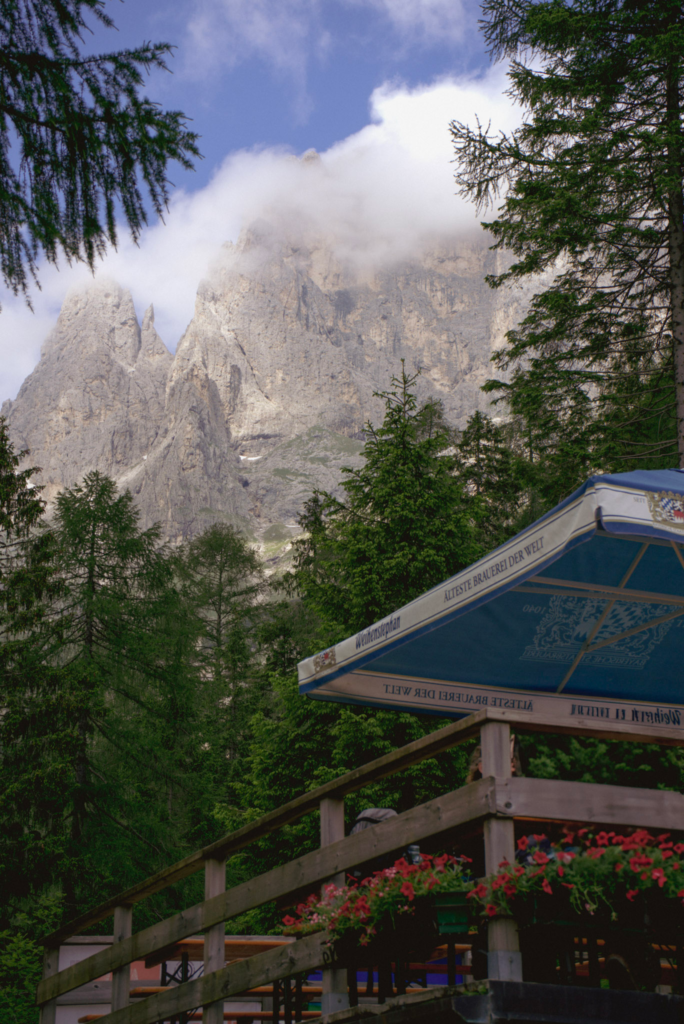
This trek runs through the Paneveggio–Pale di San Martino Nature Park, one of the most dramatic alpine landscapes in the Dolomites. Expect vast rock expanses, long silences, and peaks that glow at sunset—if the weather cooperates.
Is The Palaronda Trek Difficult?
Yes. The Palaronda Trek is difficult—and not in a vague, marketing way.
This is not a beginner-friendly hut-to-hut hike, and I would not recommend it to anyone who hasn’t already completed at least one multi-day alpine trek. Even without via ferrata sections, the “classic” route demands strong fitness, steady nerves, and comfort with scrambling, loose rock, and long elevation changes.
On most days, you’re looking at 5–8 hours of movement, often on terrain that requires full-body attention. There are sections with steep scree descents, large boulder fields, sustained climbs with little shade, and long stretches with no water sources between huts.
Early season amplifies all of this.
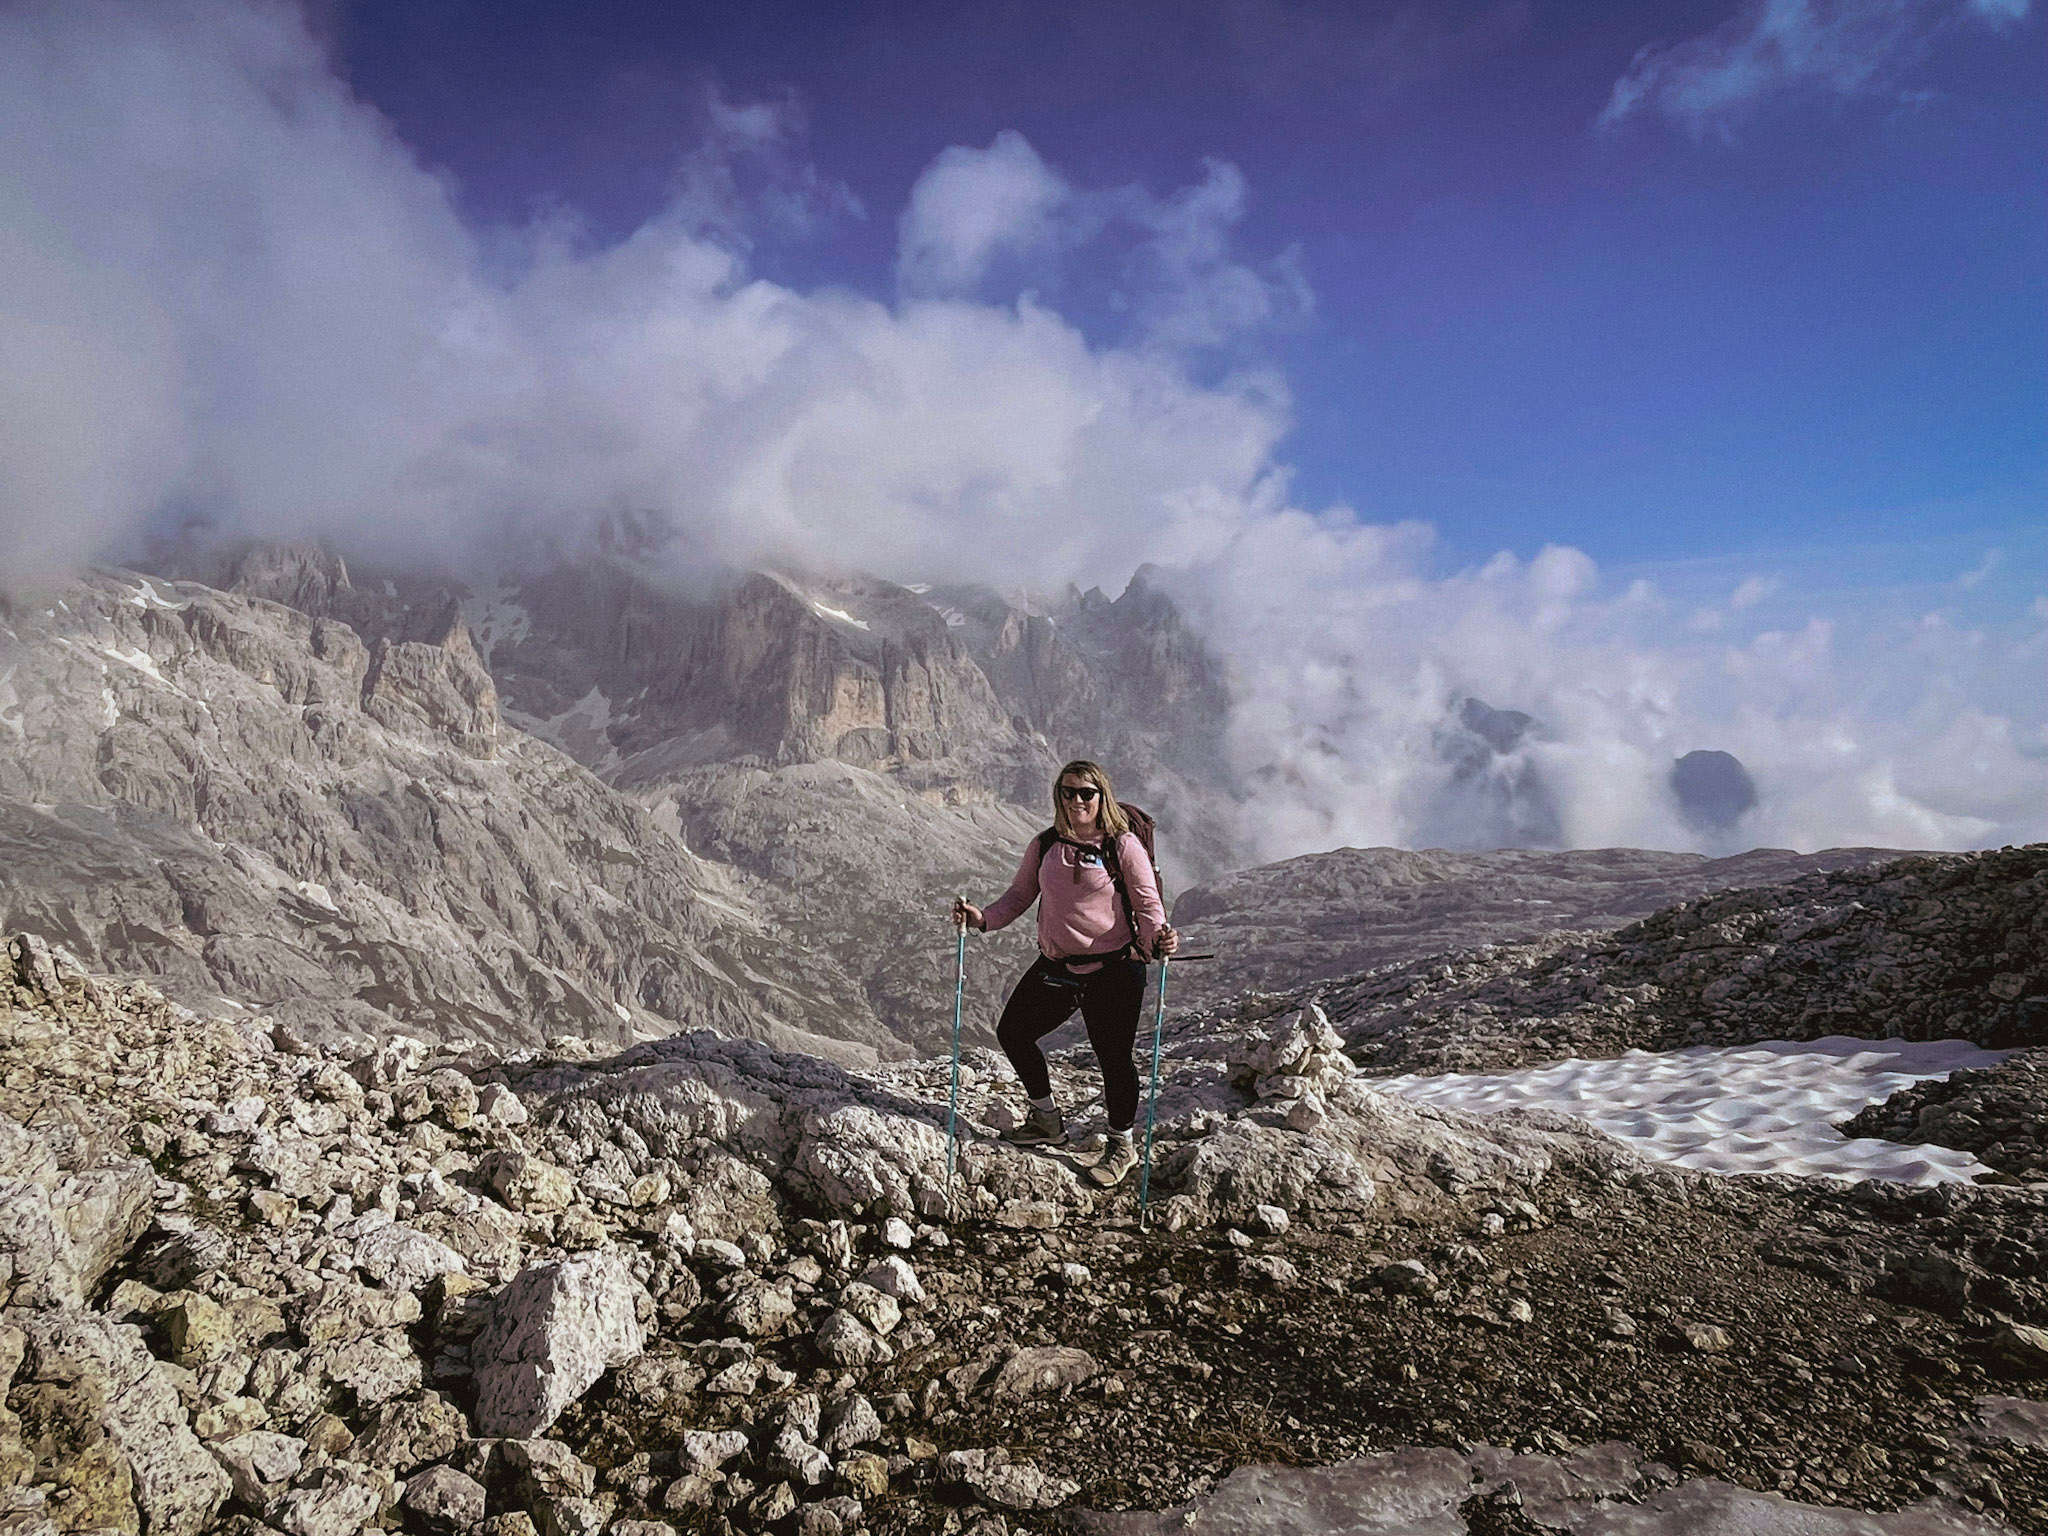
What was my experience like?
I hiked the Palaronda during opening weekend, when snow and ice were still present on exposed sections. That turned already demanding terrain into something mentally taxing, where progress slowed, routes disappeared under snow, and every decision carried weight.
If you’ve done something like Alta Via 1 or Alta Via 2, the Palaronda will feel familiar in spirit—but noticeably rougher and more sustained in places. It’s less polished, less forgiving, and more physical.
That’s exactly why some people love it.
Who Is The Palaronda Trek Not For?
In my honest opinion, I think that it’s probably not the right choice if this would be your first hut-to-hut trek, if steep descents aggravate your knees, or if scrambling and exposure make you anxious rather than focused. This isn’t a route with manicured paths or constant escape options.
If you’re new to multi-day trekking and want something gentler, routes like Alta Via 1, the Alpe di Siusi hut network, or the MADE Trek offer incredible scenery with more forgiving terrain.
Where Do You Sleep on the Palaronda Trek?
The trek is built around a string of mountain huts, or rifugi, which offer meals, bunk rooms, bathrooms, and a warm communal vibe. These are not rough shelters—you’ll eat well, meet fellow hikers, and watch sunset with a glass of local wine.
Here’s the general overnight route for the Classic Palaronda:
Below, I break down each day in separate headings, but know that each hut offers hearty food (polenta, stews, pasta), local wine or beer, and breakfast before you hit the trail again.
How Do You Get to the Palaronda Trek?
How to Use This Map:
Click the icon in the top left corner to see all the places I’ve pinned around the city— from cafés and museums to scenic viewpoints. You can turn layers on or off and click any pin to learn more about each spot. Want to keep it handy for your trip? Click the star next to the map’s title to save it to your Google account.
Then, open the Google Maps app, go to “Saved” → “Maps,” and you’ll see this map ready to guide you while you explore.
The base town for the trek is San Martino di Castrozza, a charming alpine village tucked into Trentino. You can reach it by:
- Train to Feltre or Trento, then bus to San Martino
- Car – there’s parking at the Colverde cable car
- Venice or Verona airports are the closest major hubs
How to Book the Palaronda Trek
There’s no single right way to book the Palaronda Trek — it depends on your experience and how much support you want.
A guided trek offers the most structure and support, which can be helpful in early-season conditions or if you want logistics handled for you. A self-guided booking (the option I used) secures your huts and meals while letting you hike independently at your own pace.
A DIY approach offers the most flexibility but also the most responsibility. You’ll book huts yourself and manage timing and weather decisions on your own. I explain this option in detail in my guide on how to plan a DIY hut-to-hut trek in the Dolomites.
If you’re unsure, choosing more support is often the smarter call on a route this demanding.
Where to Stay Before the Palaronda Trek
I arrived in San Martino di Castrozza the day before I started the Palaronda Trek. I had booked a single room at Hotel Stalon Alpine Chic, and I’m so glad I did. Not only is it a beautiful and cozy base, but the staff there went way above what you’d expect. I’d had some car issues coming into town, and they connected me with a local mechanic in Fiera di Primiero. Not only that—they followed up with him for me, made sure the car would be ready on time, and when I got back to the hotel after dealing with repairs, they had an aperitivo waiting for me. A glass of Prosecco, homemade snacks, and a real sense of being cared for. That kind of kindness? It sticks.
Want a better sense of where to base yourself before the trek? I’m sharing a full breakdown of San Martino di Castrozza, where to stay, and why it works so well for the Palaronda Trek (coming soon).
In the meantime, use the Stay22 map below to explore accommodation options and find the area that fits your travel style and budget.
A Note on Expectations
If you’ve never done a hut-to-hut trek before, this might feel rustic. But that’s the point. These rifugi aren’t hotels—they’re shelter, food, and community perched in wild places. They’re built on effort and cooperation, and human kindness. You’ll feel it when you’re there.
That being said, when a rifugio tells you water is limited, believe them. Try not to hog the bathroom to take a bath in the sink because you don’t want to pay for the shower fee. It exists for a reason. I saw some of the worst behavior on this trek, mostly selfish-privileged behavior by others.


Palaronda Trek Day 1: How I Got to Rifugio Rosetta and Why I Took the Cable Car
Day 1 At a Glance
San Martino di Castrozza → Rifugio Rosetta
Primary trail(s): CAI 701 / 702 (if hiking)
Cable car option: Colverde + Rosetta cable cars
Total hiking time:
Hiking from town: ~2.5–3 hours
Cable car + walk: ~15–20 minutes
Elevation gain: ~900 m (if hiking)
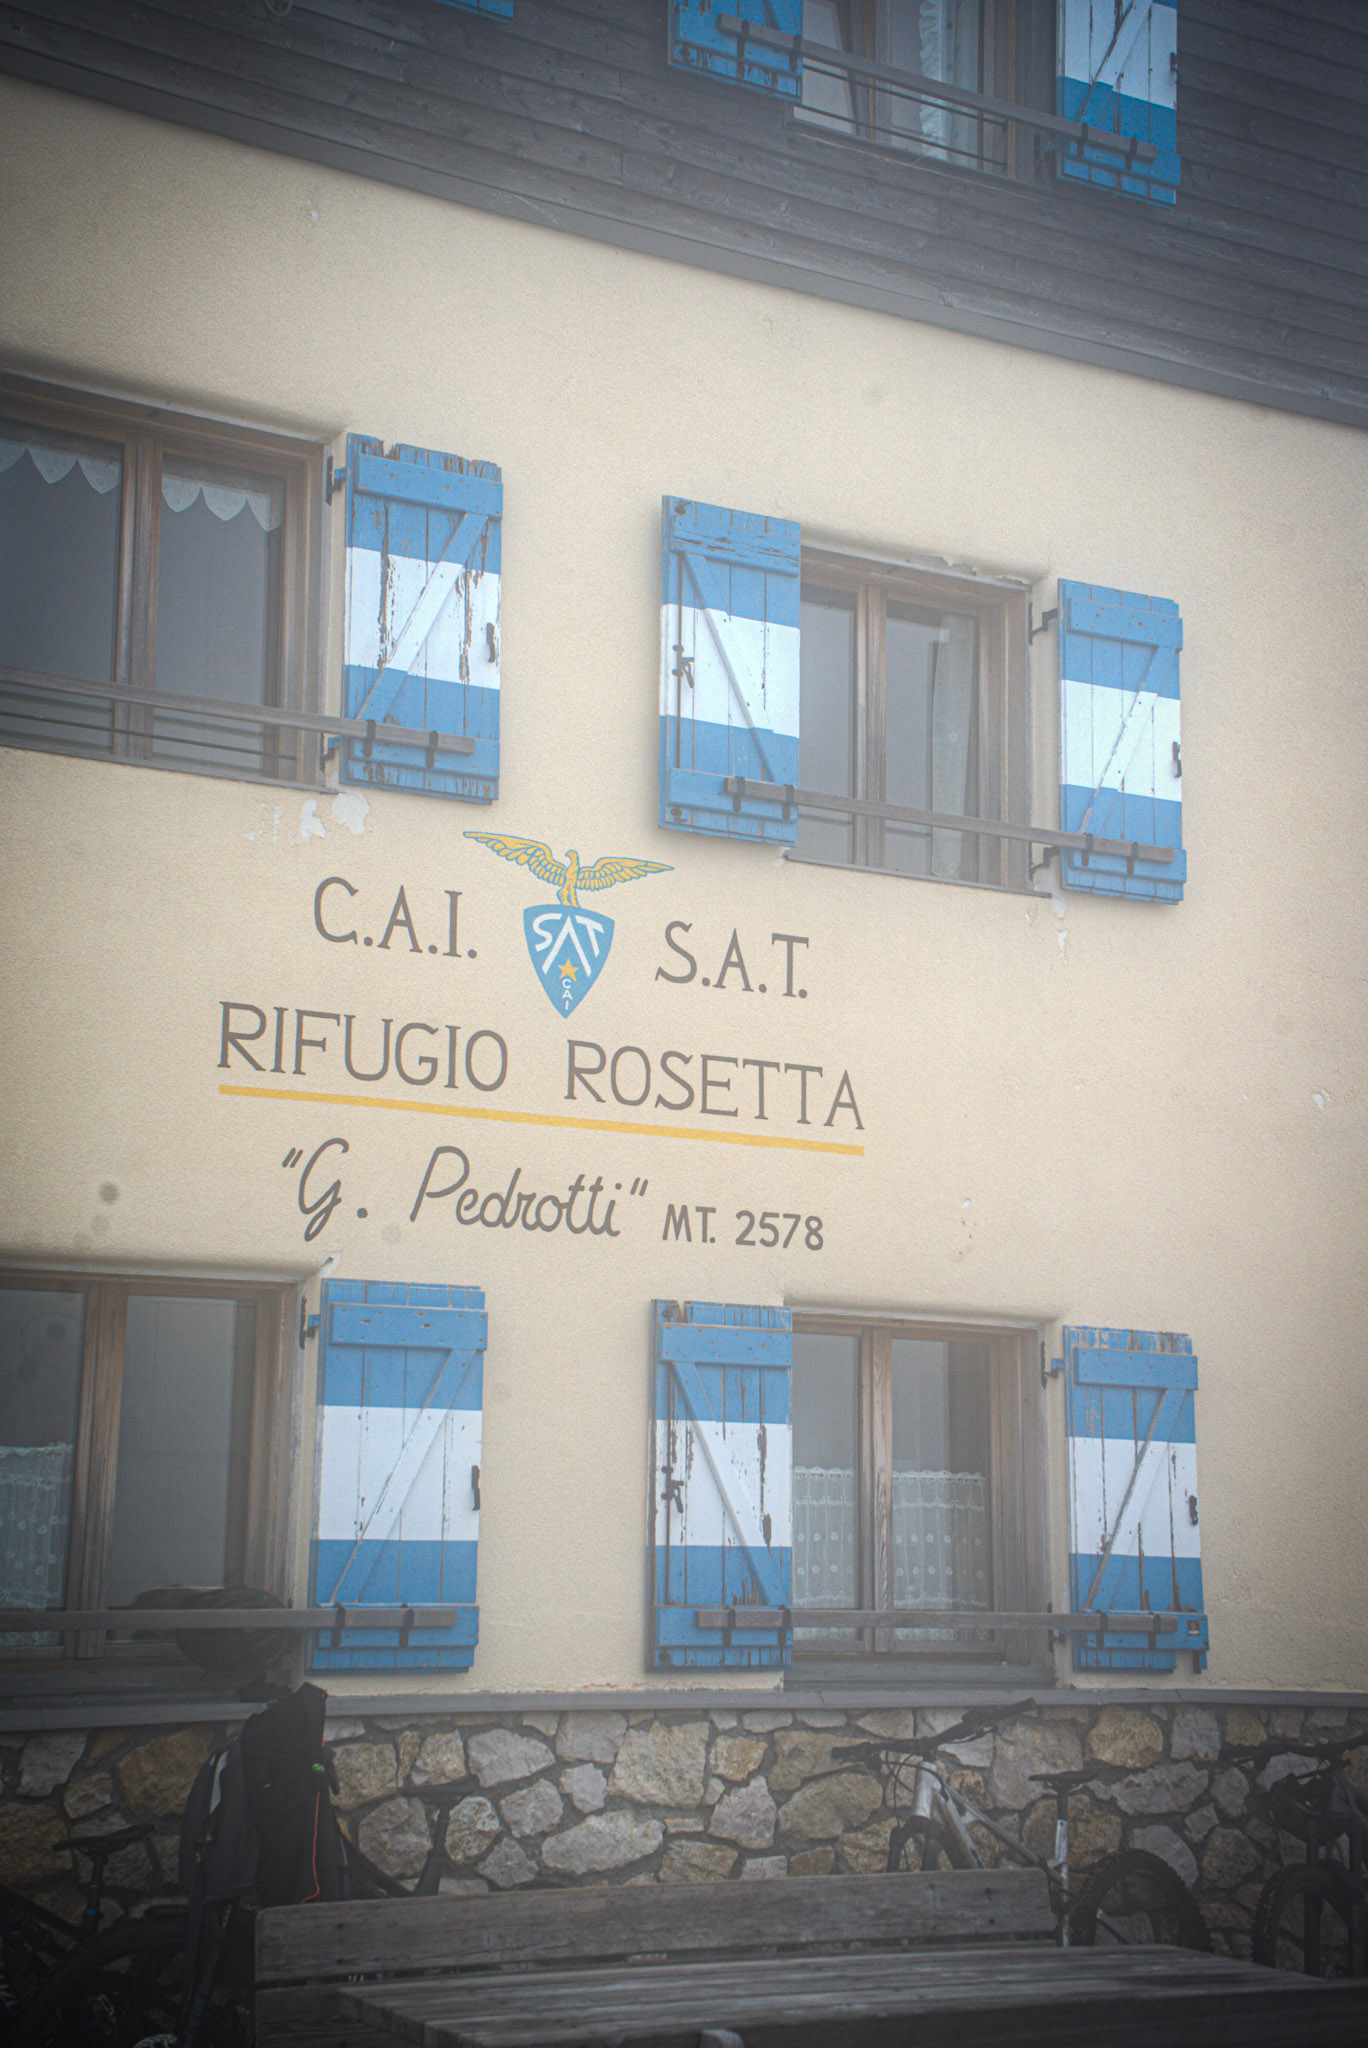
End elevation: 2,405 m (Rifugio Rosetta)
Difficulty: Moderate (hike) / Easy (lift-assisted)
Note: Taking the cable car is common and practical, especially if arriving late or conserving energy for Day 2.
Day 1 didn’t go according to plan — and that ended up shaping the entire trek.
After dealing with unexpected car trouble earlier in the day, I arrived in San Martino di Castrozza far later than intended. I had originally planned to hike up to Rifugio Rosetta, but by the time I reached the Colverde cable car station, it was clear that pushing uphill on foot would mean starting the trek already exhausted.
So I took the lift.
At the time of writing, the Colverde–Rosetta cable car costs €33.50 round trip, and it’s not included if you book through Bookatrekking. You’ll pay separately at the station, and both cash and cards are accepted.
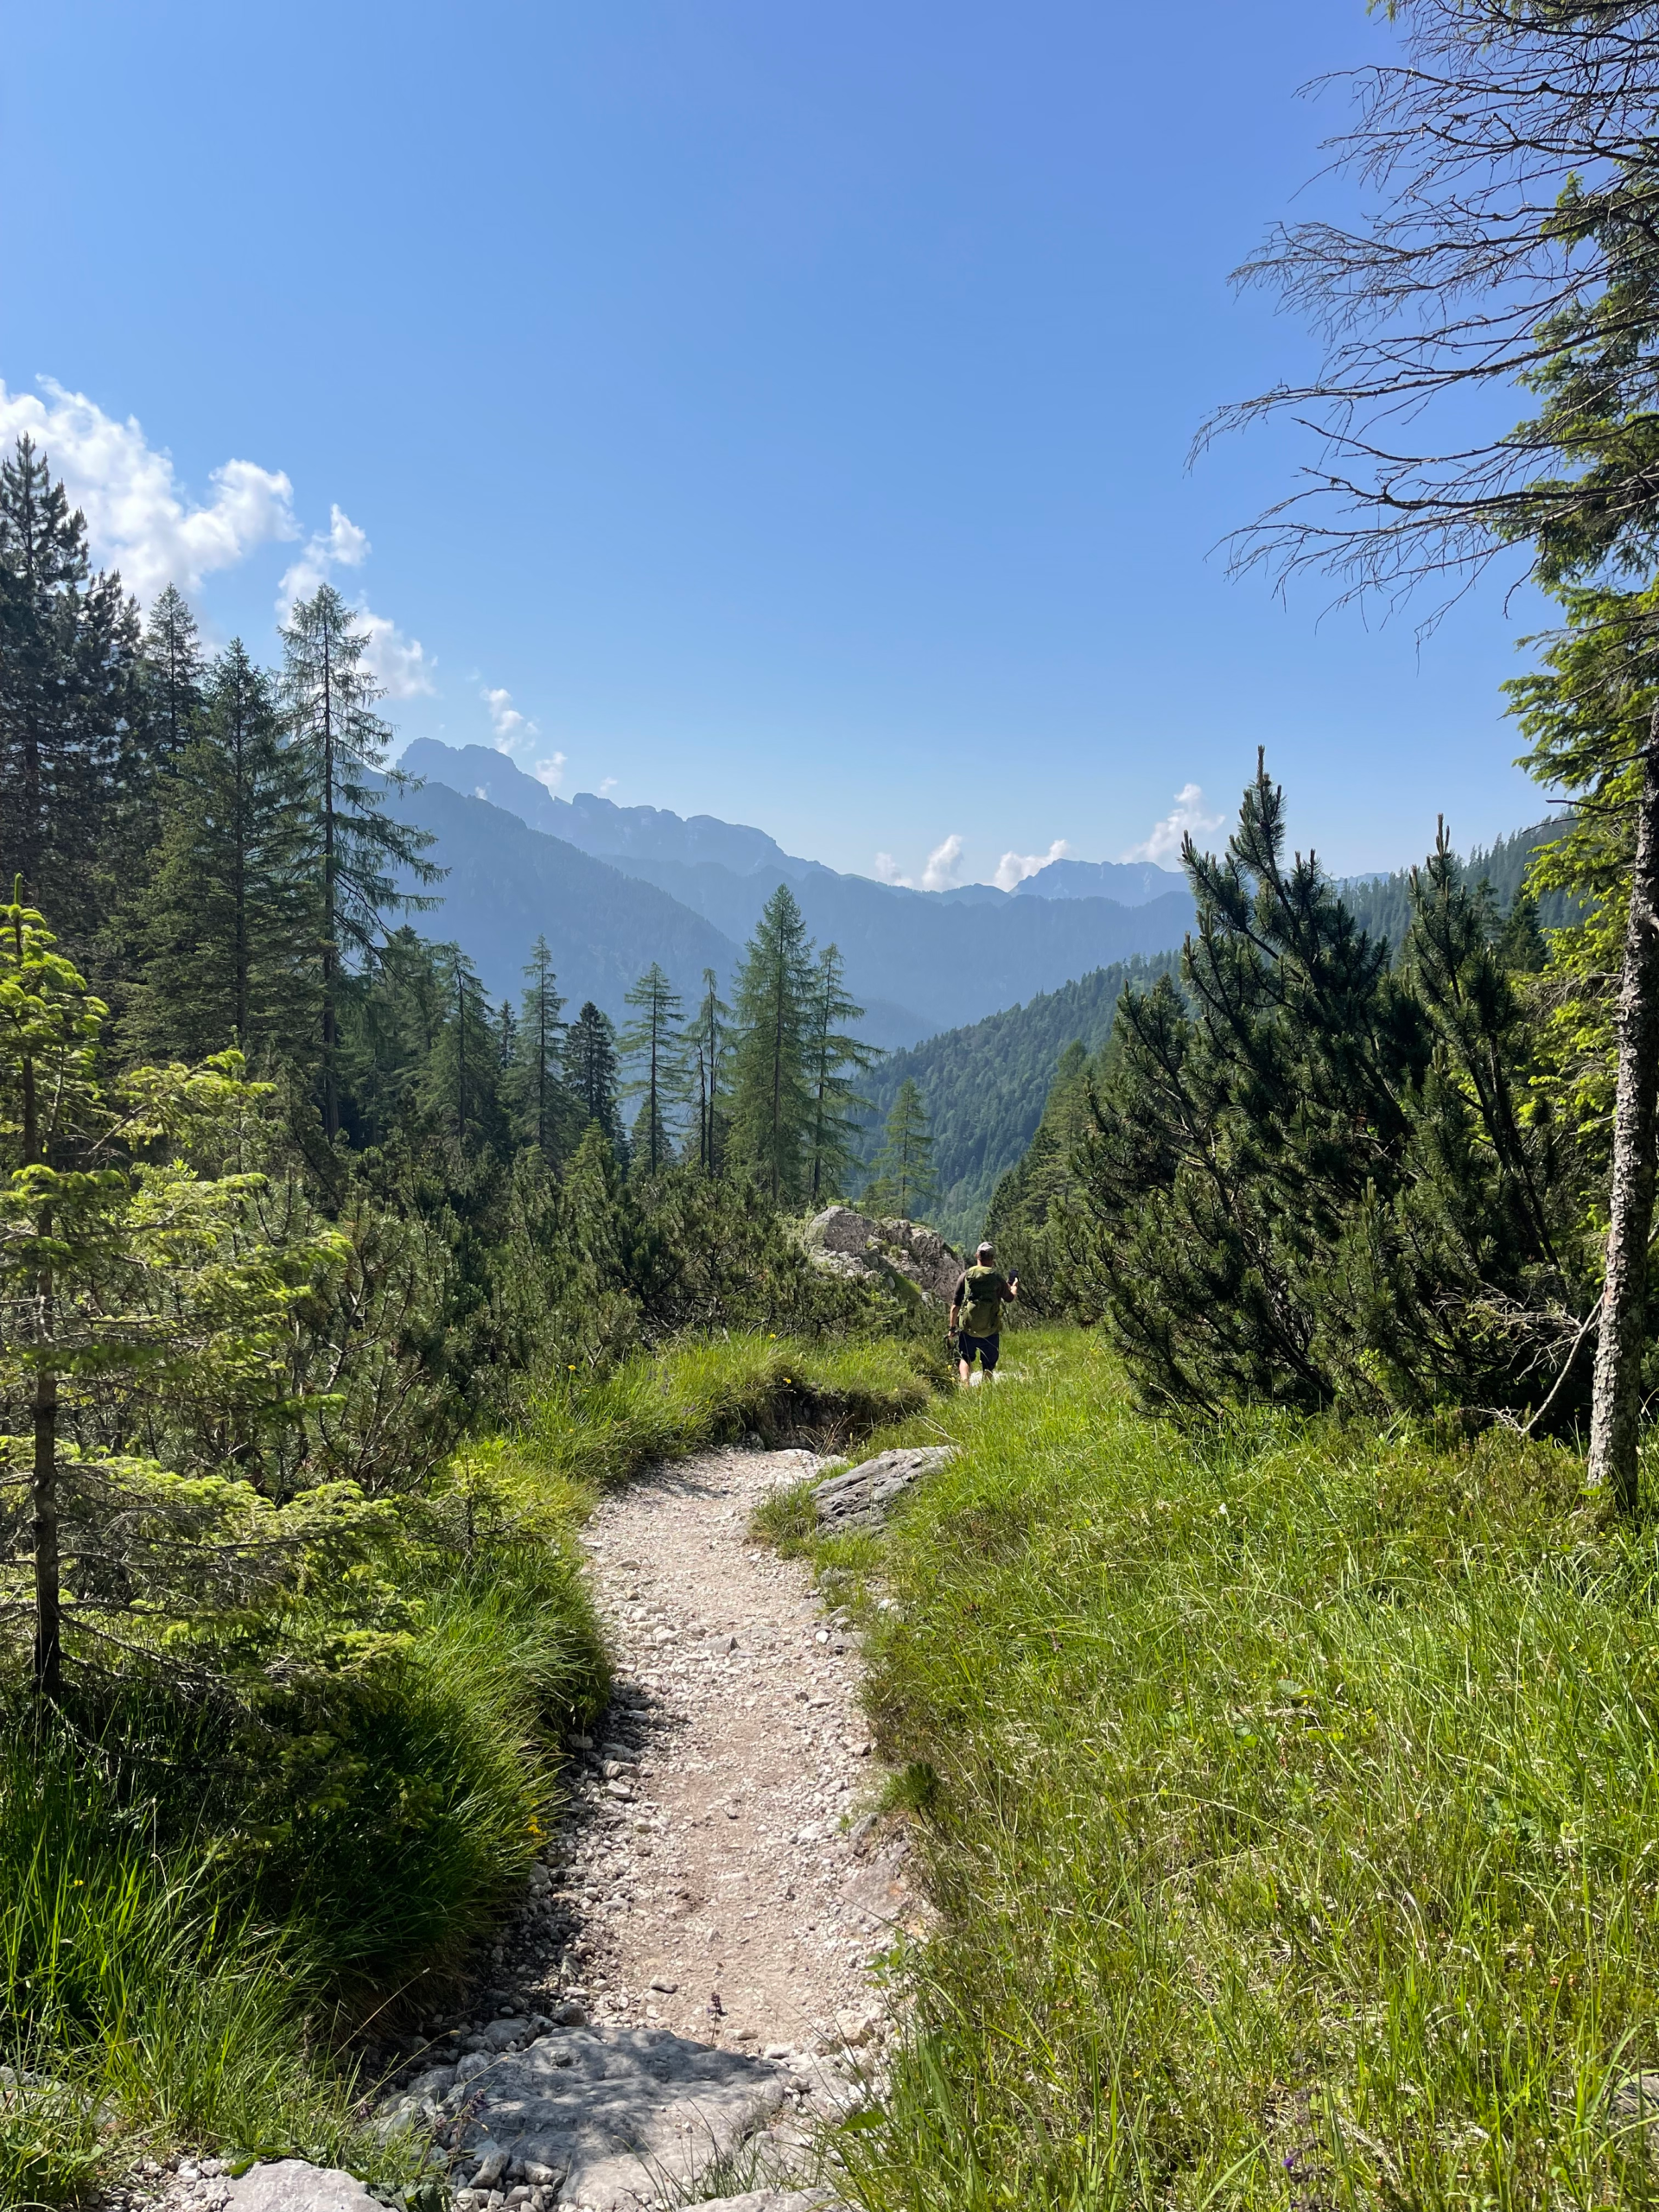
The ride happens in two stages: first through dense alpine forest, then via the iconic red lift that glides across sheer cliffs toward the plateau. If you’re sensitive to heights, the second section will test you — but the views over San Martino di Castrozza are worth it.
As the lift climbed higher, the landscape changed fast. Trees gave way to pale limestone, clouds drifted close enough to touch, and suddenly the world felt quieter. Like crossing into a different altitude — physically and mentally.
If you do have the time and energy, hiking up to Rifugio Rosetta is a solid effort. The trail from town is roughly 6.5 km (4 miles) with about 900 meters of elevation gain, and most hikers I spoke to needed 2.5–3 hours. It’s steep at the start, more exposed near the top, and a true way to earn your first rifugio meal. Just watch the weather — conditions can shift quickly near the plateau.
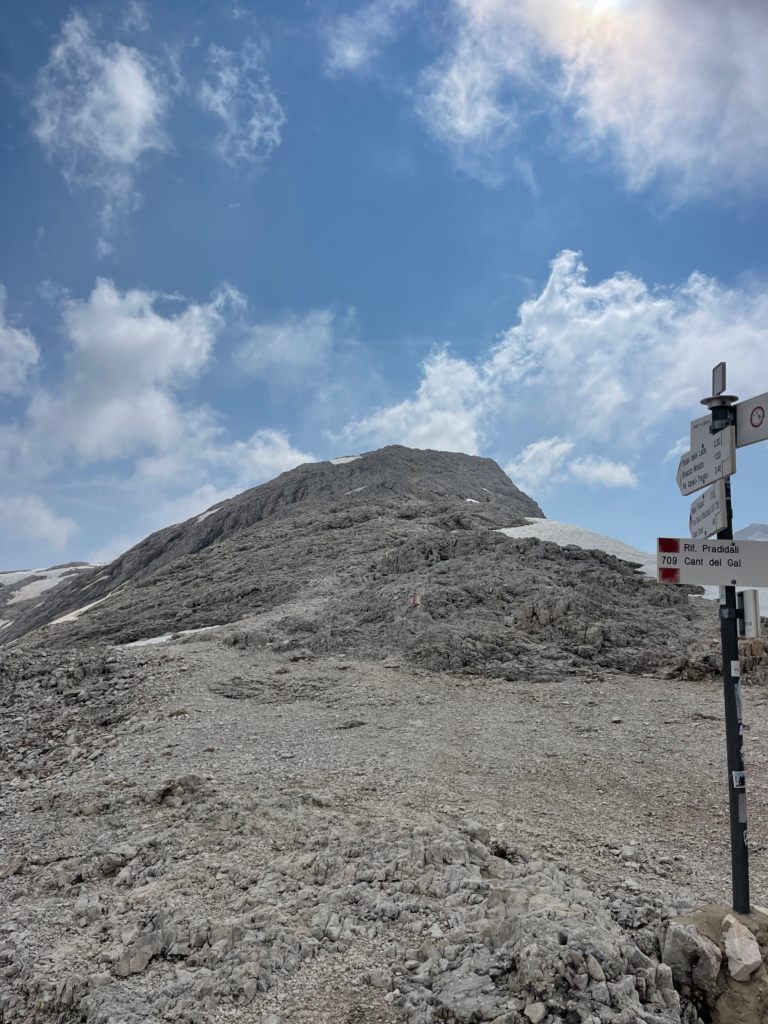
From the upper lift station, it’s a short 15-minute walk to the hut. In the early season, expect lingering snow and ice even here. This is where you start paying attention, slowing down, and reminding yourself that winter hasn’t fully stepped aside yet.
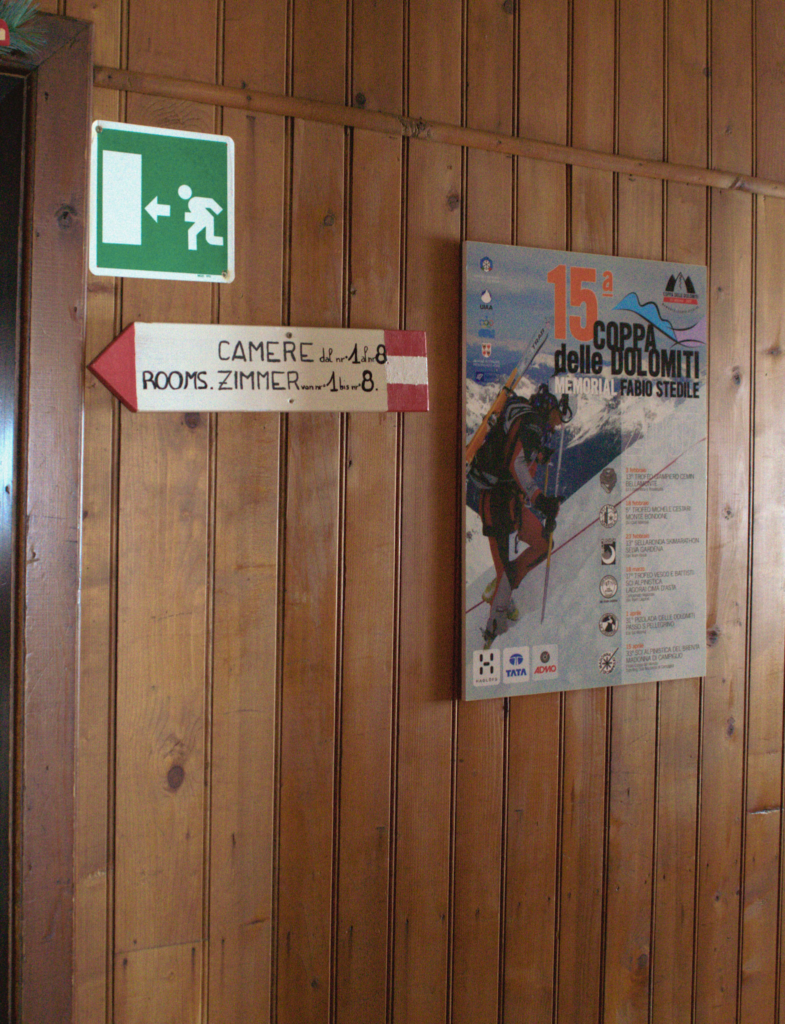
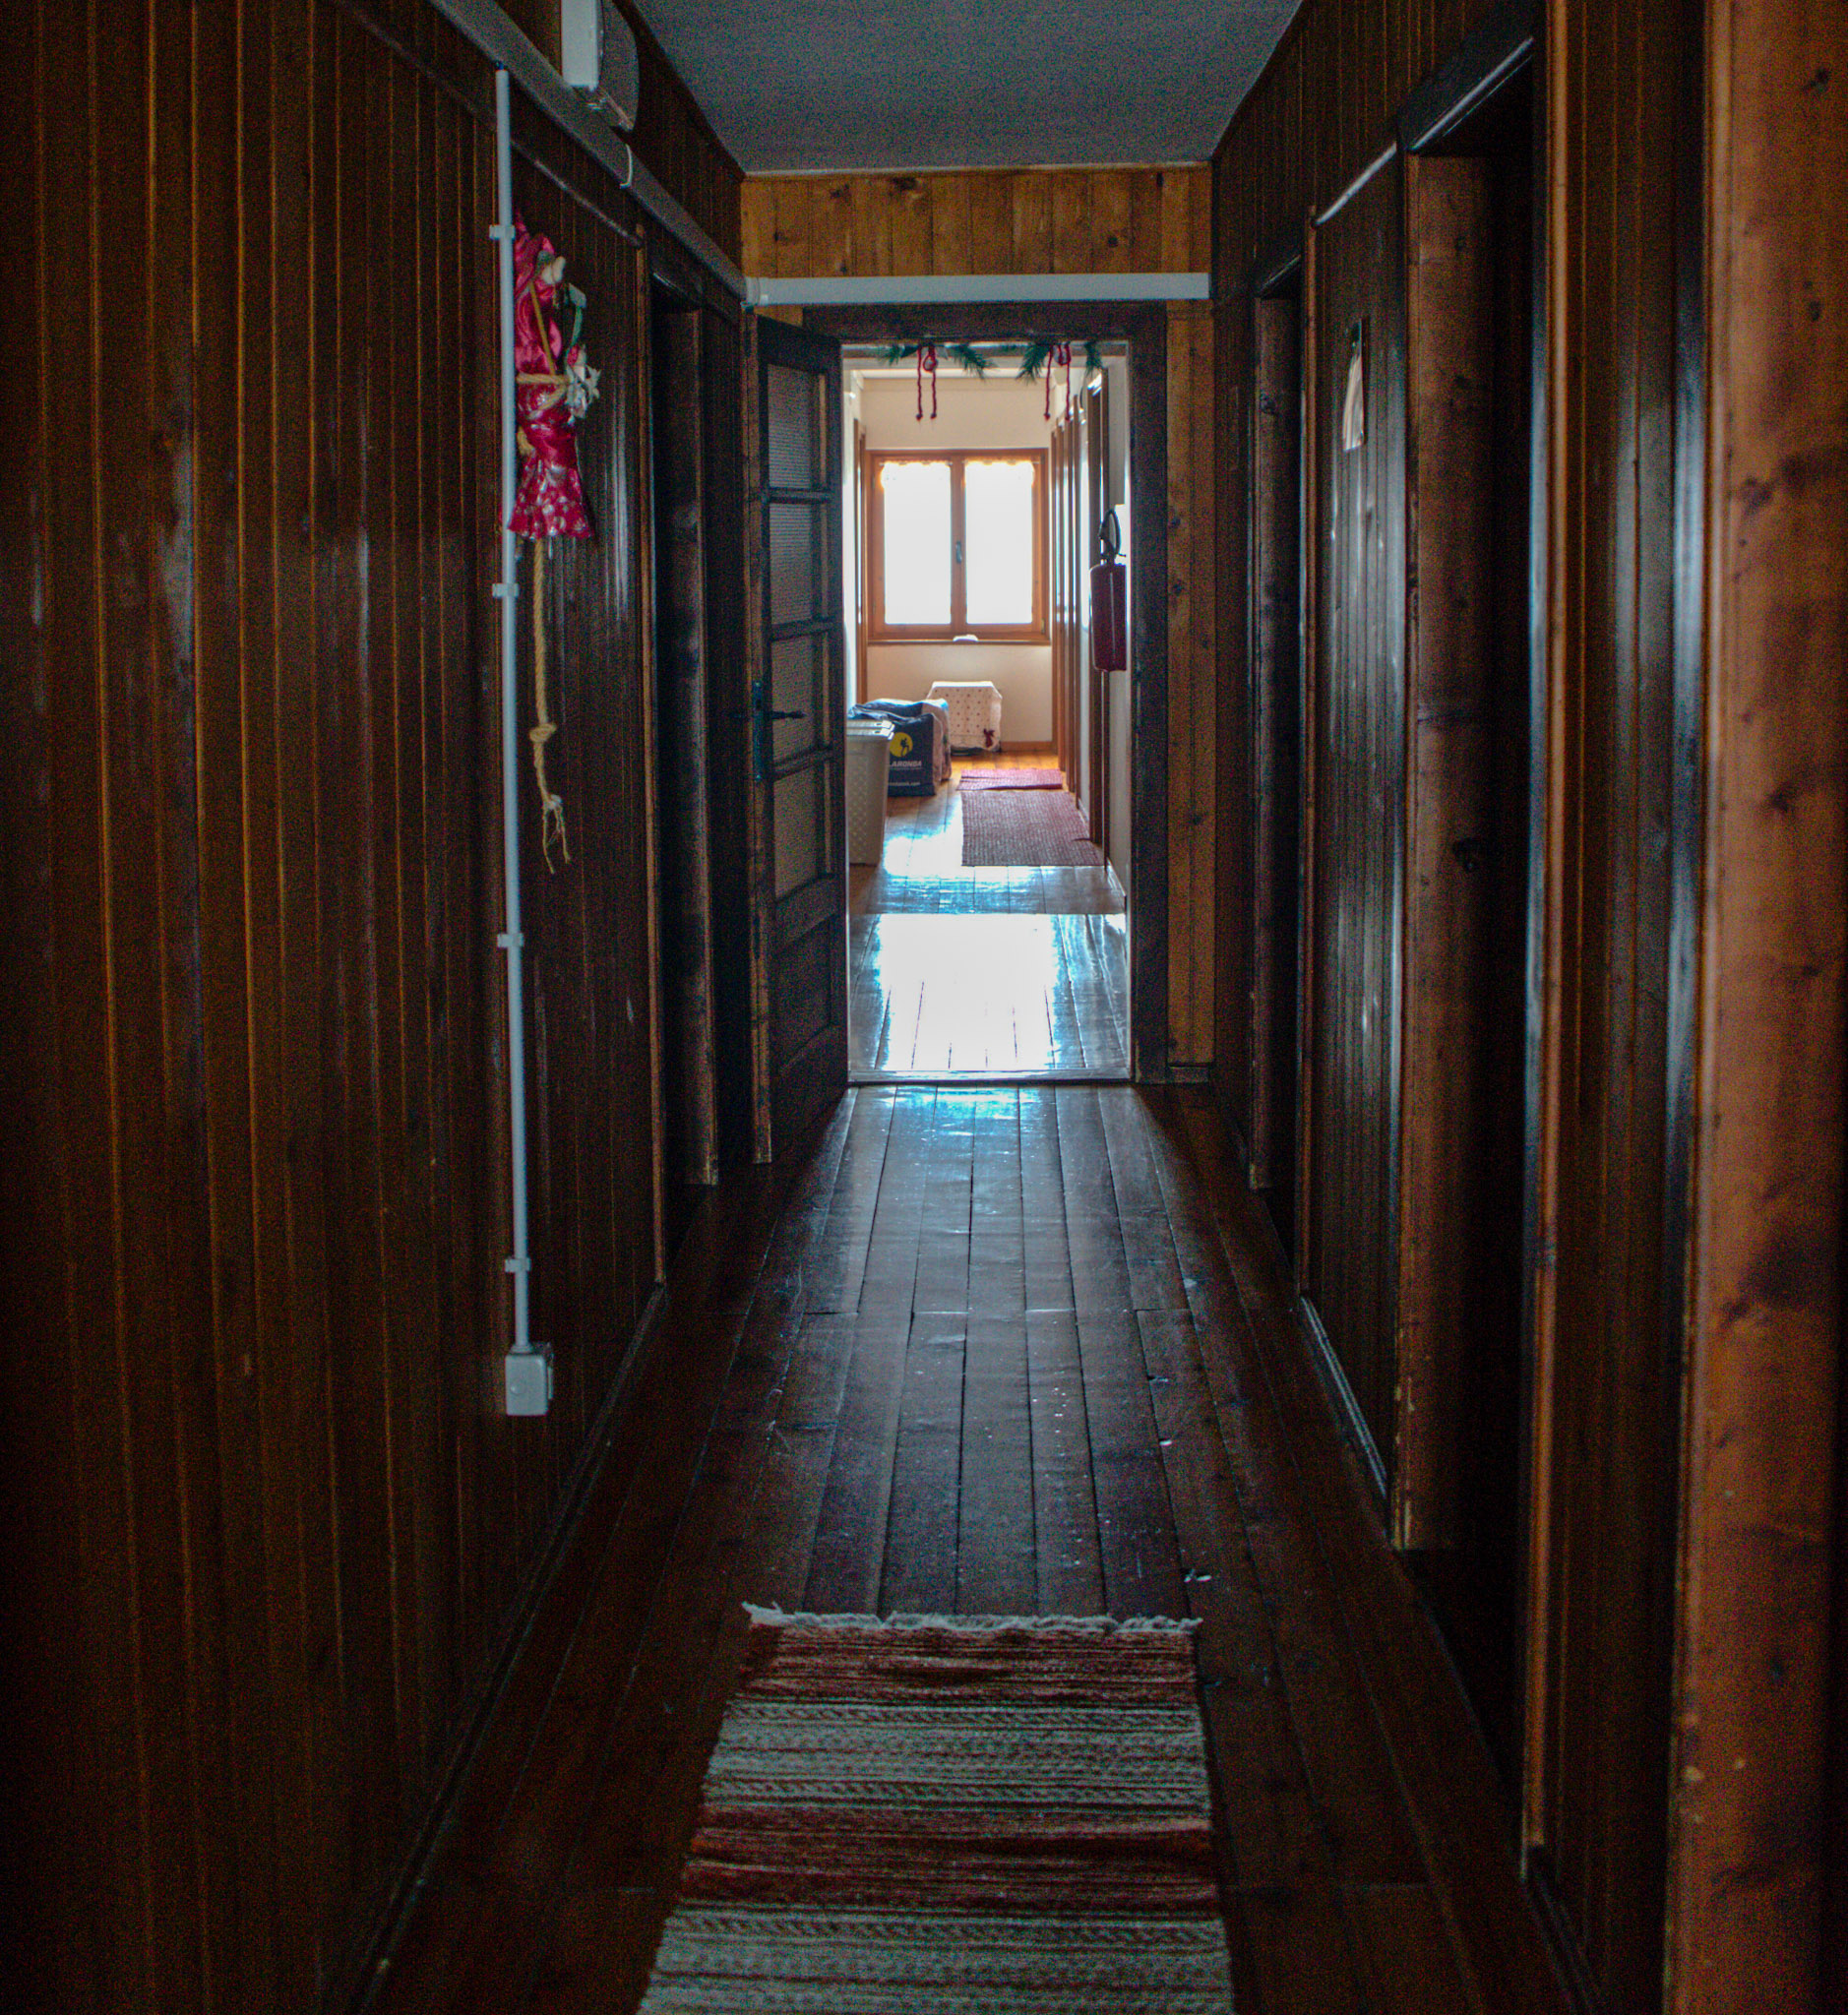
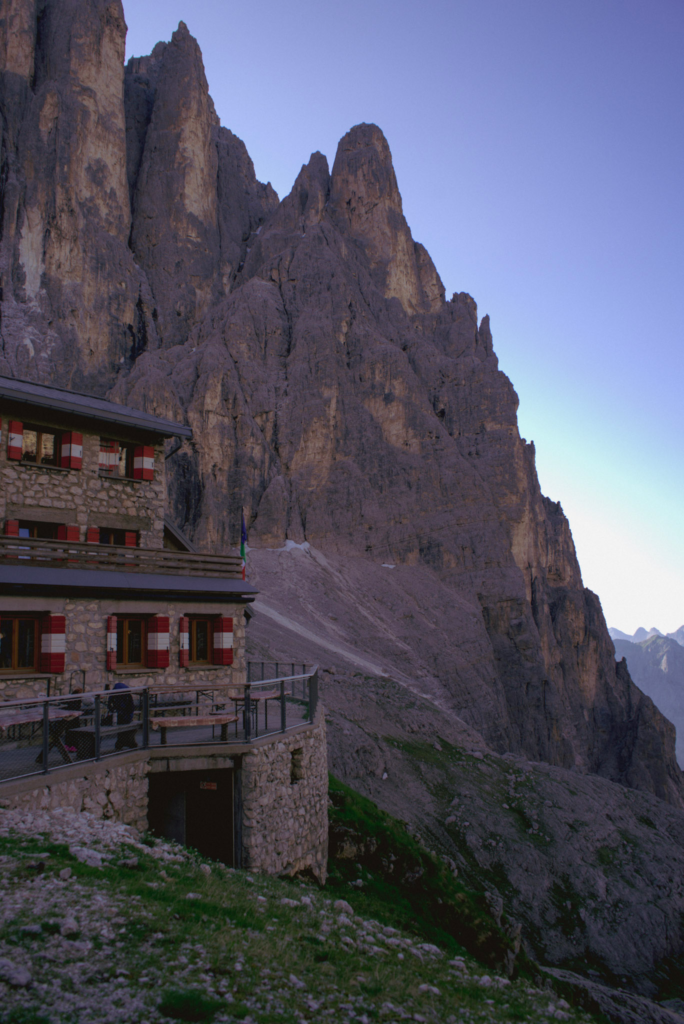
What to expect at Rifugio Rosetta
Rifugio Rosetta is a large, high-altitude hut set on the Pale di San Martino plateau. It’s busy, exposed, and functional — a true mountain hub rather than a cozy retreat. (heads up, most of this information is the same for all three rifugios)
Showers and Bathrooms
Showers are available for a fee, and you’ll need coins. Water is limited, and hot water isn’t guaranteed. Expect short, utilitarian showers rather than comfort. Bring sandals and apparently modest expectations.
Sleeping Arrangements
Sleeping quarters are dorm-style and can feel crowded when the hut is full. Space is limited, bunks are close together, and noise travels easily. Earplugs and a sleep liner are essential. Try to arrive early if you want a bottom bunk. You’ll have outlets in the room but expect to share with others. If you need to charge any phones, they have a common room just before the stairs that you can plug your phone + charging bank into.
Food and Dining
Meals are hearty and filling, designed for hikers burning a lot of energy. Dinner is served at a fixed time (7 pm) and is typically soup, a substantial main dish (often polenta-based), and dessert. It’s communal, efficient, and surprisingly social given the size of the hut. Typically, you are seated with random people, BREATHE, this is okay!
Breakfast and Coffee
Breakfast is simple and functional. Expect bread, spreads, and hot drinks. Coffee is basic and served quickly so hikers can get moving early. If you need something specific, ask the night before.
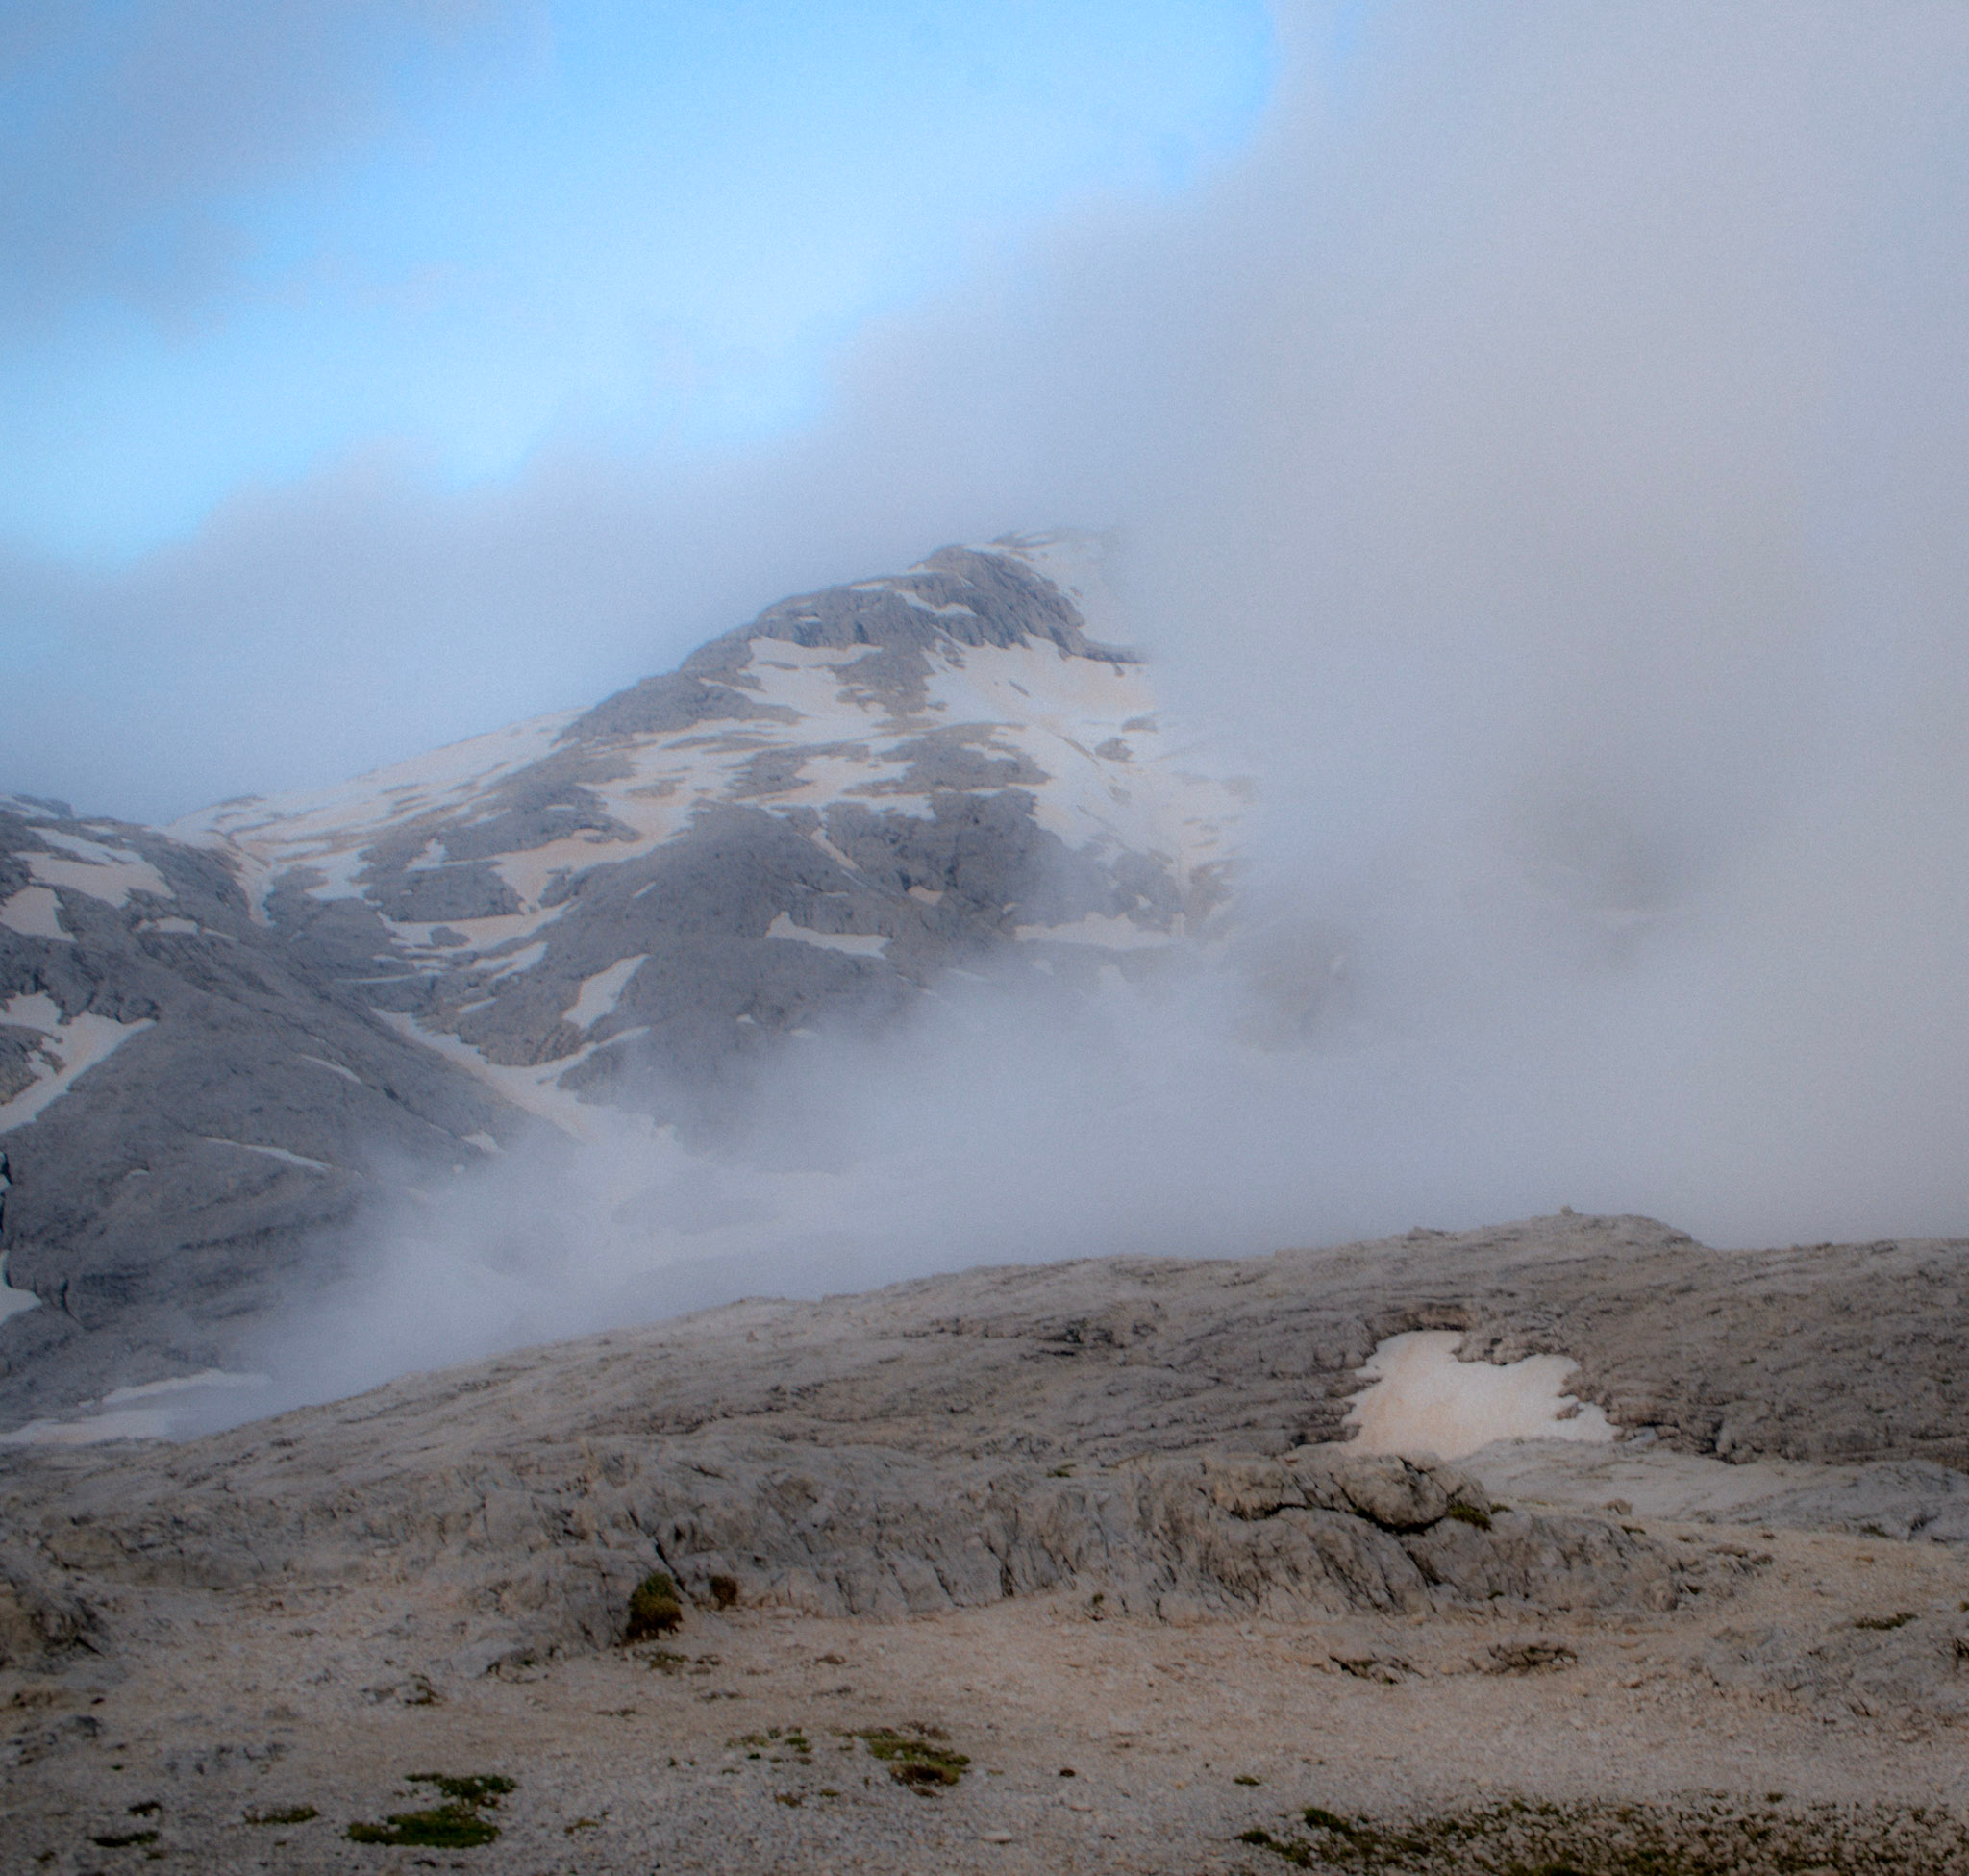
Views and Atmosphere
The views from Rifugio Rosetta are dramatic when the weather cooperates — wide-open limestone landscapes, clouds moving fast across the plateau, and a very exposed, rocky, lunar feel. When fog rolls in, visibility drops quickly, a common occurrence here.
There’s no Wi-Fi, which encourages people actually to talk to each other. Evenings are lively but not rowdy, with hikers comparing routes, conditions, and plans for the next day. The atmosphere feels purposeful — everyone knows the harder days of the trek are either coming or just finished.
Breakfast and Coffee
Breakfast is basic and functional — bread, spreads, and hot drinks. Coffee is straightforward and served quickly to accommodate early departures. If you have special requests, ask the night before.
Payment and Logistics
Rifugio Rosetta is primarily cash-based. Do not assume card payments will work. There is no Wi-Fi, and phone signal can be unreliable. Bring enough cash for meals, drinks, showers, and extras.
Check-in and dinner times are fixed, and staff expect hikers to arrive no later than 6 pm Late arrivals are not ideal, especially in poor weather (this is where excellent planning comes into play)
Curious about what to expect at Rifugios?
I created a guide about what to expect at Rifugios, so you can go in prepared!


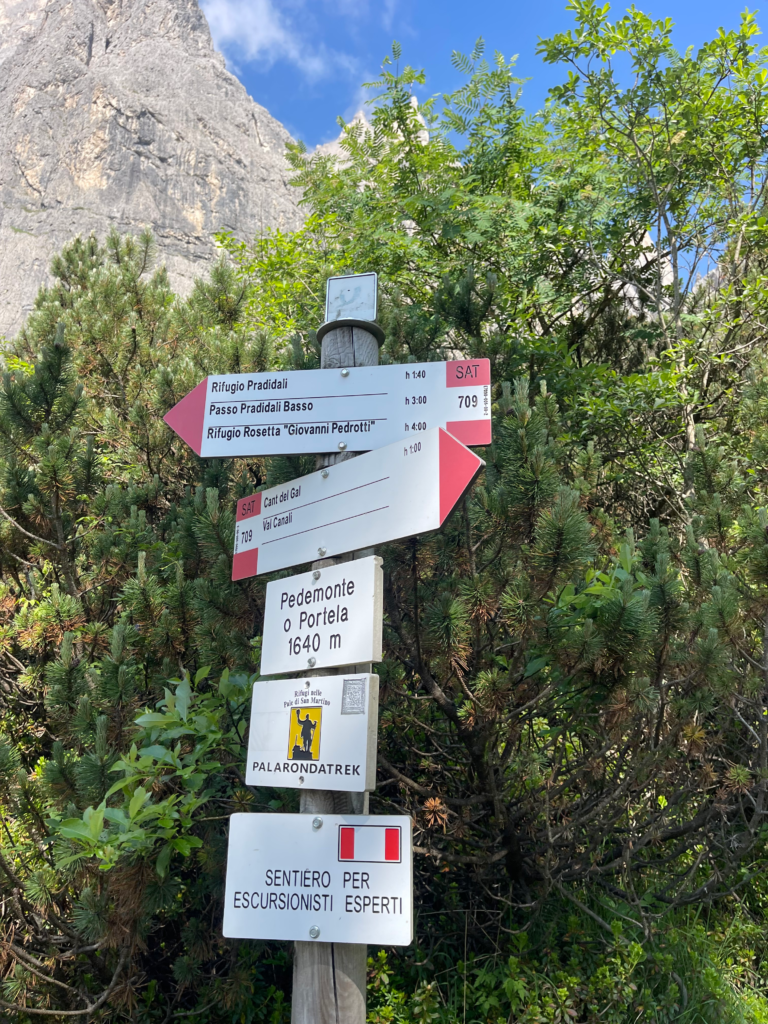
Day 2 of the Palaronda Trek: Rifugio Rosetta to Rifugio Pradidali
Day 2 At a Glance
Rifugio Rosetta → Rifugio Pradidali
Primary trail: CAI 709
Brief overlap: CAI 707 (near Rosetta departure)
Key pass: Passo Pradidali Basso
Total hiking time:
Ideal summer conditions: ~4–5 hours
Early season (snow/ice): 5–7 hours
Difficulty: Difficult (T4), T5 early season
Terrain: High alpine plateau, scree, scrambling, snow/ice
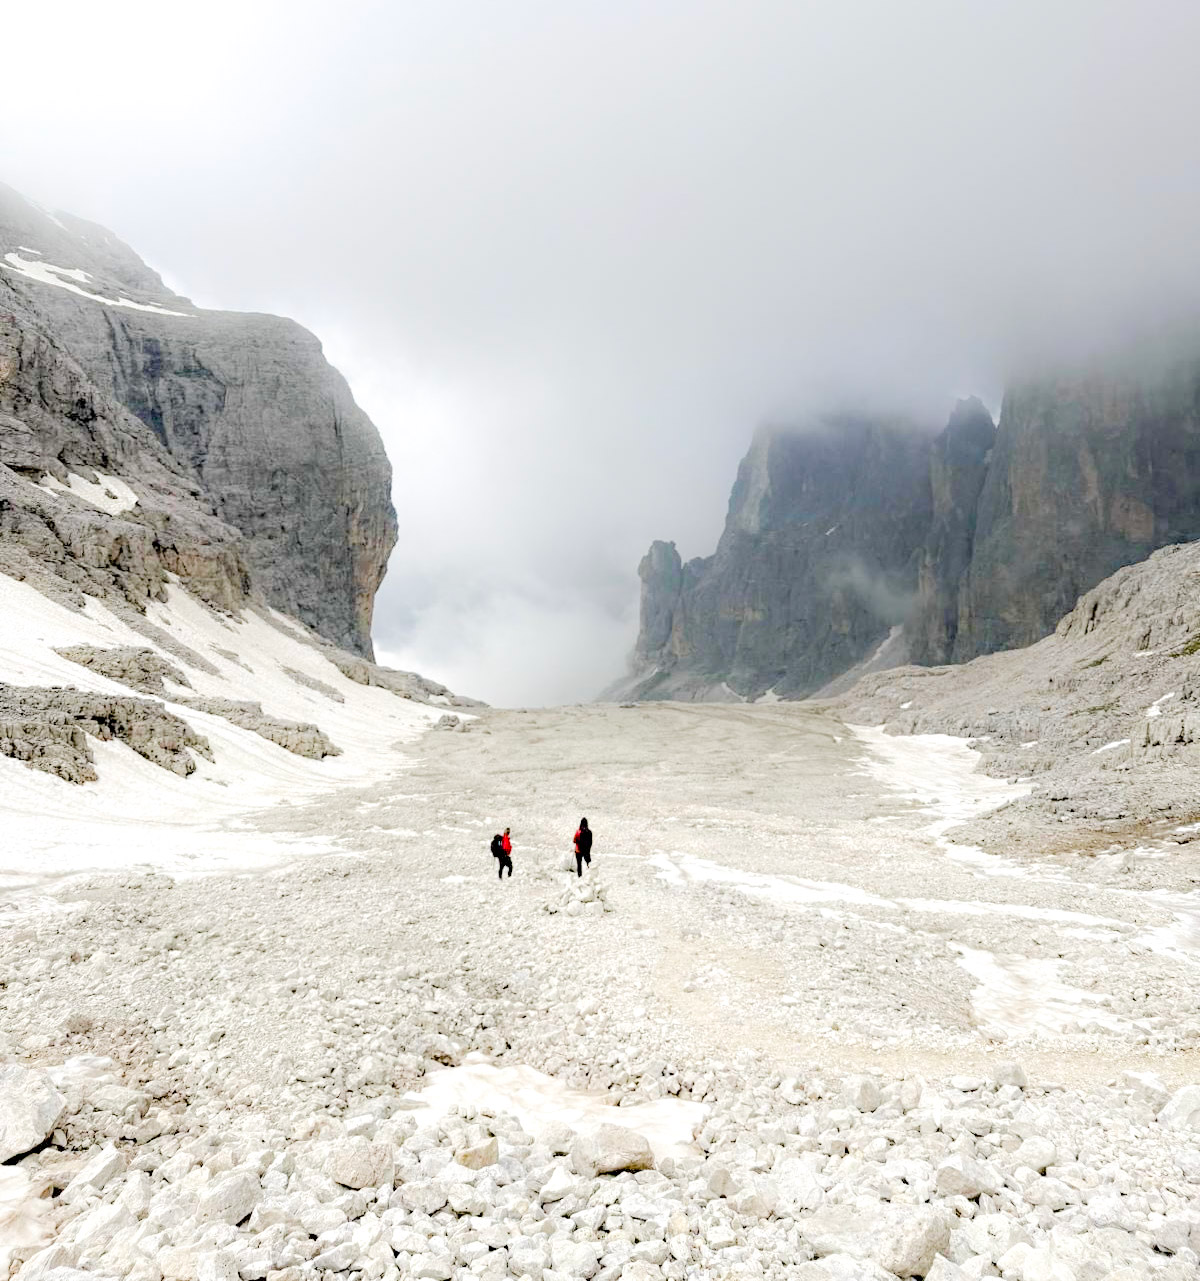
This is the most technically demanding day of the trek and the defining stage of the Palaronda.
On a map, the route from Rifugio Rosetta to Rifugio Pradidali doesn’t look extreme. In reality, it’s a high-alpine traverse that requires constant attention, solid footing, and comfort moving through unstable terrain.
Hiking this section during opening weekend, when snow and ice were still present, was annoying. This significantly increased both the difficulty and the time it took to complete.
Leaving Rifugio Rosetta (2,405 m), the trail crosses the limestone plateau of the Pale di San Martino. Depending on your exact line from the hut, you may briefly follow CAI trail 707, but very quickly the route funnels onto Sentiero 709, which you stay on for the entire day.
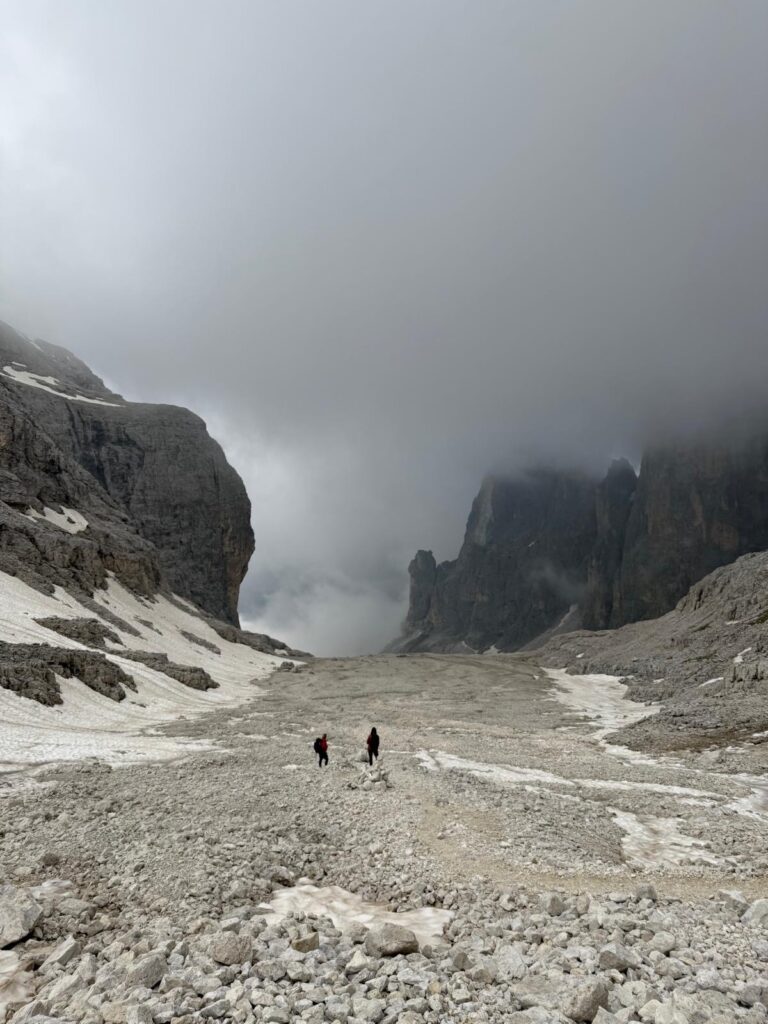
In good summer conditions, this section is rocky but straightforward. Early season changes that are completely. Snow covers sections of the trail, ice forms on slanted rock, and the path is often not visible. Navigation relies heavily on cairns and terrain awareness, not a clear tread.
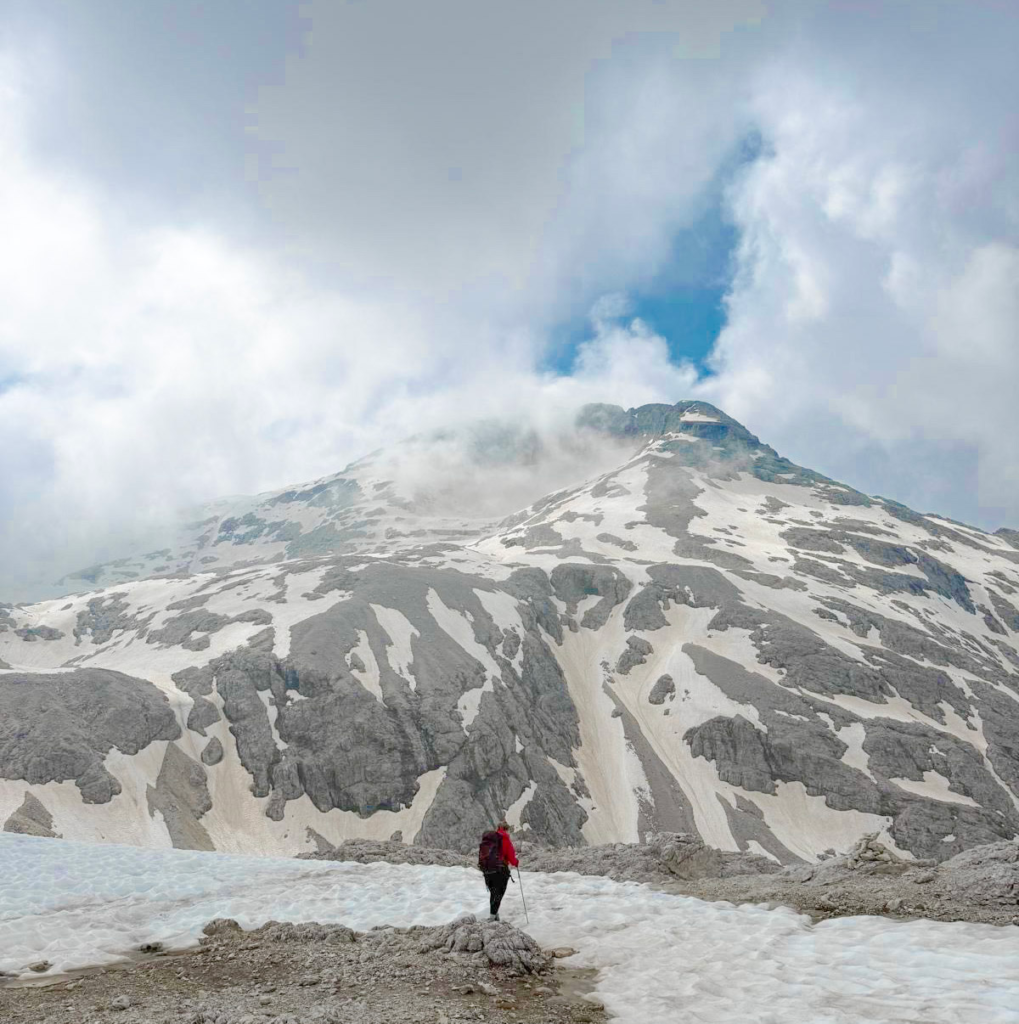
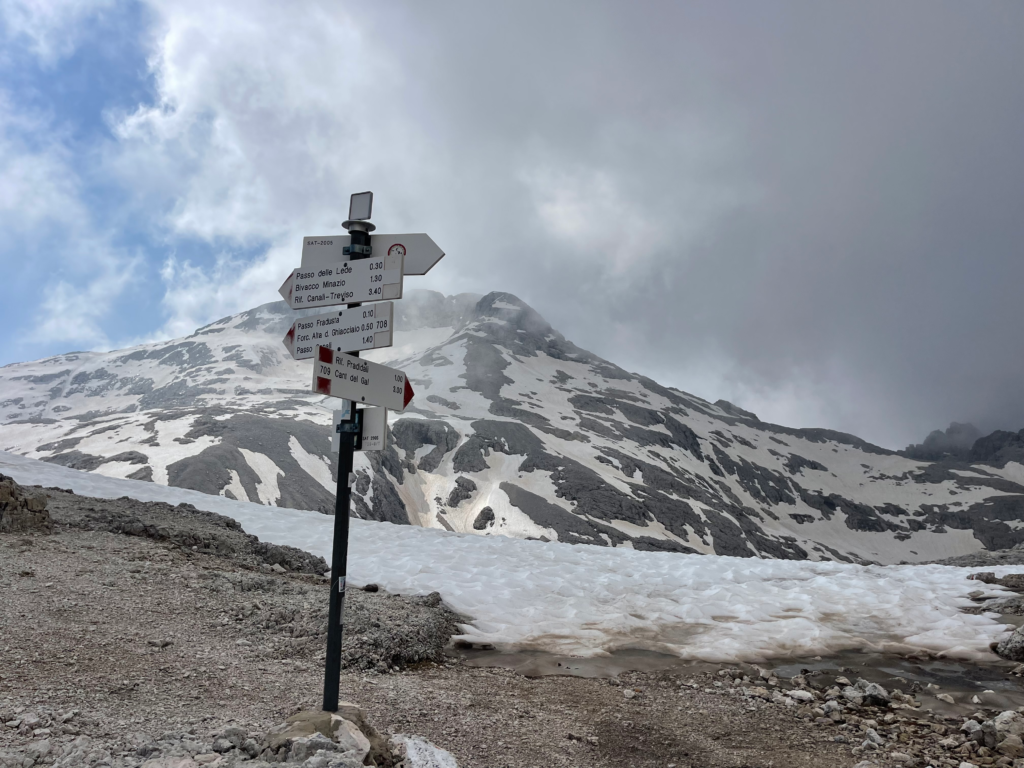
As the trail climbs toward Passo Pradidali Basso, conditions become more serious:
- Snow lingered in shaded sections, sometimes ankle-deep
- Scree fields were partially frozen and unstable
- Rock slabs were slick with ice
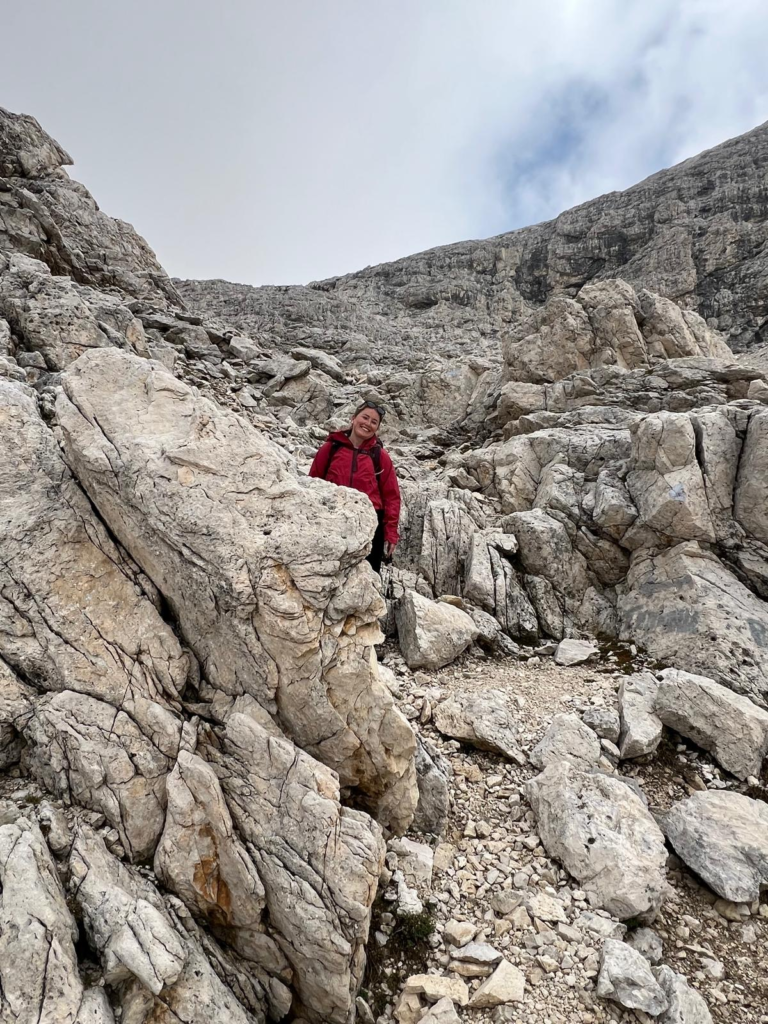
Several sections required hands-on scrambling. I was not expecting this. This is not technical climbing, but it is not simple hiking either. Foot placement matters, and progress is slow. In summer, this section is already considered T4 terrain. With snow and ice present, it felt closer to T5, and I treated it accordingly. Please note, I always rate these a bit harder than they are because people think they are invincible.
One thing worth noting: People paused to watch each other move through tricky sections and were coaching each other through their next moves because of the ice. That wasn’t planned, but it made a difference. This is a stage where collaboration and patience matter.
Reaching Passo Pradidali Basso is the key navigation checkpoint. If you see this label on your map or GPX track, you’re on route. From here, Sentiero 709 continues down into Val Pradidali toward the hut.
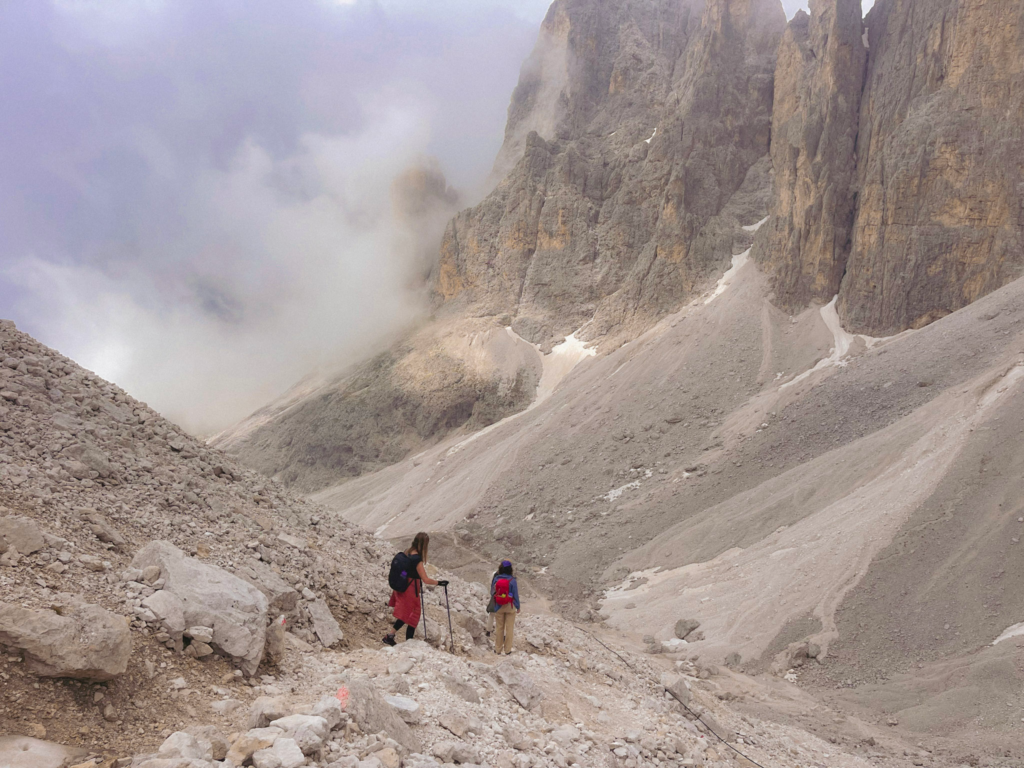
The descent does not immediately get easier. The terrain remains loose, with scree, shale, some boulders and lingering snow patches. In icy sections, going downhill felt just as controlled and deliberate as the climb. This was prime ankle-twisting territory, and I was not having it.
Eventually, Rifugio Pradidali came into view beneath steep rock walls when the fog cleared. Reaching the hut felt less like a celebration and more like relief. I was so fricking happy!
What to expect at Rifugio Pradidalli
When I made it to Rifugio Pradidalli, I was so ecstatic.
Rifugio Pradidali is a classic high-alpine hut — functional, remote, and focused on feeding and sheltering hikers rather than comfort. After a demanding day on the trail, knowing what’s waiting for you here helps set expectations.
Showers and Bathrooms
Showers are available, but they’re basic. You’ll need coins to use them — €7 per shower (as of 2025) — and they’re time-limited to roughly two minutes. If you’re one of the first people to shower, expect cold water. The system isn’t designed for long, hot rinses; it’s more of a quick wash to get the sweat and grime off.
Water is limited at this altitude, so use only what you need.
Sleeping Arrangements
Sleeping quarters at Pradidali are tight. Expect small bunks packed closely together, spread across three levels inside the hut. There’s very little personal space, and noise carries easily.
This is not the hut where you’ll stretch out or unpack comfortably. Pack earplugs, organize your bag before bedtime, and plan on a practical night’s sleep rather than a luxurious one.
Food and Dining
The food at Rifugio Pradidali are meals that are hearty, filling, and well-prepared — exactly what you want after a hard alpine day. The staff are courteous and efficient, even when the hut is busy.
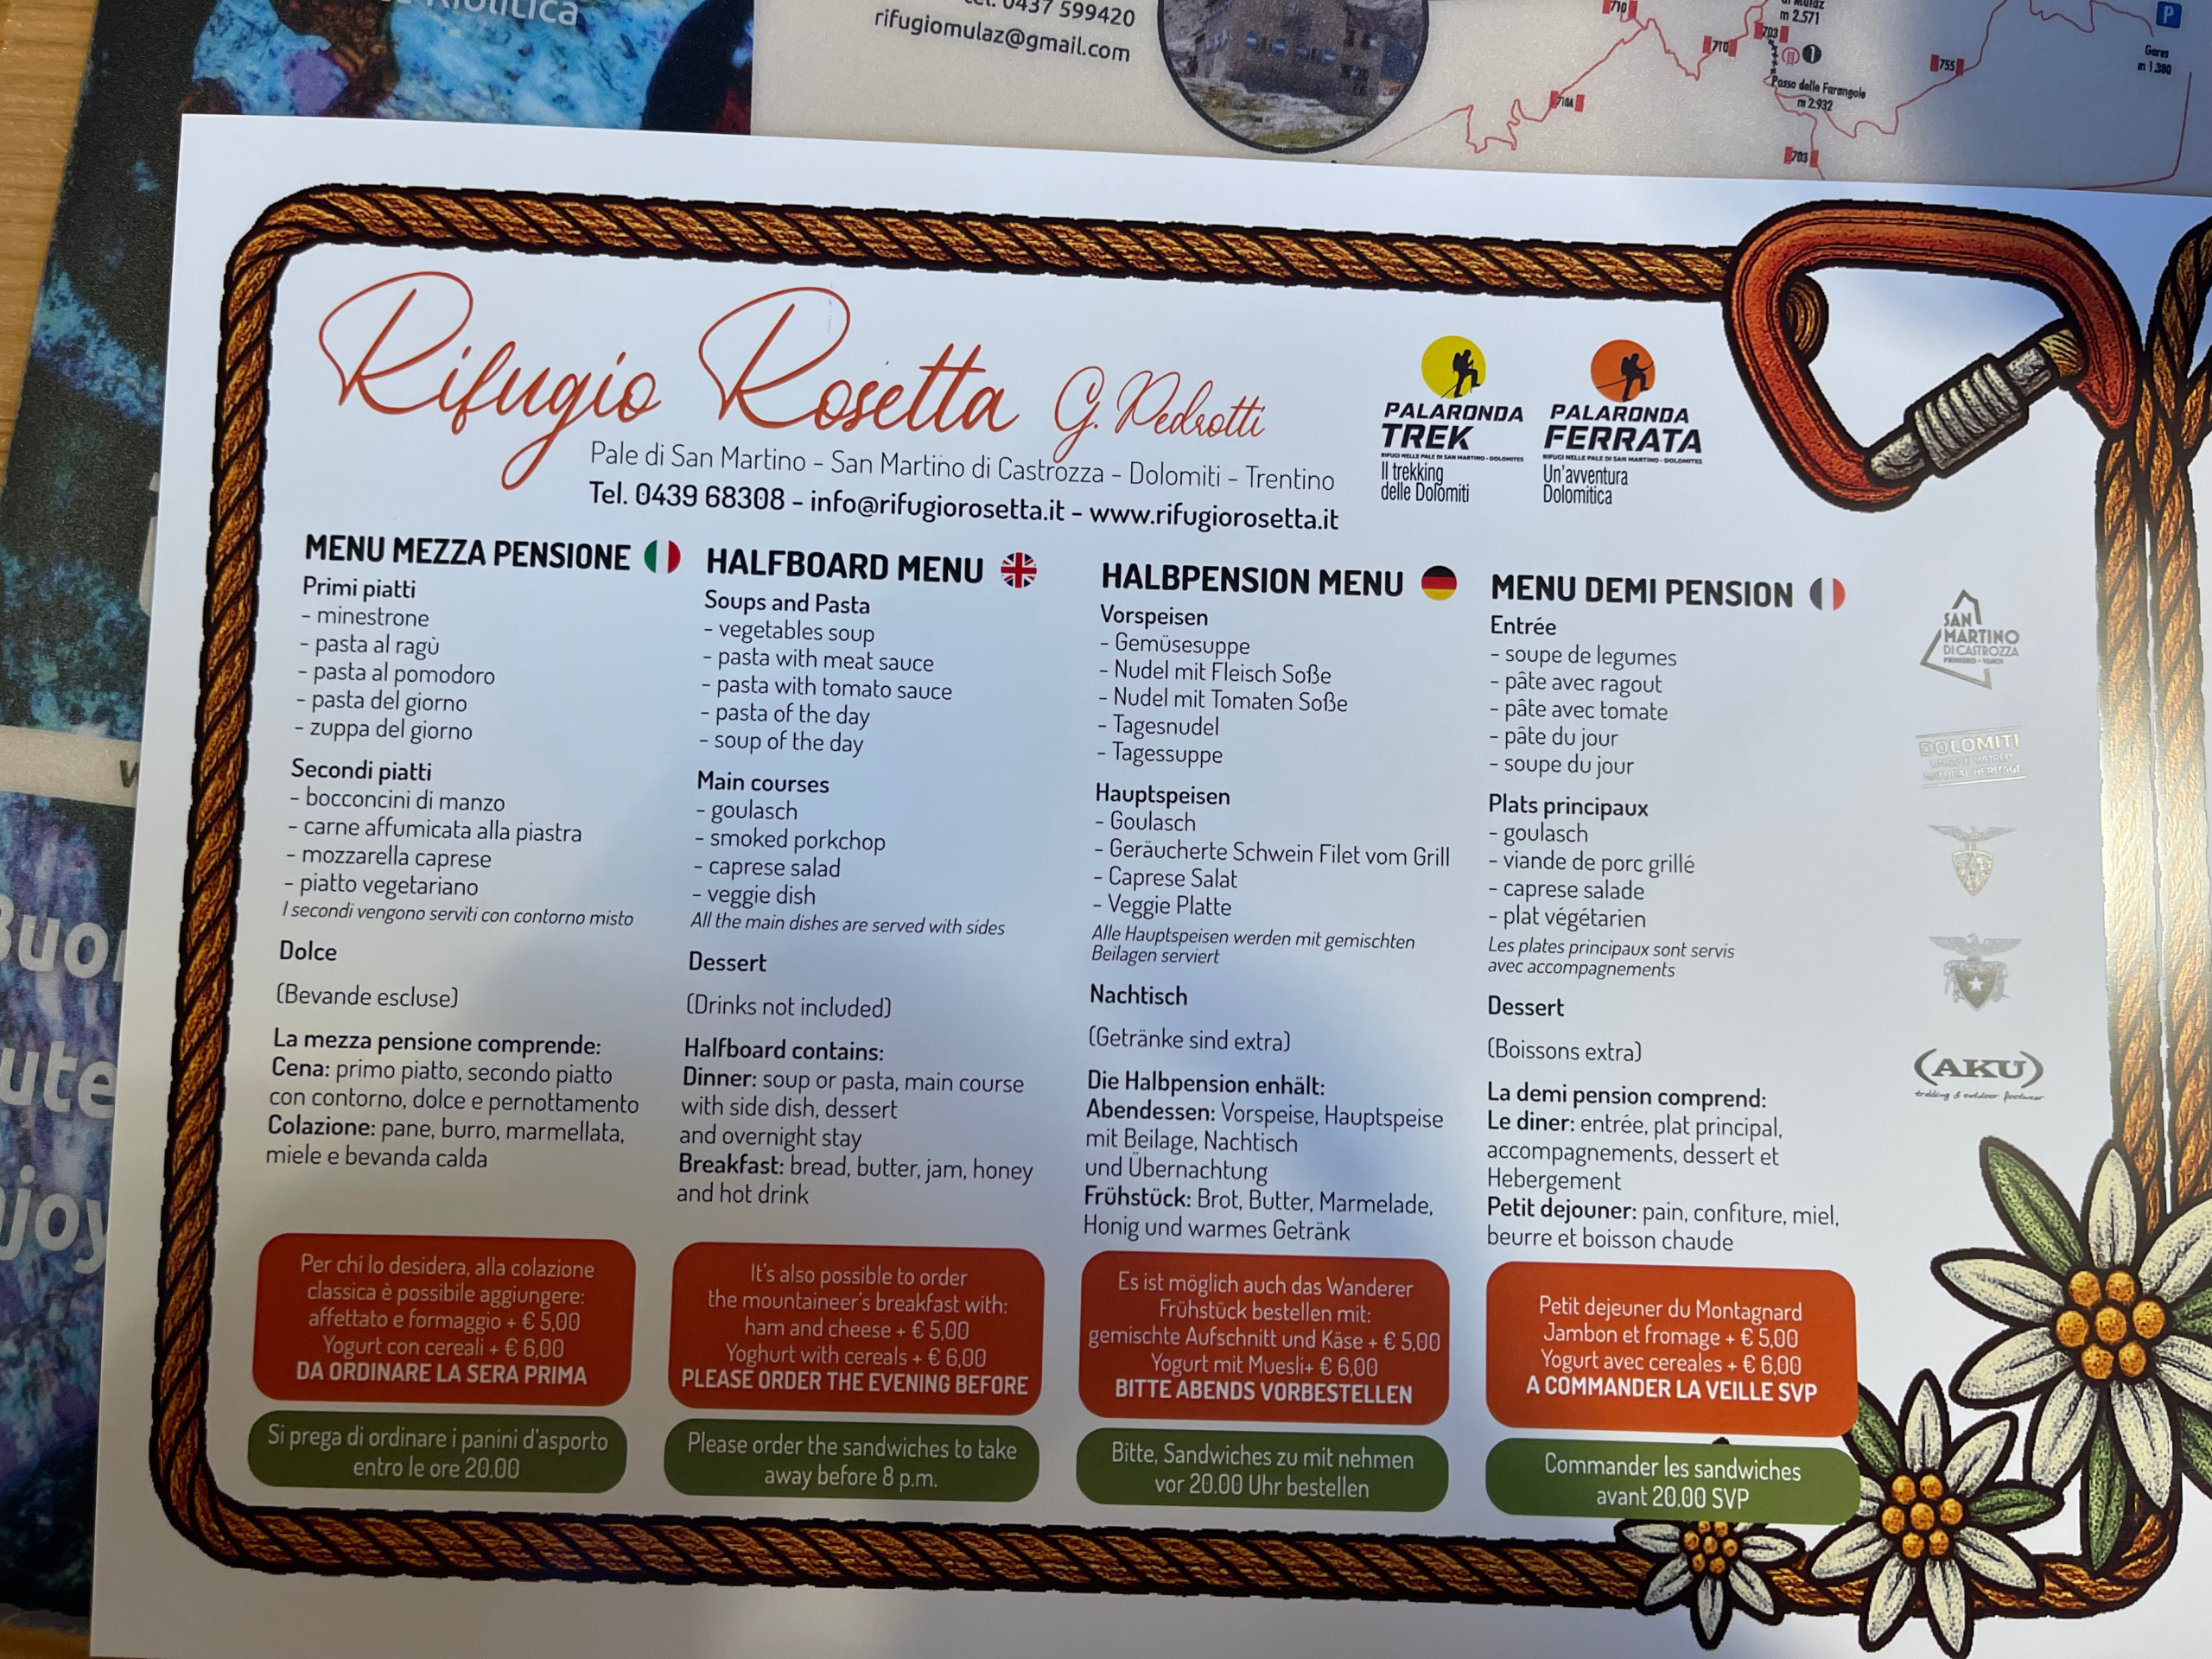
If you booked through Bookatrekking, meals are included under half-board (dinner and breakfast), unless clearly stated otherwise in your booking details.
Breakfast and Coffee
Breakfast is simple and functional:
- toast
- jam and Nutella
- hard-boiled eggs
Coffee is served in a bowl, which was a first for me and gave me a good laugh — but don’t expect specialty coffee here. It does the job, and that’s the point.
If you want anything specific in the morning, you need to request it the night before. The staff plan meals carefully due to limited supplies and deliveries.
Payment and Logistics
Rifugio Pradidali is cash only. There is no internet connection, which means:
- no card payments
- no last-minute online transfers
Prices here run slightly higher than at lower or more accessible huts, and that’s understandable. Supplies are delivered by pulley system, not by road, and everything that arrives takes effort to get there.
Views and Atmosphere
When the weather cooperates, the views from Rifugio Pradidali are excellent. Morning in particular stood out to me — watching the fog lift (or not lift) over the surrounding peaks was one of my favorite moments of the trek.
When the fog rolls in, visibility disappears quickly. That’s part of life up here. When it clears, the setting is spectacular.


Day 3 of the Palaronda Trek: Rifugio Pradidali to Rifugio Treviso
Day 3: Rifugio Pradidali → Rifugio Treviso (Canali)
Primary trail: CAI 709
Trail change: CAI 707 (after Malga Canali)
Total hiking time: ~6–7 hours (depending on breaks)
Difficulty: Moderate–Challenging
Terrain: Long descent, valley floor, forest climb
Key features: Val Pradidali, Val Canali, Malga Canali
Less technical than Day 2, but long and physically taxing due to sustained descent and heat at lower elevations.
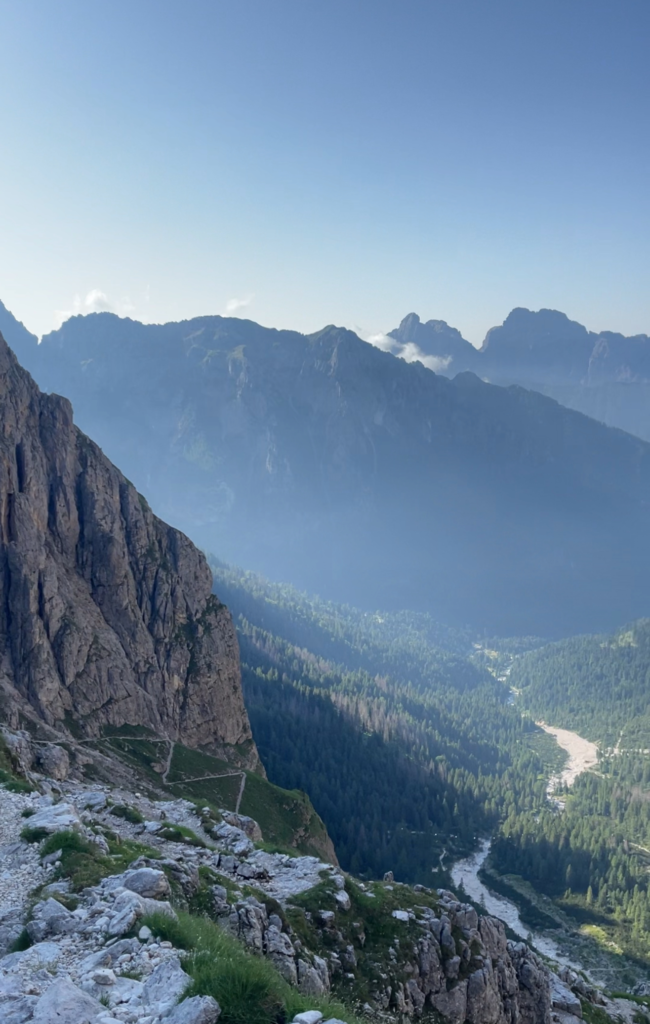
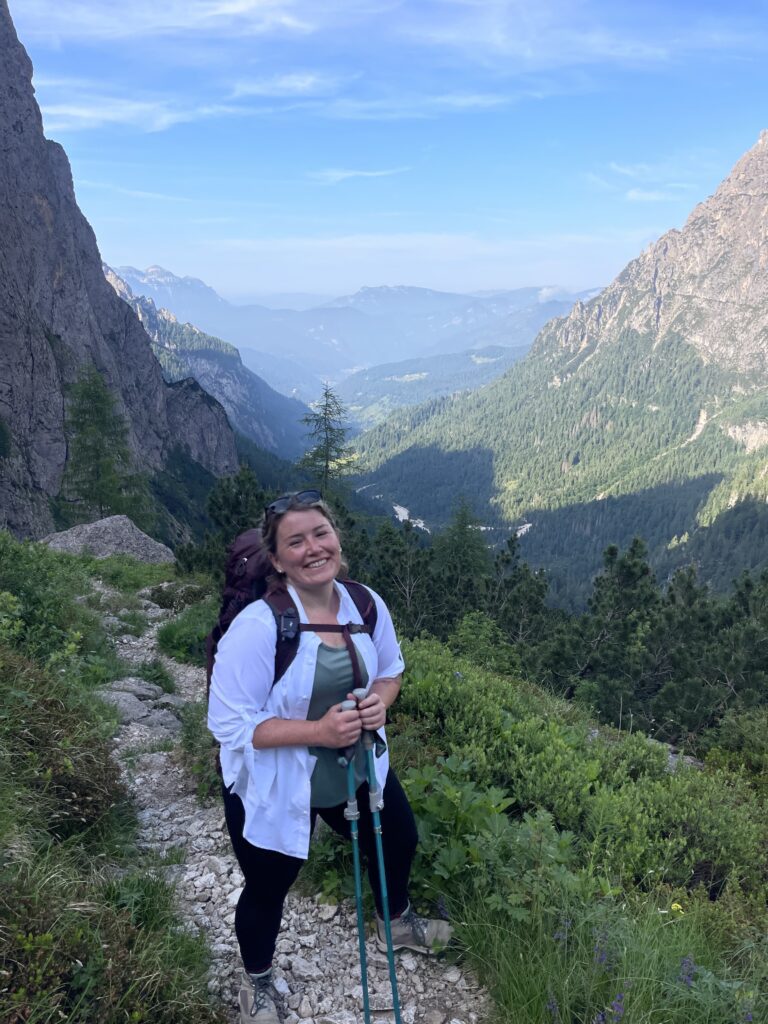
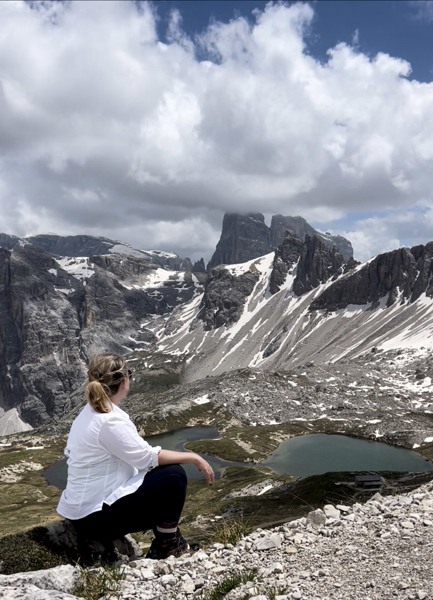
I woke up to one of the best views of the entire trek — and one of the worst nights of sleep.
Rifugio Pradidali was either too hot or too cold all night, and I never quite settled. Because of that, and because I knew this would be a long day with a big descent, I made it a point to leave early.
I caught one of the best sunrises because the fog cleared and the view of the valley down below is SPECTACULAR!
The route from Rifugio Pradidali to Rifugio Treviso starts by continuing down CAI trail 709, descending out of the high alpine environment and into Val Pradidali.
Early on, I ran into one of the sketchiest moments of the entire trek: an icy snow patch crossing the trail. I struggled to get across it. My footing was unstable, my legs and arms were shaking, and mentally I knew that one wrong slide would have sent me downhill fast. This was the moment that really confirmed what I already knew — this hike would have been safer later in the season.
I was left rendered speechless, though, when a local trail runner crossed it with his dog and had zero problems. What in the world is wrong with me?!
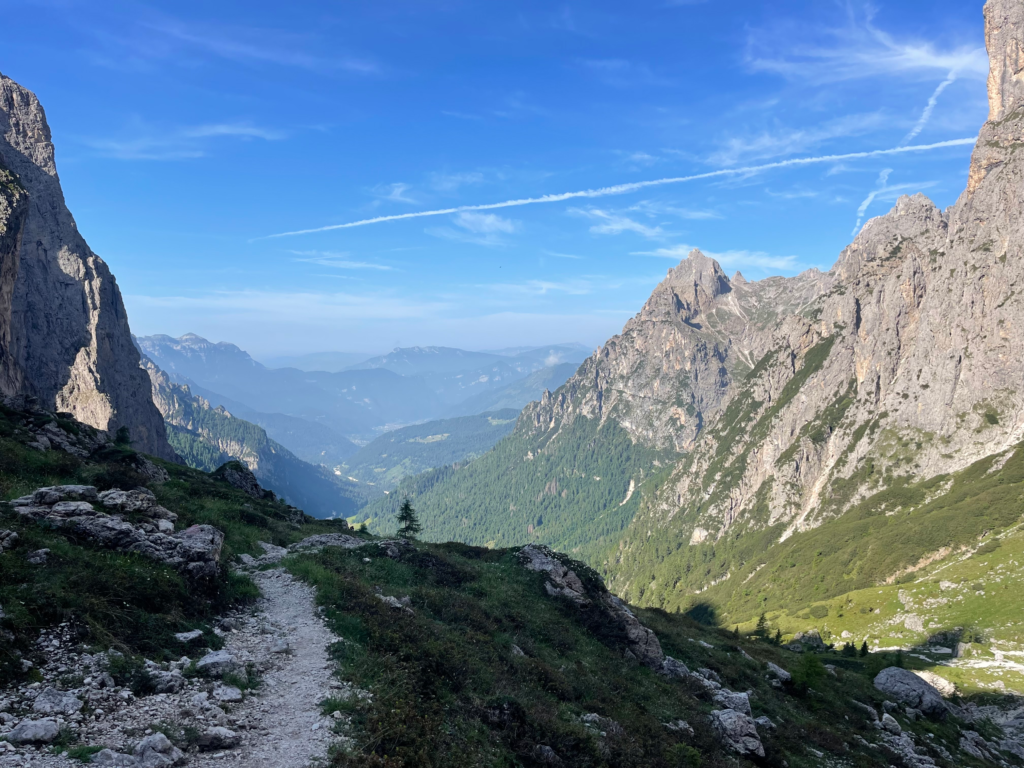
Once past that section, the descent continues steadily into Val Pradidali. This part of the trail is not technically difficult, but it’s long, and the terrain keeps your attention. The valley itself is beautiful — greener, wider, and more open than the previous day’s high plateau.
I stopped for lunch using the packed food Rifugio Pradidali had prepared for me. Near the trail, there’s a cold mountain stream, and several of us from the rifugio took the opportunity to get in and cool off. It was brief, but after the previous day, it felt incredible.
As the trail drops lower, the temperature rises noticeably. This was the first day when heat became a factor. Hydration and sunscreen matters on the trail, so don’t forget to stop and take it all in and reapply.
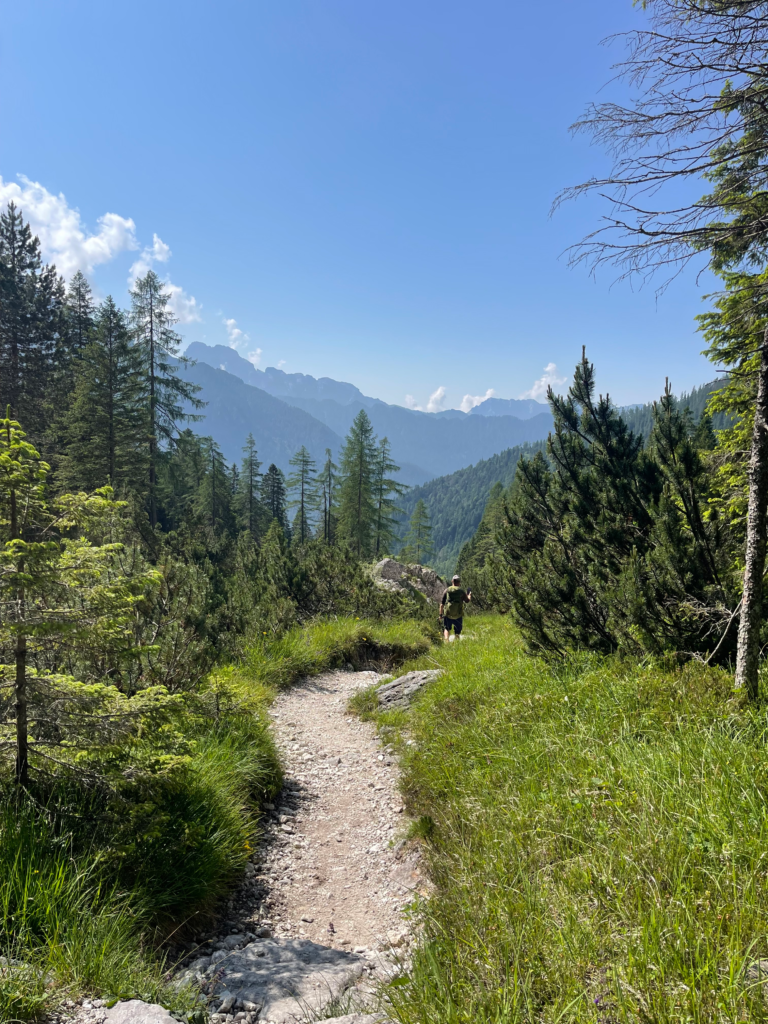
Following trail 709, you eventually curve toward Val Canali, where the landscape changes again. You’ll pass a semi-dry riverbed, and there are a few spots where people stop to cool off or swim. I chose to keep moving toward Malga Canali, hoping to grab more food.
Malga Canali was closed when I arrived, so I took a break, admired their pigs and cows, refilled my water, ate a snack, and moved on. From this point, the route switches to CAI trail 707, which climbs gently but steadily toward Rifugio Treviso.
From Malga Canali, barring long breaks, it’s about one hour to the hut (official sources say 40 minutes, but I beg to differ)
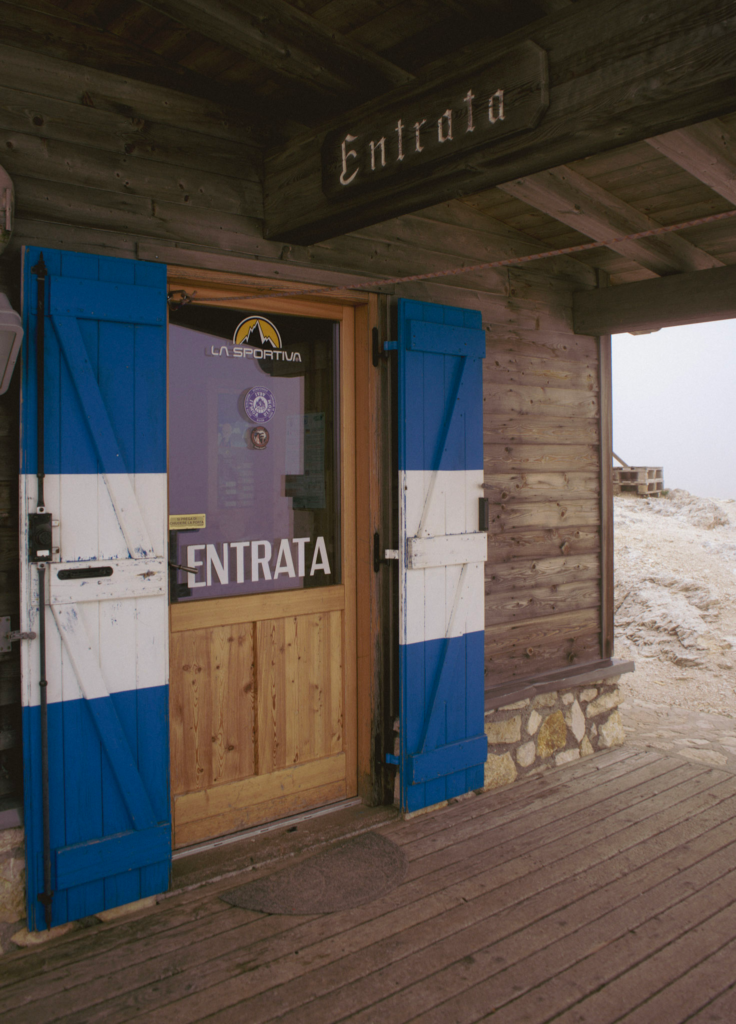
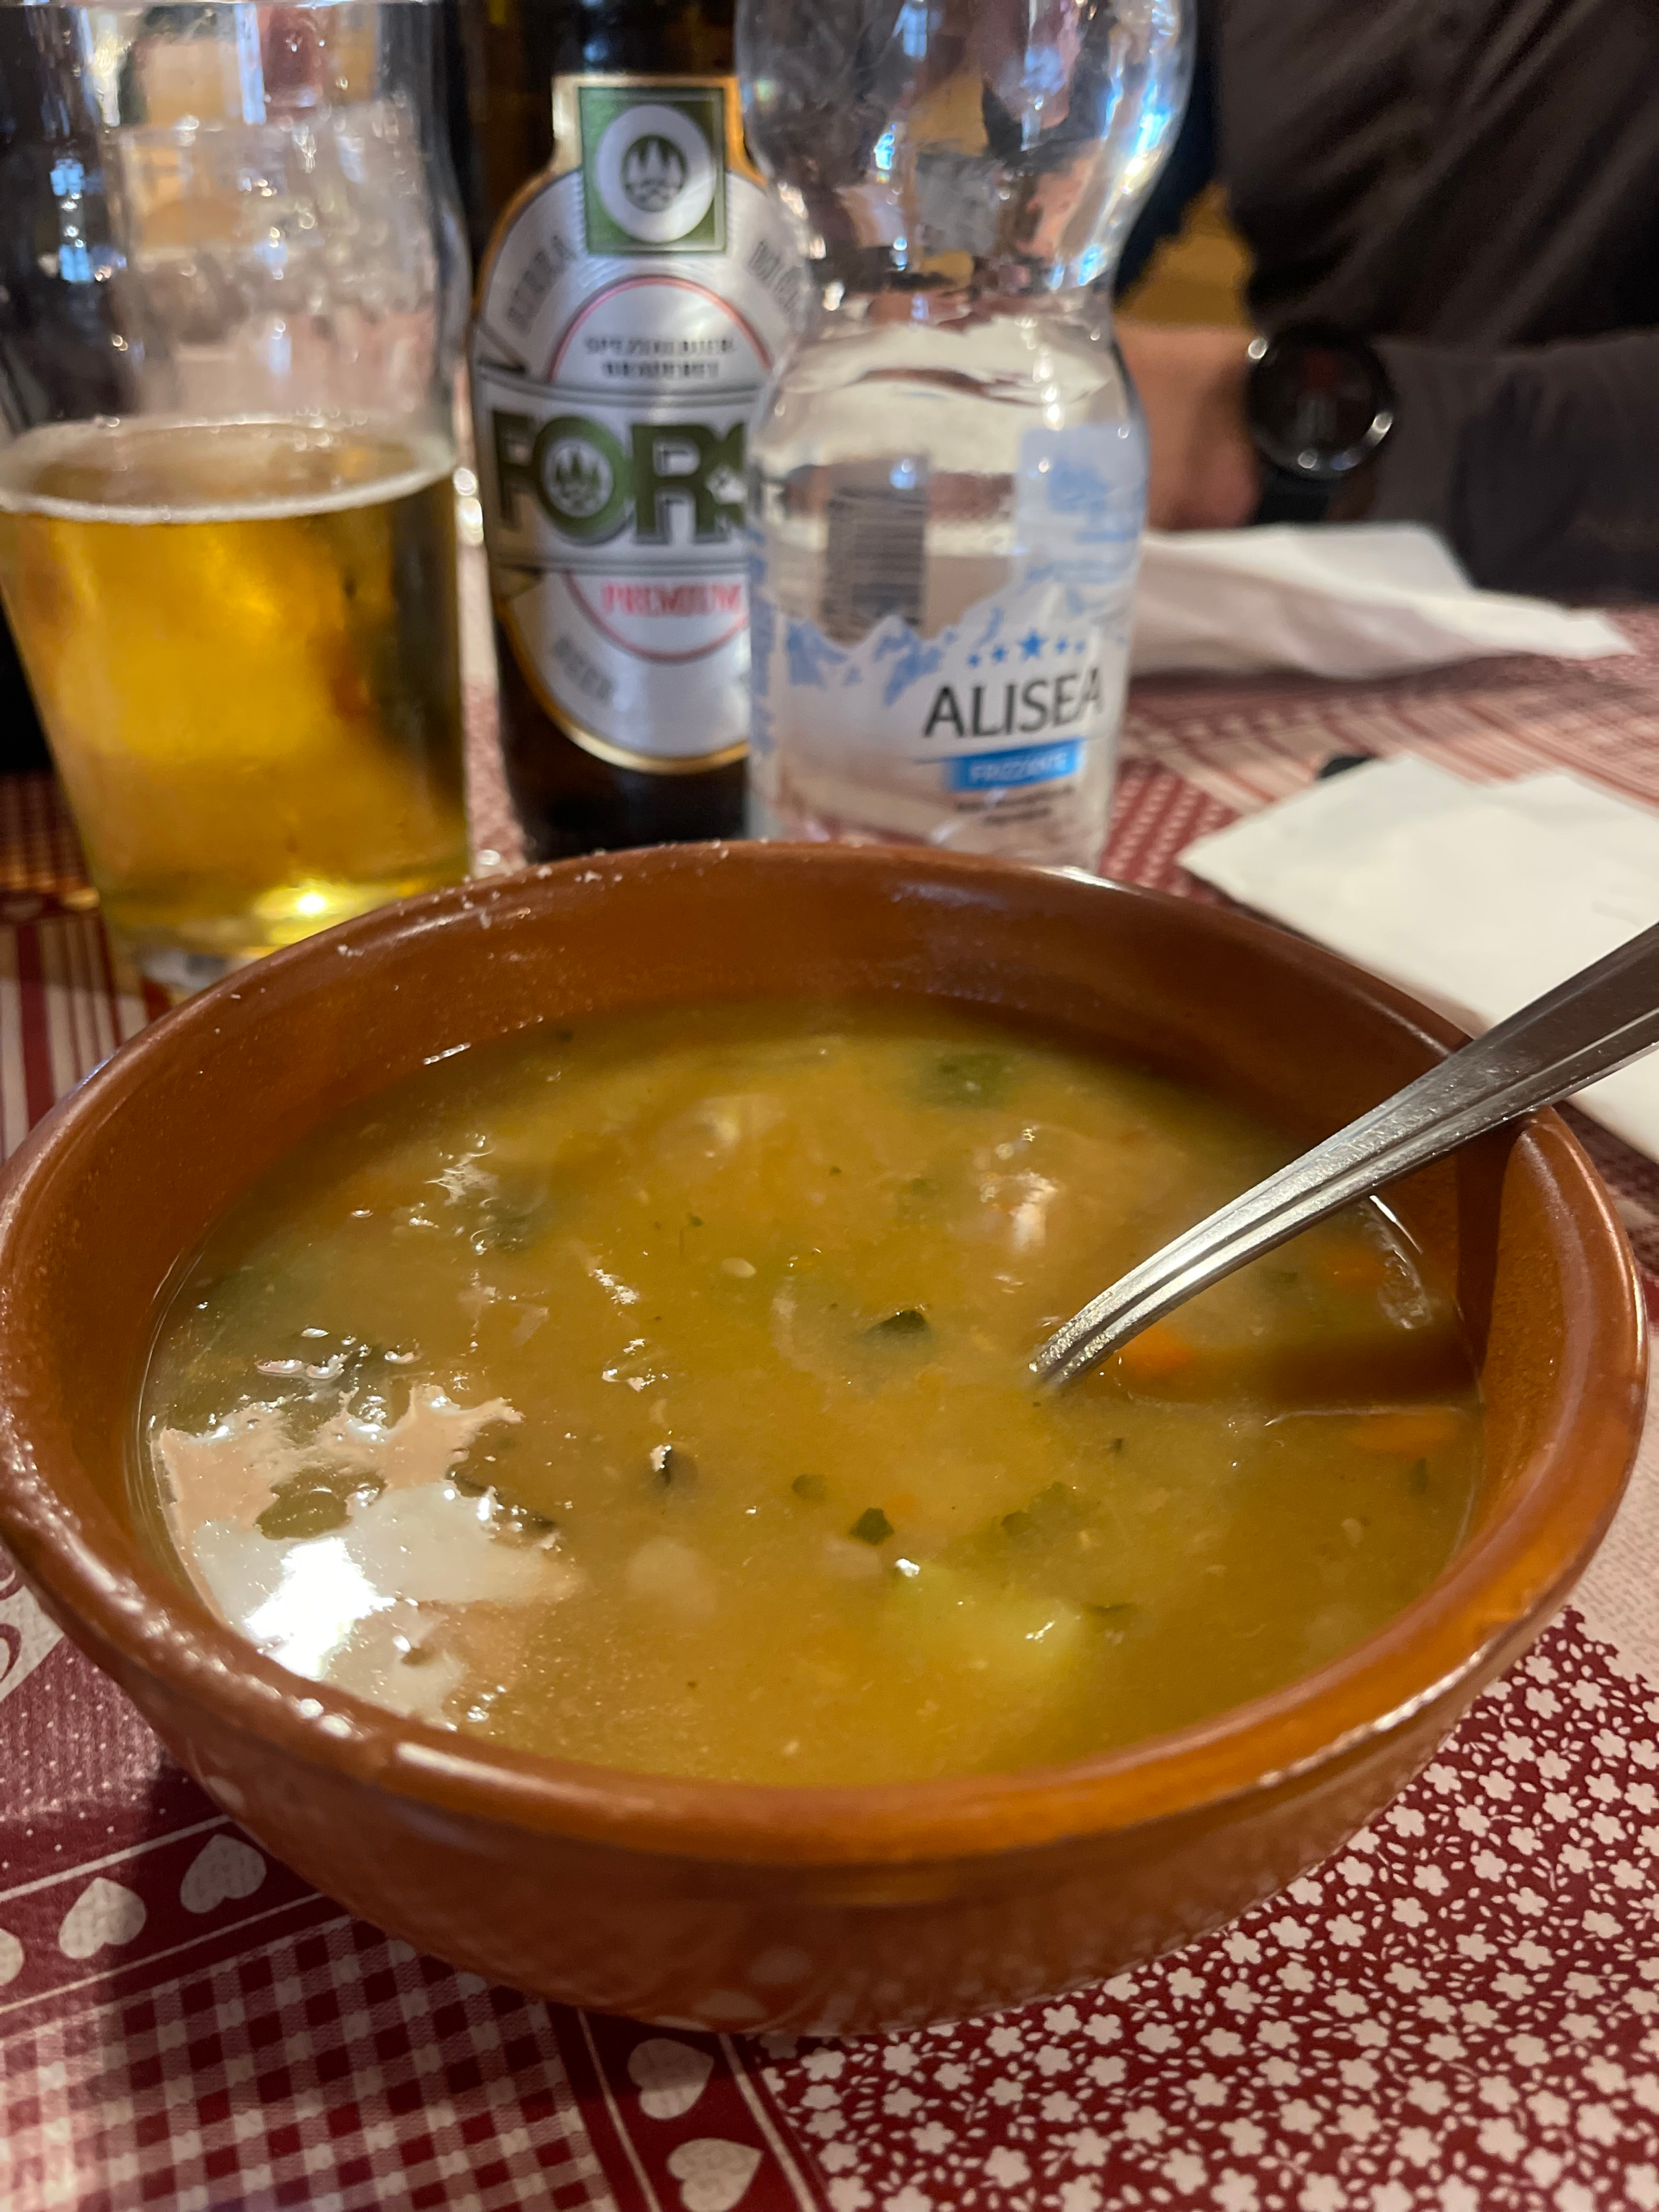
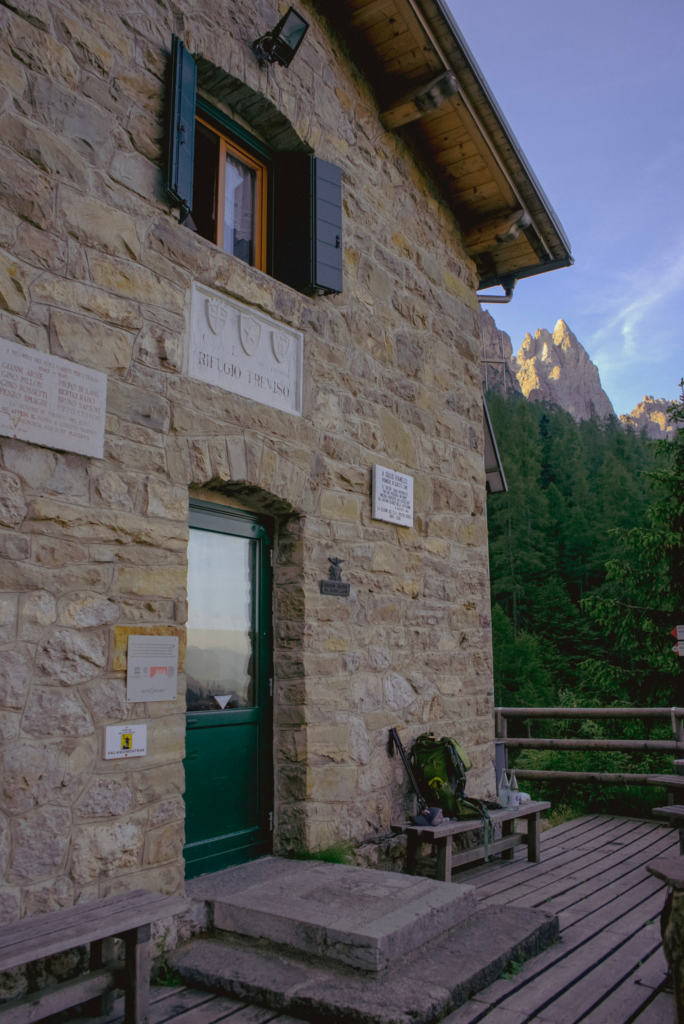
The trail winds uphill through forest, and then — almost suddenly — Rifugio Treviso appears. I arrived just before lunch service ended and immediately ordered speck dumplings in broth and a beer, followed by more water than I care to admit.
Rooms weren’t ready yet, but the staff let everyone know when they became available.
What to expect at Rifugio Treviso
Rifugio Treviso is one of the more comfortable and well-organized huts on the Palaronda Trek. After the intensity of the previous days, it feels like a place designed for recovery.
Showers and Bathrooms
Bathrooms are basic but functional. Very limited, so be courteous to others! Showers are available for €5 at the time of writing. Water is limited, so showers are short. Bring coins, a towel, and sandals.
Sleeping Arrangements
Sleeping rooms are dorm-style but more spacious than at Pradidali. Some rooms are semi-open (walls and doors without a full ceiling), which helps with airflow and reduces the cramped feeling. Earplugs are still recommended.
Food and Dining
Food here is excellent and well-prepared, with generous portions. Dinner is served at a set time, family-style. I sat with the same group of hikers that I roomed with at Rosetta and Pradidalli. This was one of the better meals of the trek and a highlight for many hikers.
Breakfast and Coffee
Breakfast is simple but filling, with bread, spreads, and hot drinks. Coffee is basic but reliable. If you need something specific, ask the staff the night before.
Payment and Logistics
Rifugio Treviso accepts cash and may accept cards when the system is working, but do not rely on it. Internet and Wi-Fi are available, but connections can be inconsistent. Always carry enough cash for food, drinks, and showers.
Staff communication here is excellent. When storms were forecast, they clearly informed everyone and recommended early departures — a detail that speaks to the professionalism of the hut.
Views and Atmosphere
The setting is beautiful, especially in clear weather. The hut has a relaxed, social atmosphere, and many hikers spend the afternoon outside reading, resting, or enjoying the views. Wi-Fi brings some people back online, but the vibe remains calm and communal.
Day 4 of the Palaronda Trek: Rifugio Treviso to Rifugio Rosetta
Day 4 At a Glance
Rifugio Treviso → Rifugio Rosetta
Primary trail: CAI 707
Total hiking time: ~6–8 hours (conditions dependent)
Difficulty: Challenging
Terrain: Sustained ascent, scrambling, snowfields, exposure
Highest point: Pale di San Martino plateau
Key risk factors: Weather, wind, lingering snow/ice
This is not an “easy finish.” Early starts and stable weather are critical.
Day 4 was the day I disliked the most — not because it was poorly planned, but because it was physically demanding at exactly the wrong point in the trek.
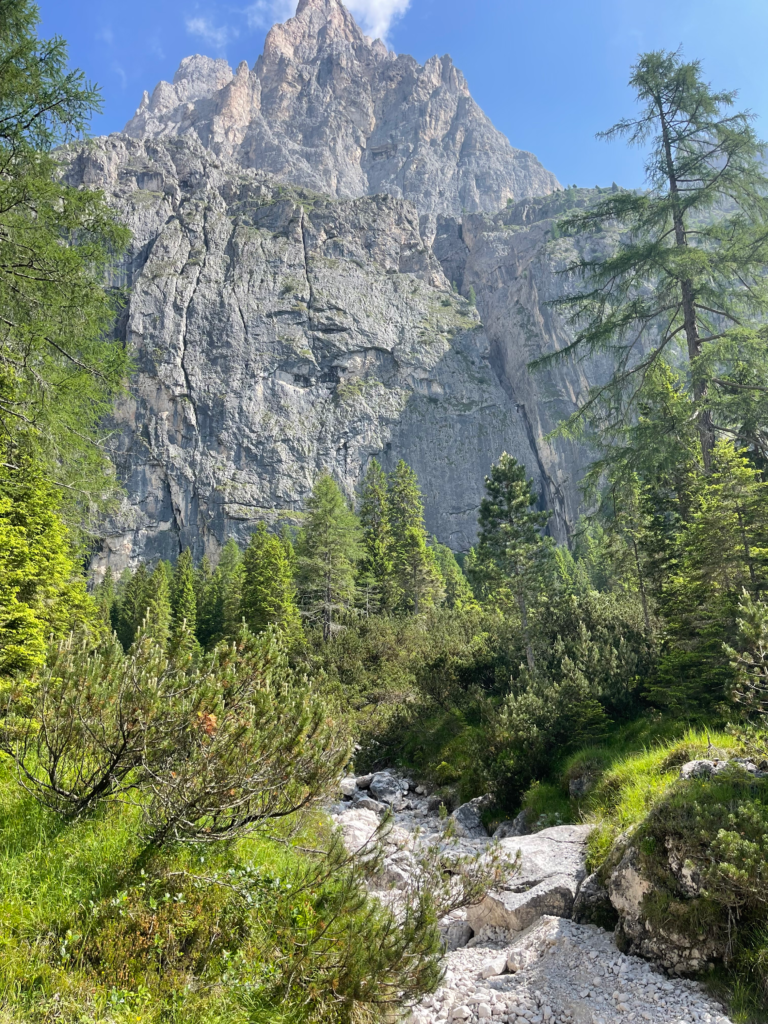
After spending the previous day in the lower valley, this stage requires a full ascent back into the upper Val Canali and onto the Pale di San Martino plateau. Your legs are already tired, and there’s very little easing into it.
Leaving Rifugio Treviso, you begin climbing on CAI trail 707, heading back up Val Canali. This trail gains elevation steadily and includes scrambling sections, especially as you move higher. Early in the season, snow and ice linger in shaded gullies and rock features, which adds complexity to what would otherwise be straightforward terrain.
It took me time to adjust to the effort required here. After several demanding days, my body needed a slower pace. I focused on deliberate movement and careful footing, especially through ice- and snow-filled crevices along the trail.
As you climb, you’ll have Cima d’Alberghetto and Cime del Coro rising to your right. Eventually, you gain elevation, and the trail begins to level out slightly — but only briefly. This is still sustained uphill travel.
The biggest challenge on this day was the persistence of snow attached directly to the mountainside that Komoot said to climb up. Some hikers felt comfortable moving across these sections, but I didn’t. Instead, I looked for alternate paths, using rock features where possible rather than crossing icy slabs. One couple watched me choose a safer scramble line and later told me they wished they’d done the same.
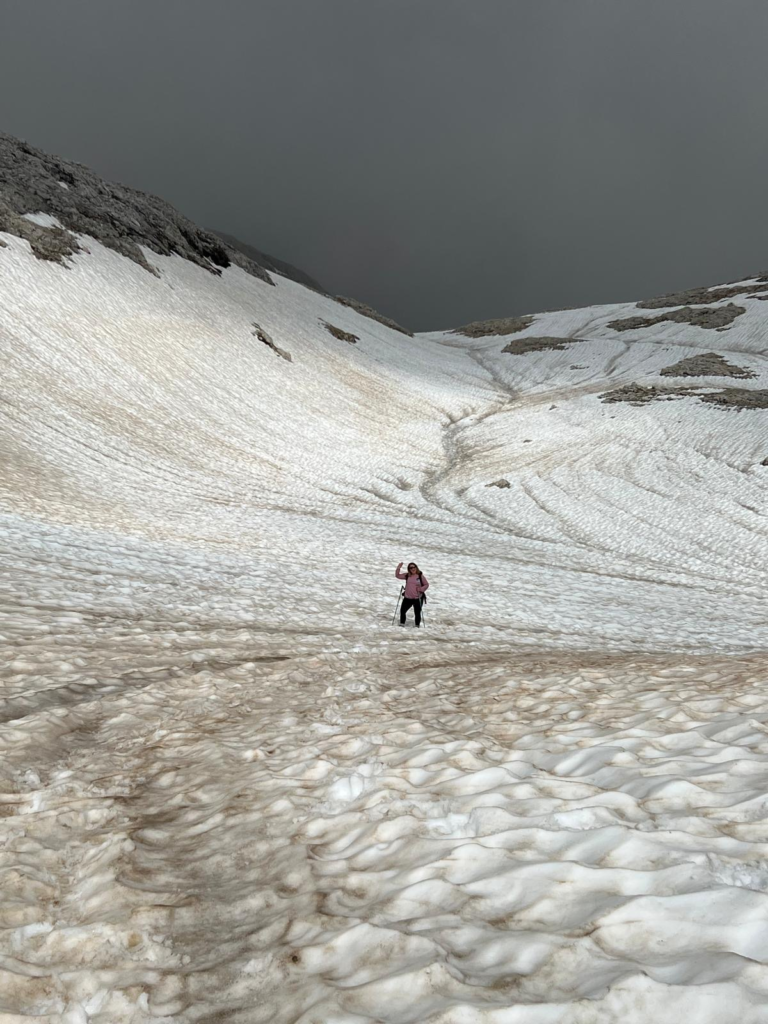
Once past this section, the terrain opens into a broad, bowl-shaped area. When I crossed it, melting snowfields still covered large portions of the trail, marked with red patches caused by snow algae. There was no clear tread in places. I put on my rain jacket and, where necessary, sat down and slid carefully over manageable snow sections. The slope wasn’t steep, but the traction was inconsistent.
From there, the route continues climbing on trail 707, with intermittent scrambling and increasingly exposed terrain. The views are remarkable — but this isn’t a day where I could linger. Wind picked up noticeably, and I knew the weather was moving in faster than forecast. I could feel it. It was odd. My gut was telling me to GTFO!
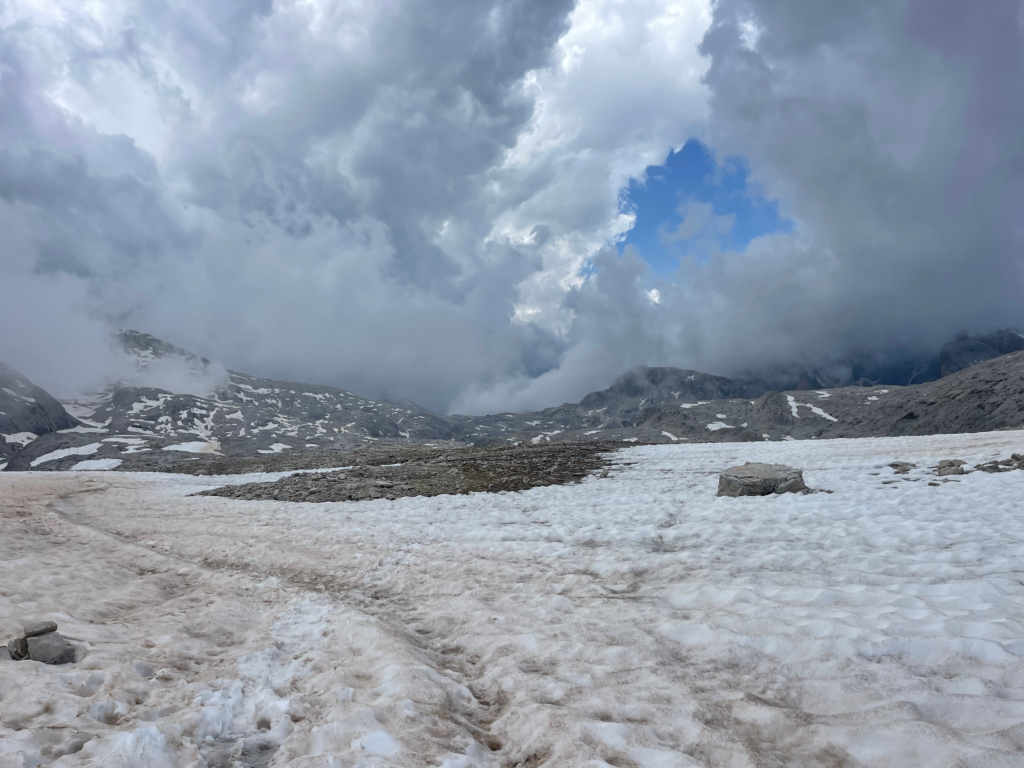
The Fradusta Glacier
I didn’t realize it at the time, but part of the final day crosses what was once the Fradusta Glacier on the Pale di San Martino plateau. During the last Ice Age, glaciers covered much of the Alps, shaping the wide valleys below. The Fradusta was long considered one of the Dolomites’ most important glaciers, alongside the Marmolada, until it was officially declared gone in 2022 after years of extreme summer heat.
That history explains the terrain here today: exposed rock, unstable debris, lingering snowfields — and nowhere to take shelter.
This was the section I had to hustle through. With the storm arriving early and thunder already nearby, staying exposed on former glacial ground wasn’t safe. I focused on efficient movement, managing scrambling sections while hail started falling and visibility dropped.
I reached Rifugio Rosetta completely soaked, heart racing, and immediately turned my attention to getting off the mountain. From the hut, it’s another 15-minute walk to the cable car, which I took down as quickly as possible.
Once back at my car, the adrenaline wore off — and yes, I cried a little. From there, I drove to Passo Rolle, where I stayed because Hotel Stalon Alpine Chic was fully booked.
Day 4 is not a gentle finish.
It’s a sustained climb back into high alpine terrain at a point when fatigue is already high. Early-season ice and snow, exposed scrambling, and weather risk all compound the difficulty.
If you’re finishing via the cable car, plan your timing carefully — you’ll want to reach it before 4:00 p.m. Weather moves fast on the plateau, and this is not a place you want to be late in the day.
If storms are forecast or conditions feel unstable, leaving early is non-negotiable. This is a day when smart route choices, adaptability, and knowing when to take a safer line matter far more than speed or pride.
If you’re hiking the Palaronda early season, this final ascent is the day to respect the most.
What Should You Pack for the Palaronda Trek?
Packing light is essential. Most hikers carry a 30–38L backpack, and that’s more than enough if you’re disciplined.
You’ll need:
- Lightweight layers (weather changes quickly at altitude)
- Wool socks + blister care
- Sleeping bag liner (required at rifugi)
- Trekking poles
- Sunscreen and a hat
- Headlamp + battery pack
- Water
- Basic first aid kit
- Small trash bag
- Cash and coins for huts (cards aren’t always accepted)
- Microspikes or light crampons (early season—there was significant ice and snow, sometimes ankle-deep)
- Quick-dry towel
- Sandals or shower shoes
Keep it simple. Rewear your hiking clothes and bring one clean set of underthings for the huts. You don’t need backups for everything — but you do need to be smart about safety, weather, and recovery.
This is not a trek where extra weight helps you. Pack intentionally.
The Palaronda Trek is worth doing
if you meet the demands of the route — not if you’re hoping to ease into hut-to-hut hiking.
This is a high-alpine trek with long days, exposed terrain, and frequent scrambling. You need to be comfortable moving on loose rock, snow patches, and uneven ground, often for 5–8 hours a day. Conditions matter more than distance here. Weather shifts, lingering snow, and fatigue will affect your pace, especially early in the season.
What makes the Palaronda challenging is the constant decision-making. Several stages require you to slow down, choose safer lines, and adapt when the trail isn’t obvious. There are very few sections where you can hike on autopilot, and even the final day ends with a demanding ascent back into high terrain.
This trek is not ideal as a first hut-to-hut experience. If scrambling, exposure, or steep descents make you uneasy, you’ll likely spend more time managing anxiety than enjoying the route. In that case, it’s smarter to build experience on a more forgiving itinerary first.
If you already have solid alpine hiking experience, are comfortable carrying your own gear for multiple days, and can adjust plans based on conditions, the Palaronda is a rewarding choice. It favors patience, awareness, and good judgment over speed — and hikers who approach it that way tend to have the best experience.
Best Time to Do the Palaronda Trek
The 2026 Opening weekend for hut to huts in the Dolomites is June 14/20th to end of September.
The Palaronda Trek is often described as doable from late June through September, but timing matters here more than on many other Dolomites routes.
Here’s how the season realistically breaks down:
Late June to early July
Possible, but highly condition-dependent. Expect snow and ice on north-facing slopes, passes, and shaded gullies — especially on Days 2 and 4. Microspikes are strongly recommended, and you should be comfortable scrambling on mixed terrain.
Mid-July to early September
The best window for most hikers. Trails are clearer, snow has largely melted, and footing is more predictable. The route is still demanding, but without the added complexity of ice and hidden tread.
Late September
Quieter and beautiful, but increasingly risky. Shorter daylight hours and the possibility of early snowfall can quickly complicate the route.
If you’re newer to hut-to-hut trekking or unsure about your comfort level on exposed terrain, mid-summer is the safest and most enjoyable time to attempt the Palaronda. Early season requires more experience, patience, and a willingness to turn back if conditions aren’t right.
This is not a trek where “technically open” always means “good idea.”
Final Thoughts: Is the Palaronda Trek Worth It?
The Palaronda Trek is not a hike you breeze through — and it’s not meant to be.
It’s physically demanding, mentally taxing, and requires consistent attention to terrain, weather, and your own limits. There are no throwaway days on this route. Even the final stage demands effort and good judgment.
But that’s also what makes it memorable. Looking back, I am glad I did it, and I loved that I challenged myself. However, if I could do it all over again, I would do it later in the season.
This is not the right choice for everyone — and that’s okay. The Dolomites offer plenty of incredible alternatives that are less demanding and just as beautiful.
But if you’re looking for a challenging, honest, hut-to-hut trek that pushes you physically and mentally — and you choose the right season — the Palaronda Trek is absolutely worth considering.