Alta Via 1 Short Route: A 4-Day Solo Hut-to-Hut Trek in the Dolomites
You don’t need 12 days to hike the Alta Via 1. In fact, the short northern section of this famous Dolomites trail delivers the same jaw-dropping alpine views, cozy rifugi stays, and solo-hiker confidence boost — in just 4 days.
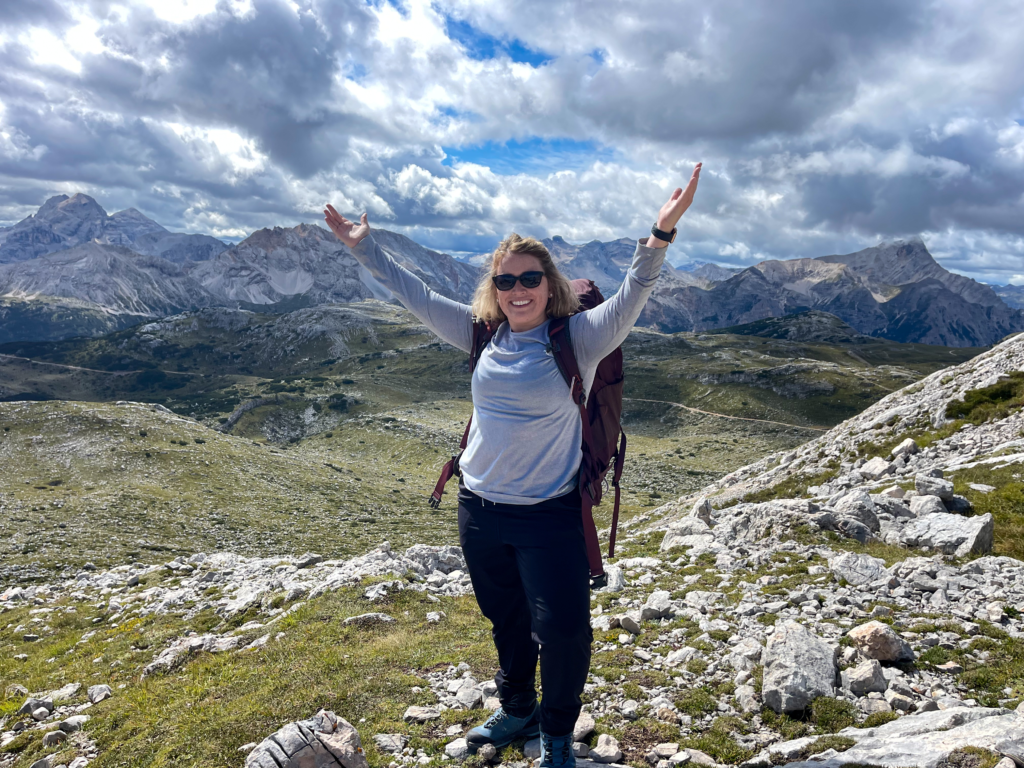
I hiked the Alta Via 1 short route solo from Lago di Braies to Rifugio Scoiattoli, navigating long climbs, dramatic passes, and an unexpected snowstorm. This post is for hikers (especially solo women) who want a realistic, experience-based guide to this shorter Alta Via 1 route — complete with my exact itinerary, tips for booking rifugi, and the honest truth about trail conditions.
This Post Pairs Well With:
- Where to stay before and after the Alta Via 1
- A First-Timer’s Guide to the Dolomites: How to Plan Your Trip
- Lago di Sorapis Hiking Guide: Passo Tre Croci to Sorapis
- How to Make a Reservation at A Rifugio
- Must Have Apps for your Time in The Dolomites
- My Favorite Places to Stay in The Dolomites
- What to Pack for Your Solo Hut to Hut Trek in the Dolomites
At a Glance: 4-Day Alta Via 1 Short Route
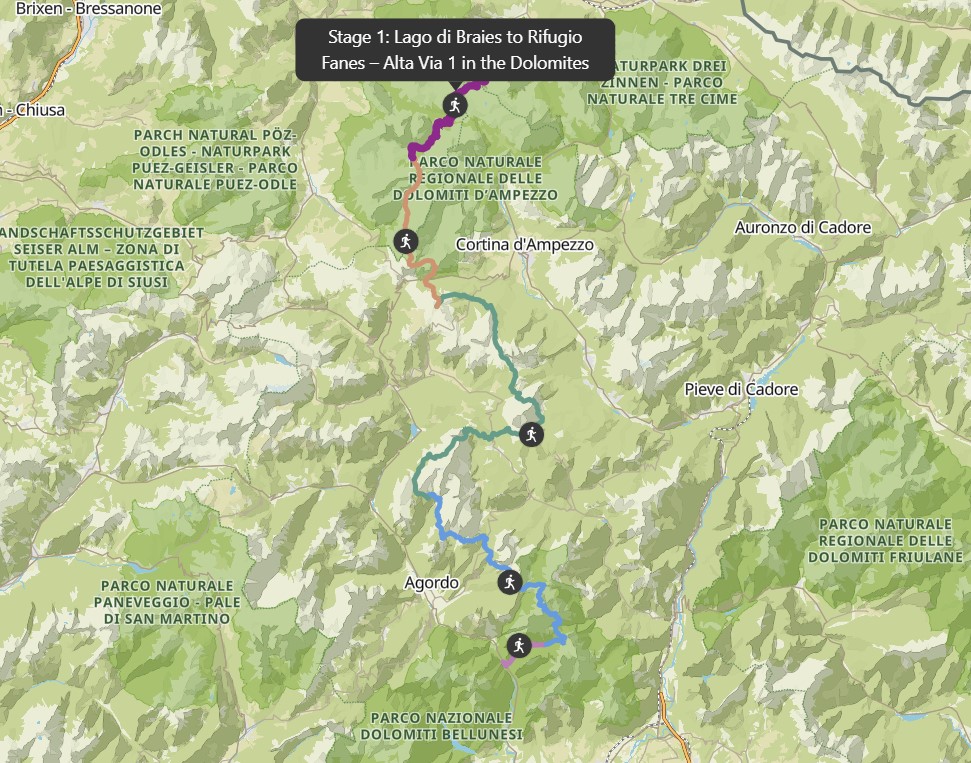
- Route: Lago di Braies → Rifugio Pederü → Rifugio Scotoni → Rifugio Scoiattoli
- Duration: 3–4 days / 2–3 nights
- Distance: ~45 km (28 miles) total
- Elevation: +2,800 m / −2,600 m (approx.)
- Difficulty: Moderate — long days, sustained climbs, rocky and uneven footing; no via ferrata required
- Best season: Late June – mid-September (snow lingering early season is common)
- Rifugi stayed: Pederü, Scotoni, Scoiattoli
- Signage: White-red CAI trail markers, “Alta Via 1 / Dolomiten Höhenweg 1” signage, numbered trails throughout
- Best for: First-time hut-to-hut hikers, solo hikers, and those short on time who still want a true Alta Via experience
What Is the Alta Via 1?
Alta Via 1 is the classic hut-to-hut trek through the Dolomites. Known as the “High Route 1,” it’s a long-distance trail that stretches roughly 120km (75 miles) from Lago di Braies to Belluno. The full route typically takes 8–12 days, weaving through towering limestone peaks, high alpine meadows, and historic World War I sites.
What Is the Alta Via 1 Short Route?
There’s no official “short” version — but many hikers opt to complete the stunning northern section.
The Alta Via 1 short route typically begins at Lago di Braies and concludes at Rifugio Scoiattoli, traversing some of the most iconic landscapes of the Dolomites in just 3–4 days. It’s a perfect option if:
- You’re short on time
- You’re hiking solo
- You’re new to hut-to-hut trekking
Along the way, you’ll stay at well-spaced rifugi (mountain huts), cross high alpine passes, and get a taste of everything that makes the Alta Via 1 unforgettable — without committing to the full trail.
4-Day Alta Via 1 Short Route Itinerary (Day-by-Day)
Here is a day-by-day breakdown of what to expect during the Alta Via 1 short
Day 1: Lago di Braies → Rifugio Pederü
Distance: ~14–16 km
Elevation Gain: ~900–1,000 m
Time: 6–7 hours
Difficulty: Moderate to Challenging
Highlights:
- Panoramic views over Lago di Braies
- Boulder fields near Rifugio Biella
- Lush descent into Fanes-Sennes-Braies Nature Park
Trail Summary:
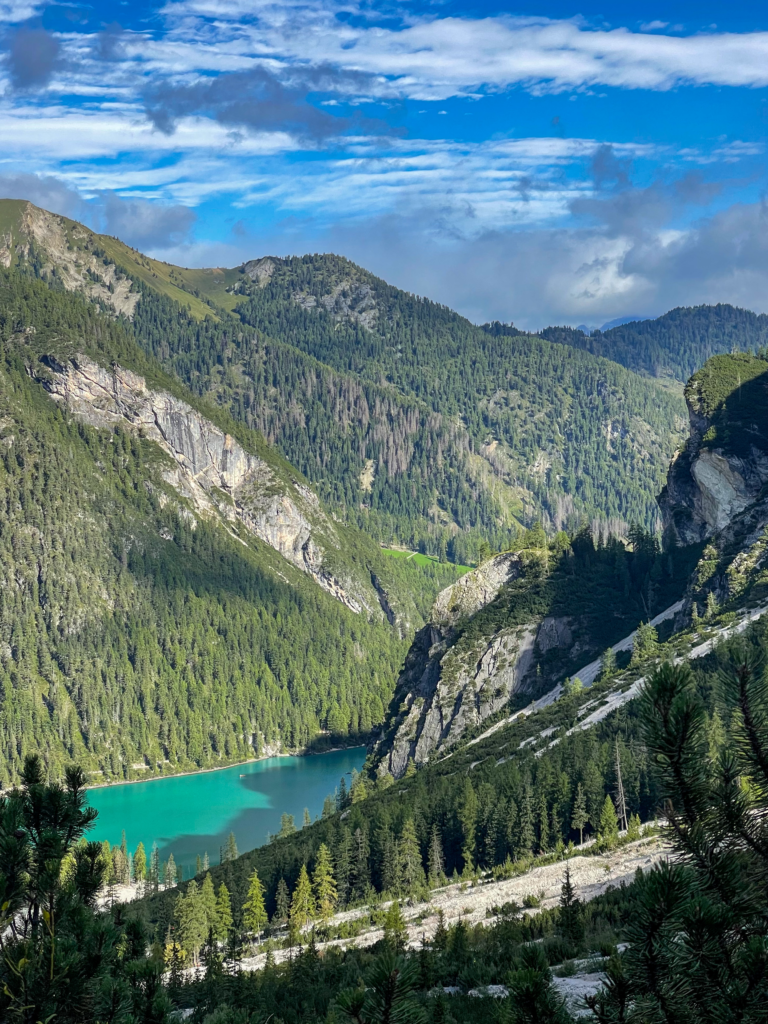
The day starts gently with a stroll around Lago di Braies after your bus drops you off, but quickly turns into a steep alpine climb. Don’t forget to turn back around and get views of Lago Di Braies shining in the summer sun. It’s incredible!
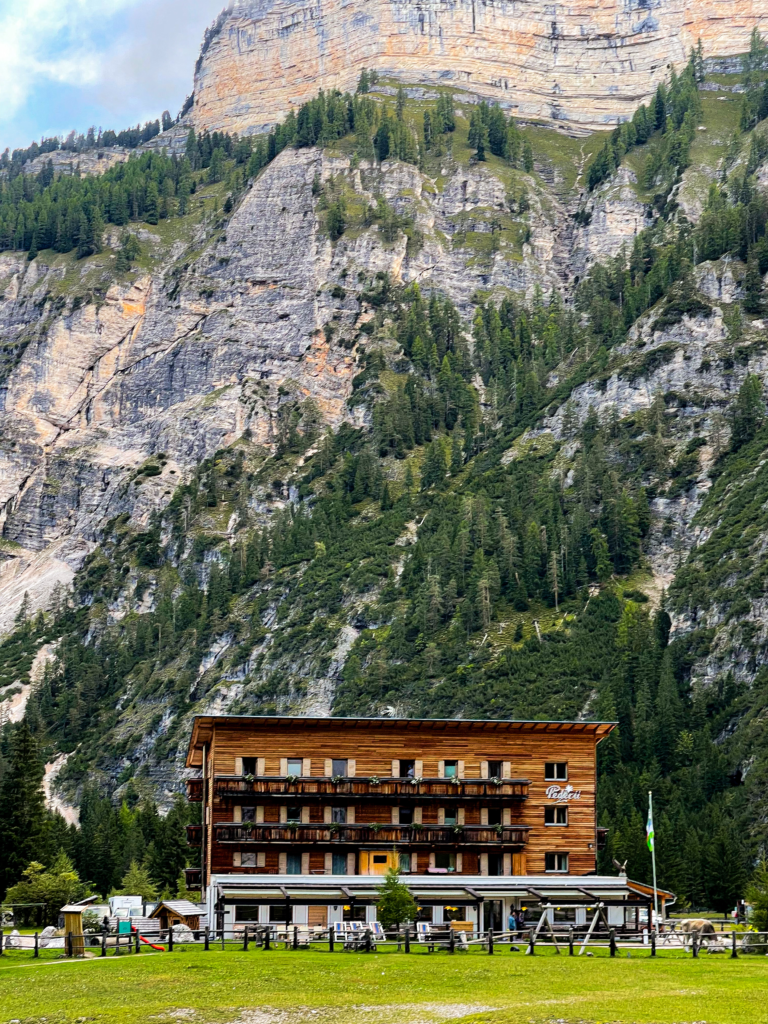
Trekking poles are essential here for the climbs, but you’ll want to put them away when scrambles come into play. You’ll pass Rifugio Biella, descend into Fanes-Sennes-Braies, and stay the night at Rifugio Pederü, a modern hut with excellent food and showers.
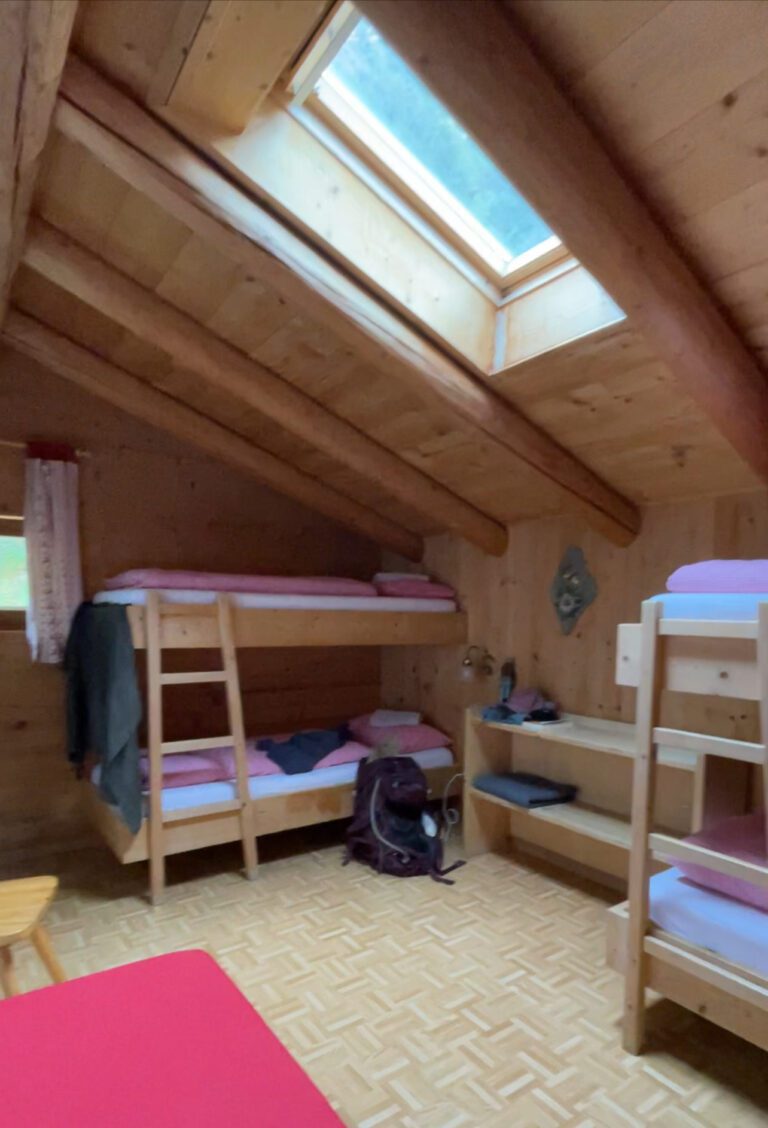
Rifugio Pederü Review: Comfortable, Practical, and a Great First Night
Located at the base of the Fanes-Sennes-Braies Nature Park, Rifugio Pederü is an ideal first stop on the Alta Via 1 short route — especially if this is your first hut-to-hut hike. It feels more like a mountain guesthouse than a traditional rifugio, which makes the transition into hut life much easier after a long Day 1.
Why stay here:
- Spacious 8-bed dorms that feel less cramped than most rifugi
- Some of the best bathrooms on the route, with hot showers and modern facilities
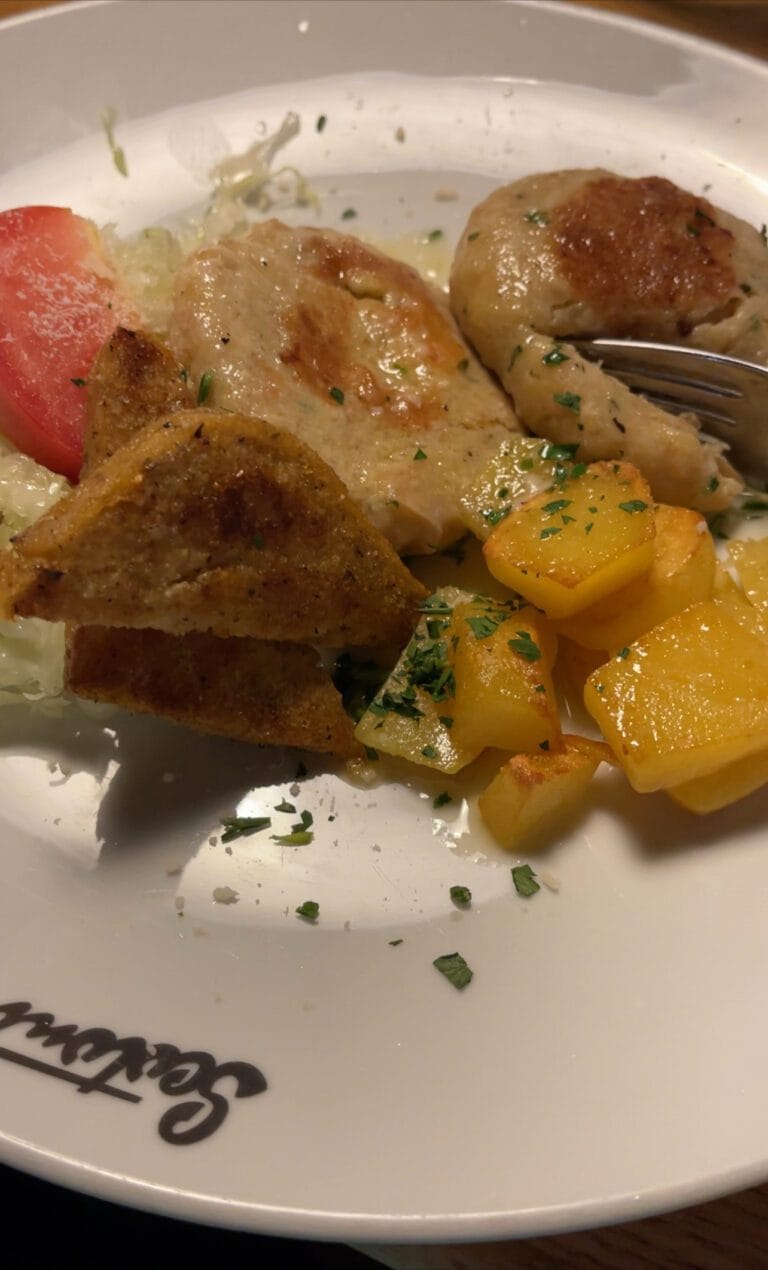
- Hearty, satisfying meals — the schnitzel is absolutely worth it
- Calm, practical atmosphere that’s perfect for resting and resetting
Food: Excellent and generous portions
Vibe: Comfortable, grounded, and no-frills — a true recovery stop
Pro tip: Before dinner, order a packed lunch for the next day. I got a meat-and-pickle sandwich, an apple, and a snack — more than enough fuel for the long hike toward Rifugio Scotoni.
Day 2: Rifugio Pederü → Rifugio Scotoni
Distance: ~13–15 km
Elevation Gain: ~900–1,100 m
Time: 6–7 hours
Difficulty: Moderate
Highlights:
- Fanes Plateau wildflowers
- Challenging Forcella del Lago scree climb
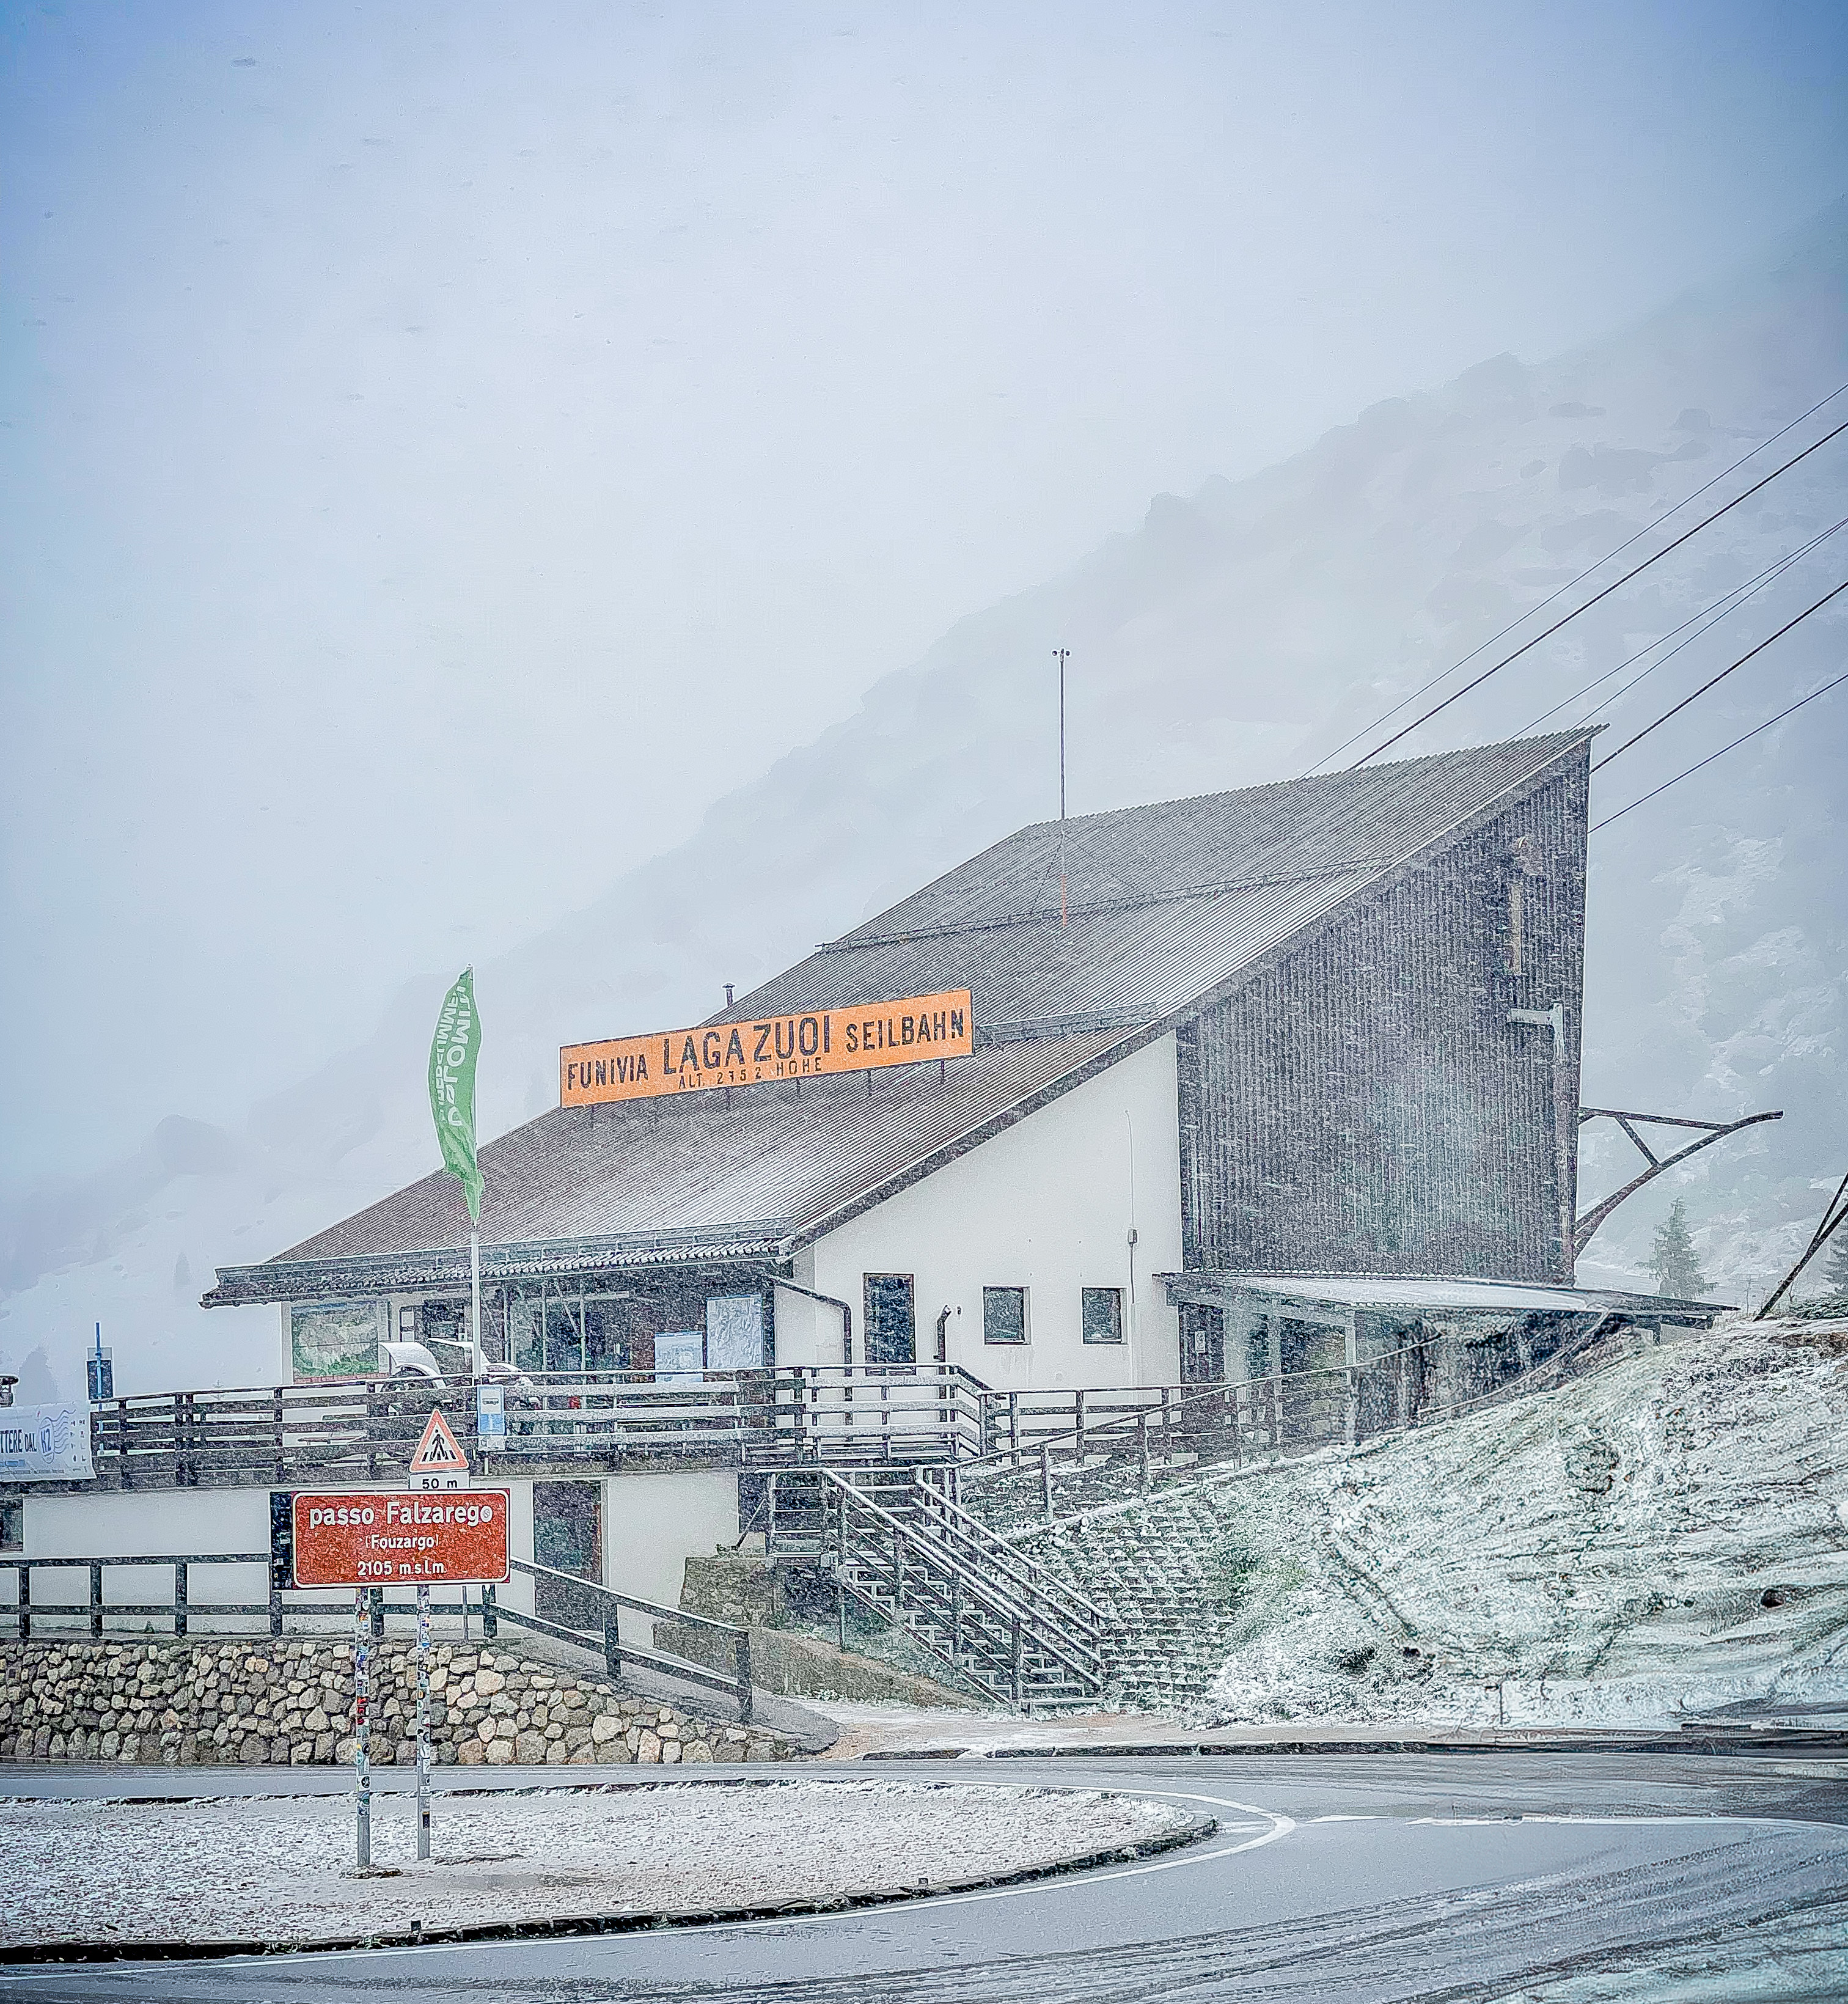
- Lago di Lagazuoi’s turquoise glow
Trail Summary:
This was the most dramatic day. After a slow climb to the wide-open Fanes Plateau, the trail turns gnarly with a steep ascent to Forcella del Lago. You’ll descend sharply toward the surreal Lago di Lagazuoi before arriving at Rifugio Scotoni, my personal favorite rifugio on the route. Just a note, on the descent from Lagazuoi, your knees will be screaming.
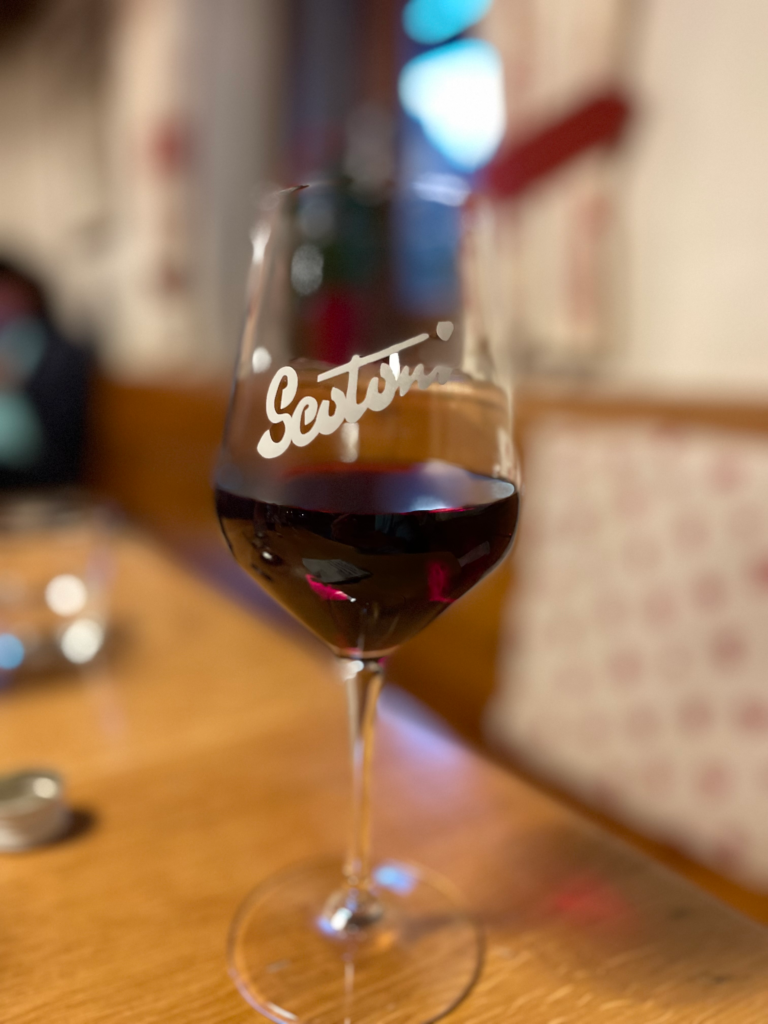
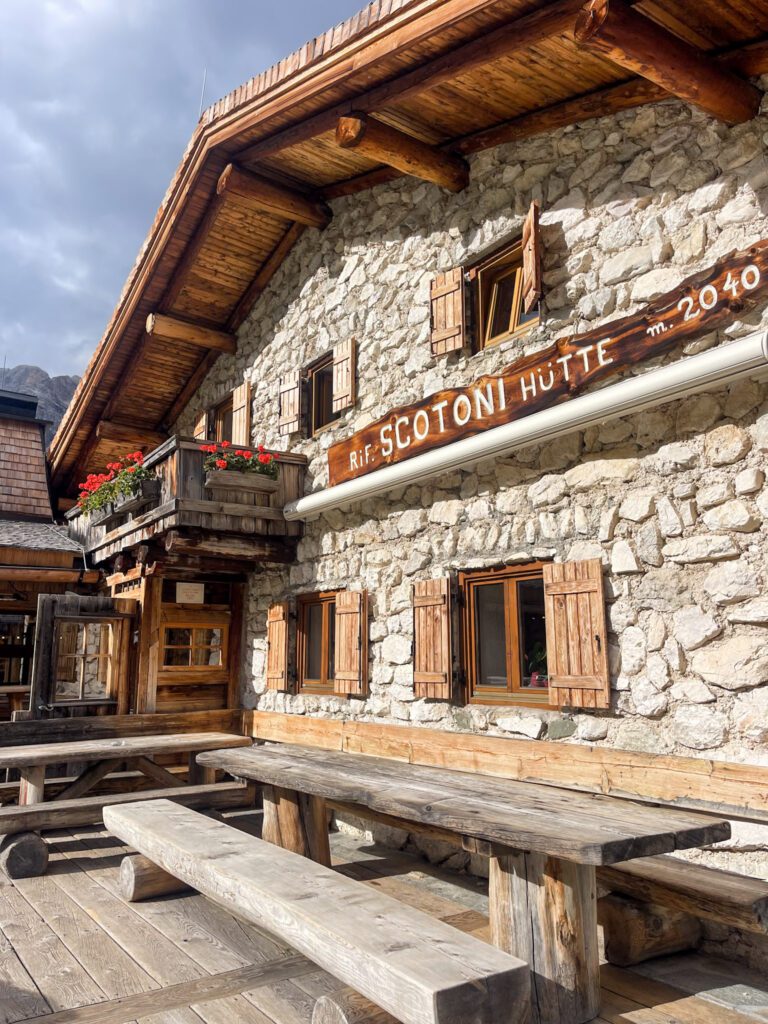
Rifugio Scotoni Review: Cozy, Remote, and Unforgettable
Tucked in a rocky basin beneath Lagazuoi, Rifugio Scotoni is the kind of place hikers talk about long after their trek ends. It’s remote, peaceful, and surrounded by sheer cliffs that glow at golden hour. The vibe here is relaxed and rustic — a perfect contrast to the busier rifugi near towns or cable cars.
It’s also privately owned, which adds to the personal charm and quieter atmosphere.
Why stay here:
- Quiet setting with no crowds — feels like true wilderness
- Some of the best food I had on the trail (get the barley soup!)
- Simple dorm rooms, but very clean and well-run
- Spectacular views, especially in the late afternoon
Vibe: Rustic, low-key, and ideal for solo hikers who want to unwind
Food: Excellent — hearty, home-cooked meals and a great terrace for post-hike drinks
Pro tip: Arrive early to claim a good bunk and enjoy the peaceful pre-dinner hours outside
Day 3: Rifugio Scotoni → Rifugio Scoiattoli
Distance: ~10–12 km
Elevation Gain: ~700–900 m
Time: 5–6 hours
Difficulty: Moderate
Highlights:
- Historic WWI tunnels and trenches
- Open ridge views over Cortina
- Reaching the iconic Cinque Torri area
This day was shorter than planned as a snowstorm came through the area and basically rendered everything closed. I met a wonderful group who had also planned their trek with Bookatrekking as well, and we all decided to leave together. We all got pummeled with rain and snow during the start of the trek, so we backtracked and went to the nearest bus stop to take us to Rifugio Scoattoli. Proof that the weather can change on a dime! We started
Where I Stayed:
Despite its popularity, it’s still a great place to spend your final night on the trail.
Why stay here:
- Incredible sunset and sunrise views over the Ampezzo Valley
- On-site telescope for stargazing (weather permitting!)
- Lively terrace, often with climbers and locals stopping in
- Showers and dorms are clean, with shared bunk rooms
Vibe: More social and energized — not as quiet as Scotoni, but fun in a different way
Food: Classic Italian Alpine fare; I recommend the pasta or goulash
Pro tip: If you finish early, grab a drink and soak in the views from the deck — it’s one of the best panoramic spots on the whole route
Can You Hike the Alta Via 1 Solo?
Short answer: yes — absolutely.
Solo hiking on the Alta Via 1 is very doable, particularly on the short route, which follows well-marked CAI trails and connects rifugi at reasonable, predictable intervals. The path is clearly signed from the northern start at Lago di Braies, and during the main hiking season, you’ll encounter other hikers daily without the trail ever feeling crowded or chaotic.
That said, solo hikers on the Alta Via 1 should be honest with themselves about:
- Overall fitness and endurance for long mountain days
- Comfort hiking alone in alpine terrain
- Weather awareness and flexibility
- Navigation skills, even on marked trails
I hiked this section of the Alta Via 1 solo and felt confident throughout—largely because I planned conservative daily distances, monitored weather closely, and was willing to adjust my itinerary when conditions changed. One of the biggest advantages of hut-to-hut hiking is the built-in sense of community at the rifugi; even when you hike alone during the day, evenings are shared, social, and reassuring.
If you’re considering your first solo hut-to-hut trek in the Dolomites, the Alta Via 1 short route is one of the most approachable ways to do it—provided you prepare thoughtfully and respect the mountains.
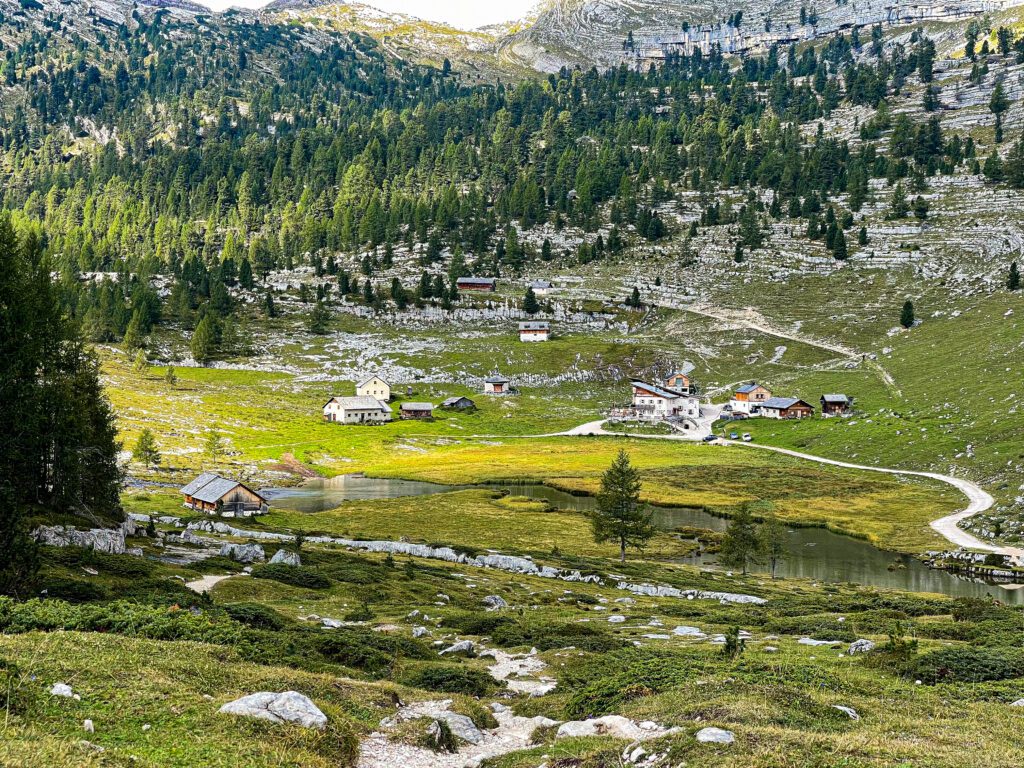
Where You’ll Stay on the Short Route (Rifugi Overview)
On this shortened section of the Alta Via 1, you’ll typically stay at a small handful of well-established rifugi. Each one has a very different feel, which is part of what makes hut-to-hut hiking in the Dolomites so memorable—no two nights feel the same.
- Rifugio Pederü
Often one of the first overnight stops on the short route, Rifugio Pederü sits in a wide alpine valley and feels more grounded and practical than dramatic. It’s an important logistical hub with solid food, straightforward accommodations, and a calm atmosphere—an ideal place to ease into hut life, especially if this is your first multi-day trek. - Rifugio Scotoni
Tucked into a rugged basin below Lagazuoi, Rifugio Scotoni is one of those huts hikers talk about long after the trek ends. The setting is spectacular, the food is consistently excellent, and it has a slightly more social, celebratory feel. This is often a highlight night for many hikers on the Alta Via 1. This is where I saw a local farmer bringing his cows down off the mountainside in preparation for the almabtreib - Rifugio Scoiattoli
Perched above Cortina with sweeping views of the surrounding peaks, Rifugio Scoiattoli feels like a transition point between deep mountain trekking and a return to civilization. Its panoramic location, busy terrace, and proximity to cable cars make it feel very different from earlier huts—an exciting and slightly surreal place to spend a night after several days on the trail.
Each rifugio provides dinner, breakfast, and dorm-style sleeping, with shared bathrooms and basic amenities. While accommodations are simple, the atmosphere, food, and sense of community are what make staying in rifugi such a defining part of the Alta Via 1 experience.
What to Know Before Hiking the Alta Via 1 Short Route
Below are a few things you should think about when planning your Alta Via 1 trek
Guided vs. Self-Guided
This is one of the most common questions I get — and the answer depends entirely on your experience level and comfort zone.
I completed this trek self-guided, but I didn’t do it blindly. I used professional support for logistics and relied on my own navigation and pacing once on the trail.
I’ve written a dedicated blog post that walks through:
- The pros and cons of guided vs self-guided trekking
- Who should consider a guide
- When self-guided makes more sense
- Cost, safety, and confidence factors
- If you’re on the fence, I highly recommend reading the post below before deciding.
👉 Guided vs Self-Guided Hut-to-Hut Hike
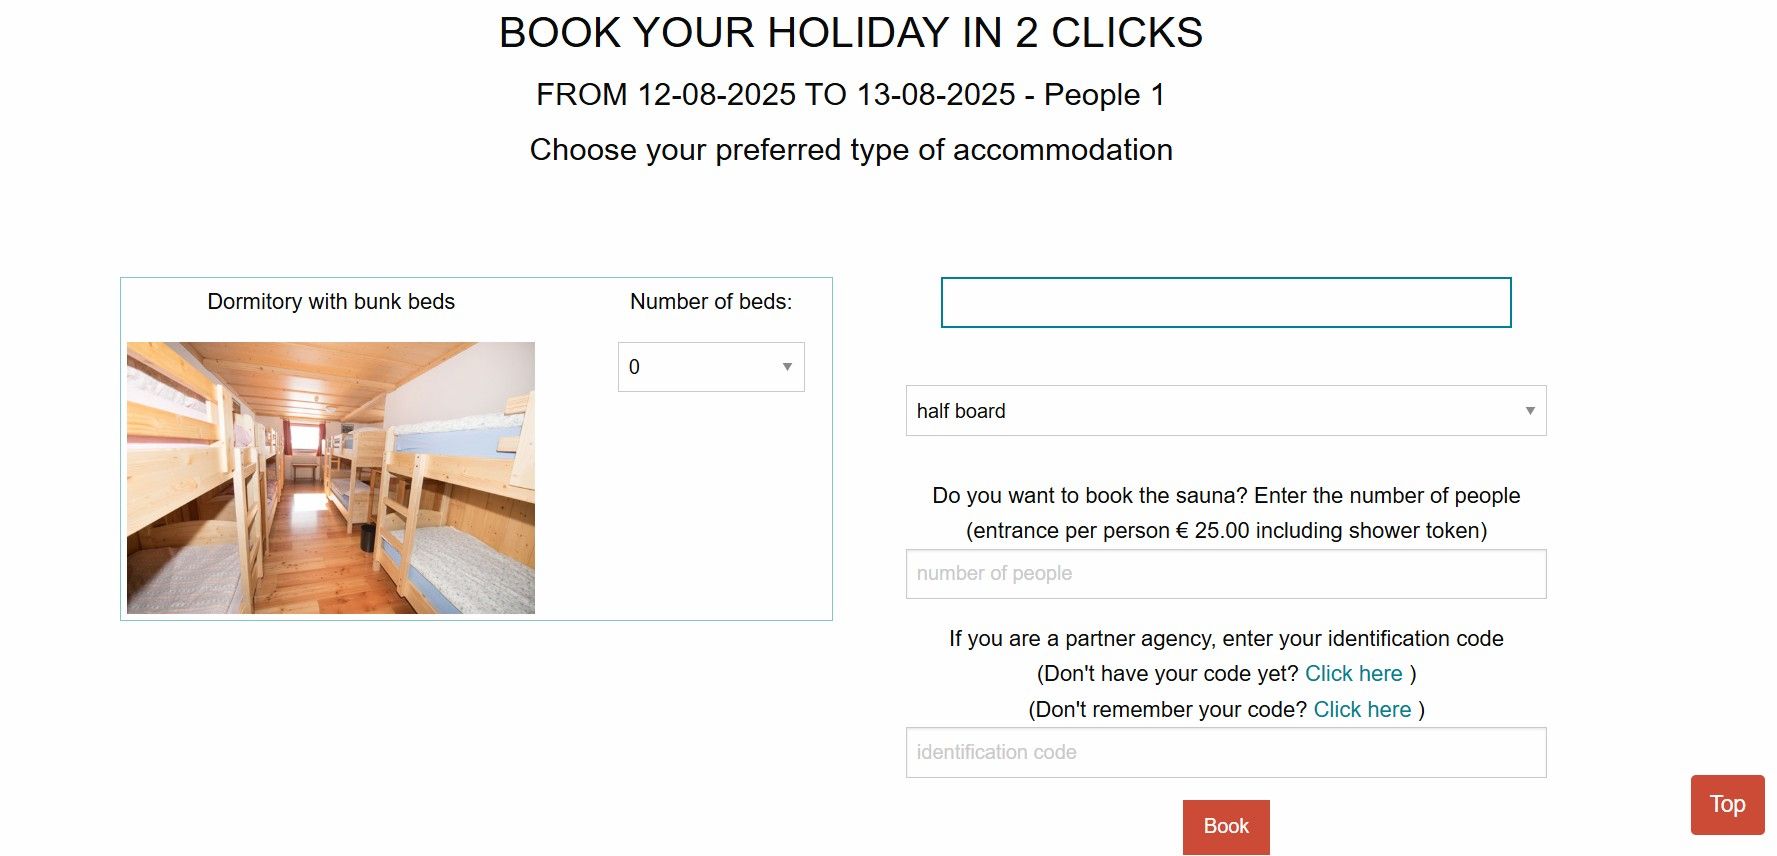
How to Book Rifugios
Rifugio booking can feel intimidating at first — different languages, limited availability, and varying reservation systems. I’ve been there.
That’s why I wrote an in-depth guide that covers:
- When rifugios open reservations
- How far in advance to book
- What to include in an email request
- Common mistakes first-timers make
- When to use booking services like Bookatrekking and Dolomist
👉 How to Book Rifugios in the Dolomites: A Beginner’s Guide
Whether you book independently or through a service, understanding the process will make your trip far less stressful.
Where to stay before and after the Alta Via 1?
Where you stay before and after hiking the Alta Via 1 can make or break your logistics—especially if you’re hiking the short route and relying on public transportation. Most hikers base themselves near a trailhead town, not deep in the mountains, to keep arrival and departure days simple.
If you’re starting near Lago di Braies, towns like Cortina d’Ampezzo and Dobbiaco are popular, practical choices thanks to their transport connections, range of accommodations, and easy access back to the trail. If you’re finishing further south, places like Belluno offer a quieter and often more affordable place to rest after your hike.
Because where you stay depends heavily on your exact start and end points, bus schedules, and how many days you’re hiking, I’ve broken all of this down in a separate guide—including specific towns, neighborhoods, and hotel recommendations based on different Alta Via 1 itineraries.
Need to make reservations for your pre- and post-hike hotels
What to Pack for the Alta Via 1
Light layers, rain gear, trekking poles, earplugs.
See my full packing list → What to Pack for a Solo Hut-to-Hut Trek
Pre-Hike Logistics: What I did BEFORE the Alta Via 1
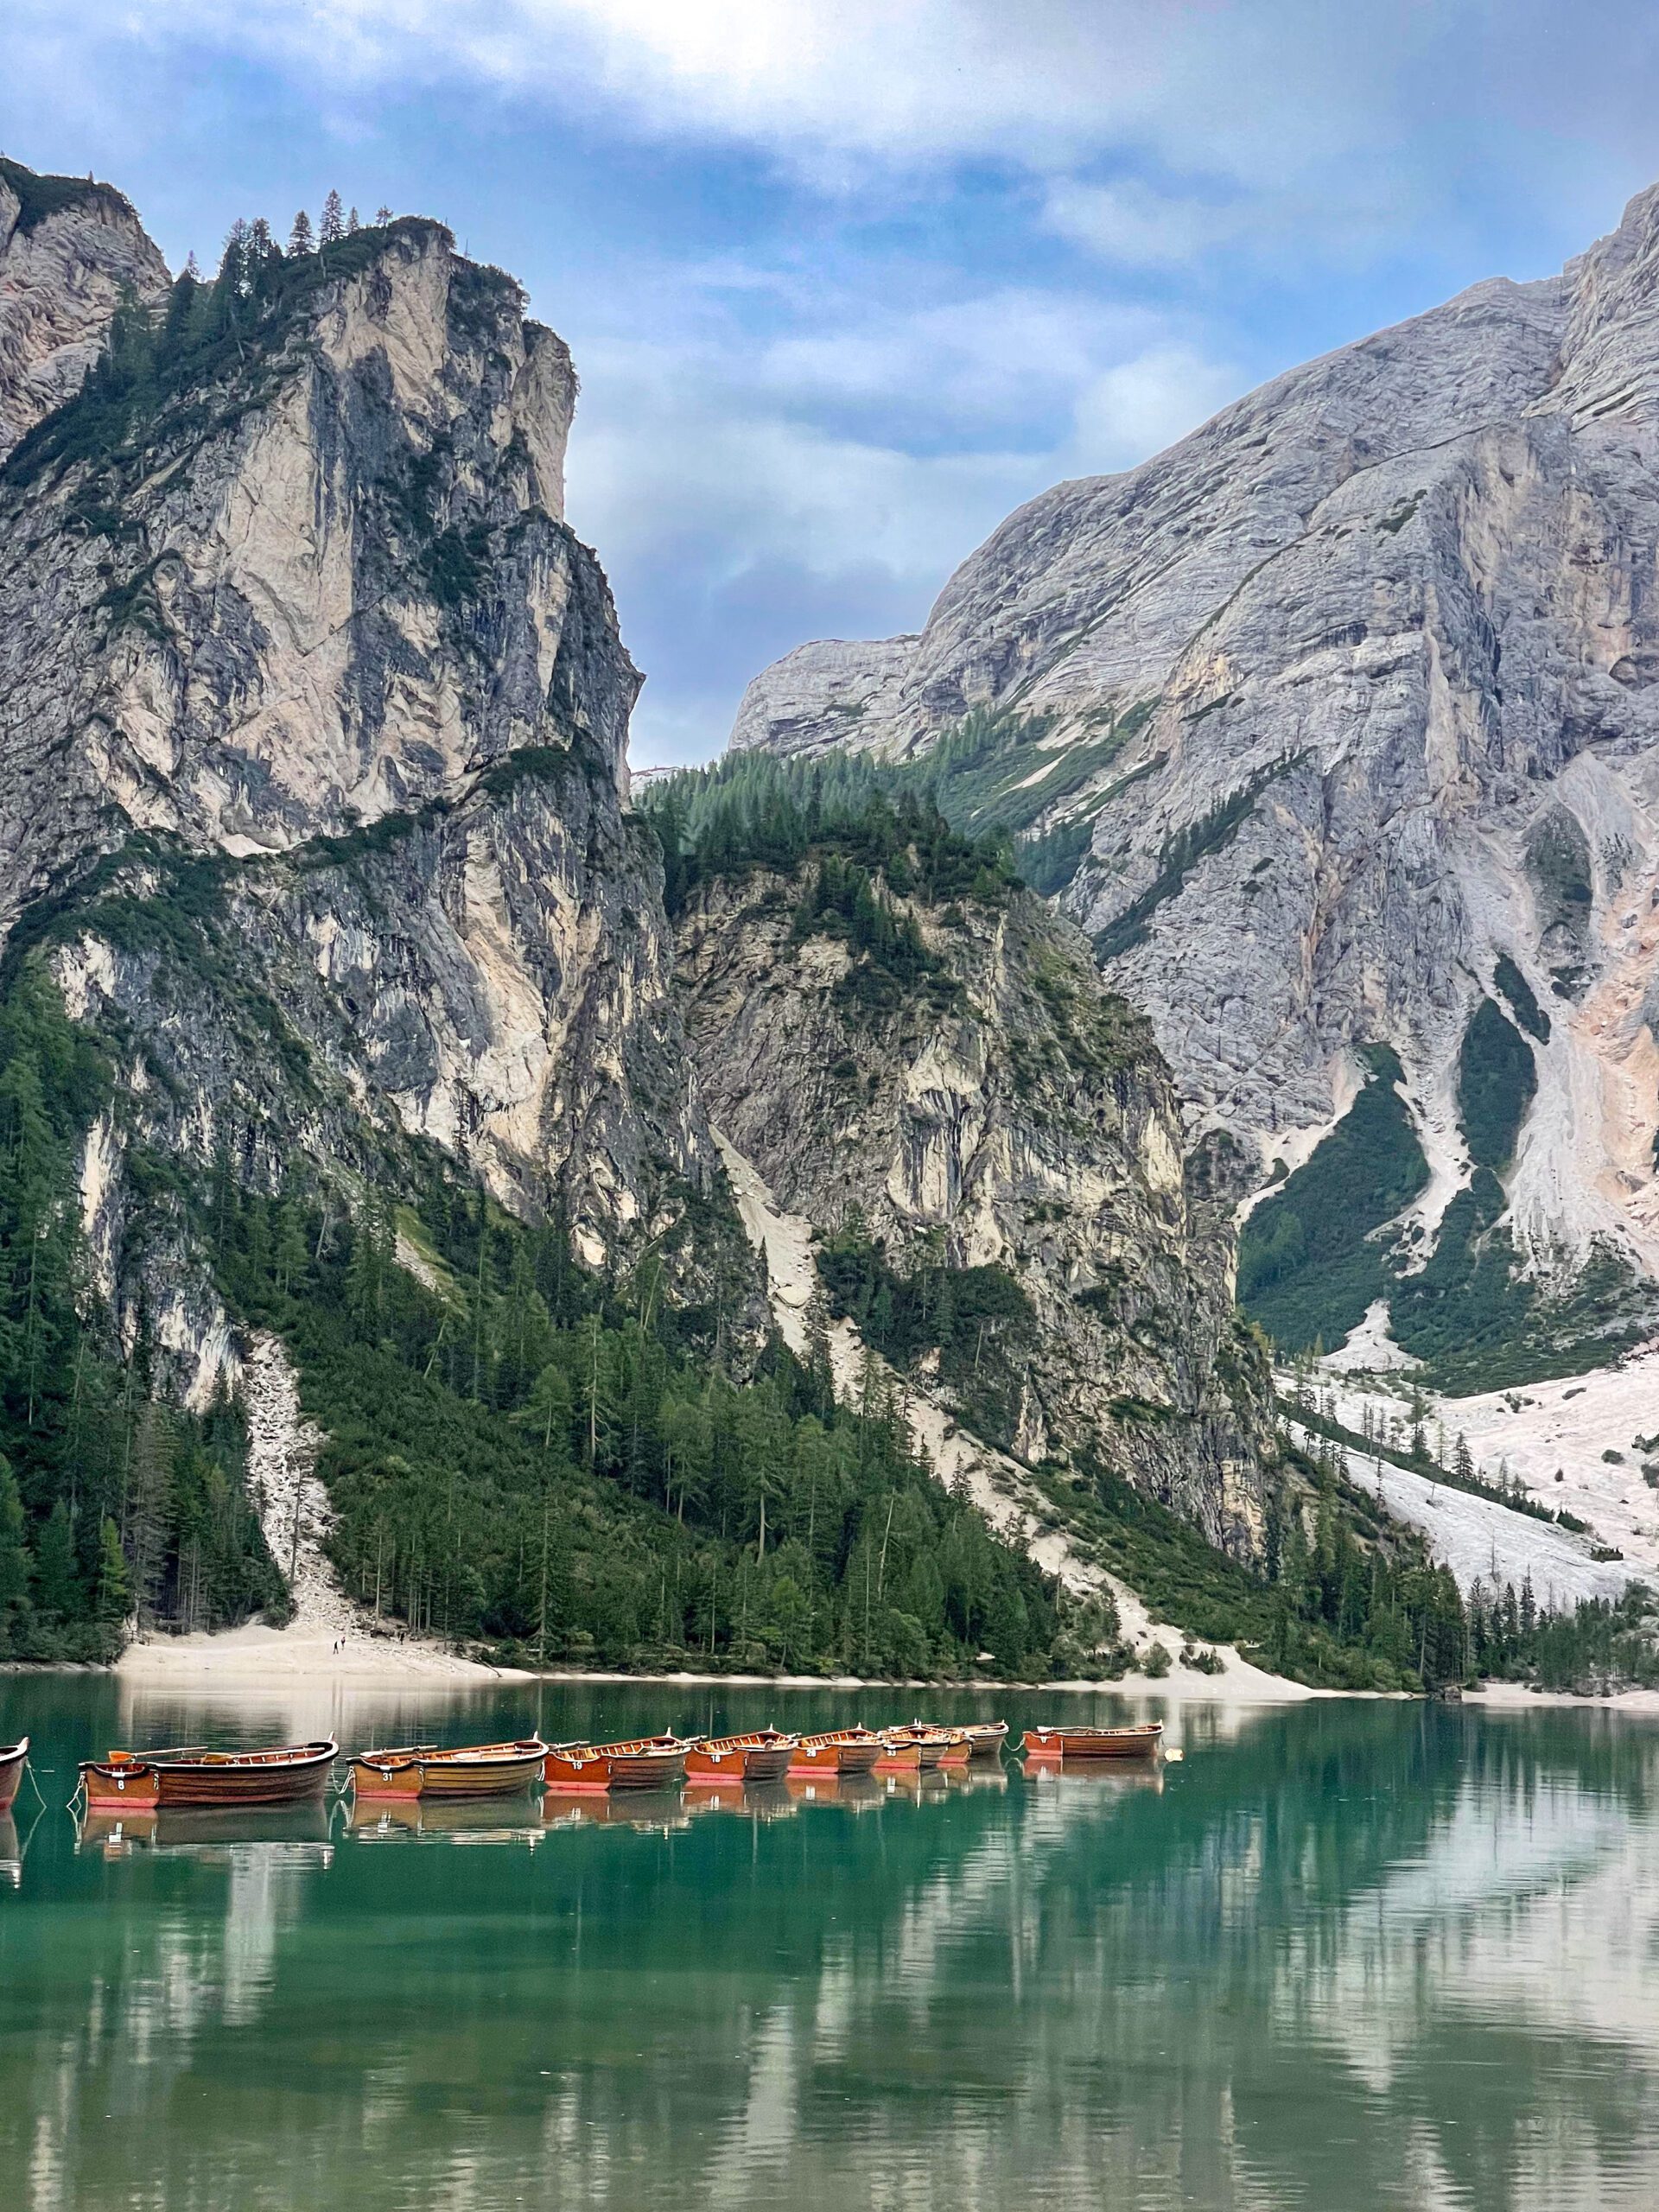
I began my Alta Via 1 journey at the iconic Lago di Braies, one of the most photographed lakes in the Dolomites—and for good reason. Mirror-still waters, jagged limestone peaks, and that classic boathouse. Even if you’re itching to get hiking, take a few minutes here. The morning light is magic.
I stayed the night before at Hotel Trenker, a fantastic base just outside the lake area. I’d already parked my car for free in Cortina the day before to make things easier at the end of the hike—highly recommend this trick if you’re doing a point-to-point trek.
From Hotel Trenker, I caught Bus 442, which stops right outside the hotel, and brought me to the lake by 8:30 AM.
LAGO DI BRAIES RESERVATION TIP
From June to September, you’ll need to make reservations for the bus to get to Lago Di Braies. Click here for reservation information
Komoot Maps Used For this Trek
- Ascent to the Seekofel hut above the Pragser Wildsee lake – Alta Pusteria
- Alta Via 1: Etappe 2: Rifugio Pederü – Rifugio Scotoni – Bookatrekking.com
- Rifugio Pederü to Rifugio Fanes
- Rifugio Lavarella to Forcella del Lago
- Descent to Lago di Lagazuoi and Rifugio Scotoni
- Alta Via 1 – Stage 3 – Rifugio Scotoni – Rifugio Scoiatolli
Common Questions About the Alta Via 1 Short Route (FAQs)
No—there is no officially designated “Alta Via 1 short route.” The term is commonly used to describe hiking only the northern section of the trail, starting at Lago di Braies, which delivers classic Dolomites scenery without committing to the full 8–12 days.
Most hikers complete the Alta Via 1 short route in 3–4 days, depending on pace, weather, and route variations. This makes it ideal for hikers with limited time or those attempting their first hut-to-hut trek in the Dolomites.
No—via ferrata gear is not required on the Alta Via 1. It is a trekking route, but hikers should still be prepared for long days, rocky terrain, and occasional exposure in alpine environments.
Yes, fit beginners can hike the Alta Via 1 short route with proper preparation. Prior hiking experience, good fitness, and comfort on uneven mountain terrain are more important than technical skills.
Yes—the Alta Via 1 short route is well-suited for solo hikers, including solo female hikers. Trails are clearly marked, rifugi are spaced at manageable distances, and there is a strong sense of community at the huts each evening.
The best time to hike the Alta Via 1 short route is late June through September. Early in the season, lingering snow is common at higher elevations, while September offers quieter trails and cooler temperatures.
Yes—rifugi along the Alta Via 1 should be booked in advance, especially in July and August. Even on the short route, popular huts often fill up weeks or months ahead during peak season.
Weather in the Dolomites can change quickly, and storms or snow may require altering your plans. One of the most important skills on the Alta Via 1 is knowing when to adjust your itinerary or turn back—safety always comes before finishing a route.
Why the Alta Via 1 Short Route Is Worth It
You don’t need weeks off work to hike one of the world’s best trails.
The Alta Via 1 short route gives you:
- Iconic Dolomites scenery
- A beginner-friendly intro to rifugio life
- Solo travel confidence (even if it rains or your toenail falls off)
More than anything, it reminds you that the mountains don’t care how fast you go — just that you show up, prepared, present, and respectful.